I love the way a fresh porch can change the mood of an entire house. This list grew from afternoons spent fiddling with ribbons, paint samples, and the soft scent of cut flowers while the sunlight warmed the steps.
Spring Porch Decor DIY Crafts slipped into my weekends as a gentle habit more than a project.
Each idea here felt like a small discovery I wanted to share with friends who enjoy hands-on touches. The projects are playful, often messy in the best way, and they bring a light, floral welcome to any entry without asking for a big budget.
Bright mason jar planter trio for sunny corners
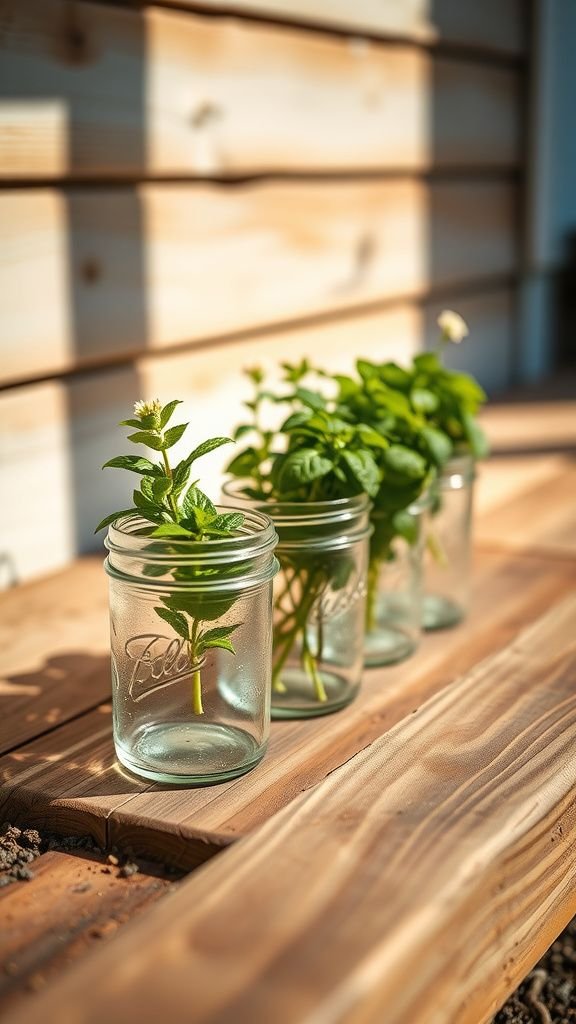
I have a soft spot for mason jars lined up on a sunlit step. The cool glass and the faint clink when they nudge each other create a comforting rhythm.
I often choose herbs or tiny blooms and the green leaves contrast with the clear, slightly bubbly glass. On breezy days the scent of soil and fresh herbs drifts up, and small bees hover like curious guests.
The visual of three jars at different heights gives the porch a casual, collected feel that invites people to linger.
Steps
- Gather three clean mason jars, small plants, potting mix, and decorative stones for drainage.
- Place a thin layer of stones in each jar, add potting mix, and nestle the plants so roots are covered.
- Arrange the jars at staggered heights on the porch step or a narrow shelf, grouping by leaf texture and color.
Hand-painted terra cotta pot set with floral accents
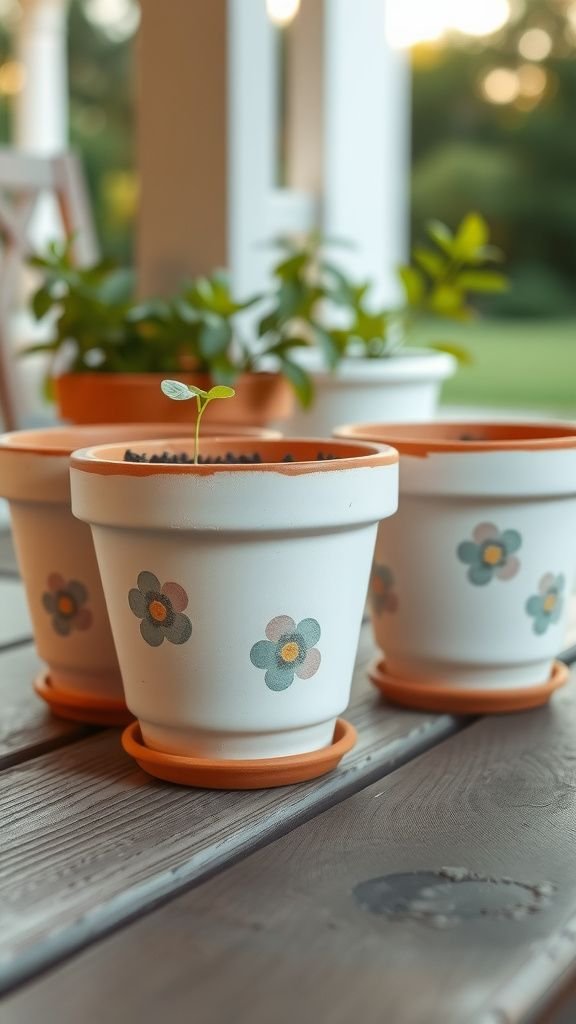
Terra cotta has this warm, earthy smell that always brings me back to old garden days. When painted, those rough rings and imperfect edges take on a new personality.
I tend to choose muted pastels and add tiny floral motifs that feel like notes left by a friend. The matte finish and the faint dust of clay on my fingertips make the process tactile.
Placed together, the pots hum with color and the soil scent mixes with faint paint fumes, creating a porch vignette that seems both crafted and casually worn-in.
Steps
- Select three terra cotta pots in graduated sizes and wipe them clean of dust.
- Apply a base coat of chalky pastel paint, allow to dry, then add small floral motifs with a fine brush.
- Seal gently with a matte sealant and place plants or cut blooms inside, arranging the set on the porch.
Welcome board with pressed flowers and soft colors

There’s an immediate quiet pleasure in a wooden board that carries a gentle greeting framed by pressed petals. The dry, papery texture of the flowers contrasts with the smooth painted board.
I remember pressing blooms between heavy books for a week, then arranging them in a scattered, informal cluster. The muted colors of pressed petals give an aged, tender look that feels like a pocket of spring tucked into the entryway.
When someone knocks, the board’s faded blooms and the faint scent of wood make arrivals feel slower, softer.
Steps
- Choose a smooth wooden board and sand any rough areas so the surface feels pleasant to the touch.
- Arrange pressed flowers on the board in a pleasing cluster, then adhere them with clear craft glue and gently smooth.
- Paint a small welcoming word in soft paint around the arrangement and apply a protective clear coat once dry.
Recycled wine bottle lights strung along railing

I like the lazy glow of bottles when dusk falls and the porch becomes a softer world. The glass catches the last light and the tiny bulbs inside create a constellation that feels handmade.
There’s a slight weight when I lift a bottle, and the faint scent of the old cork lingers. Hanging these along the railing transforms ordinary wood into a shimmering edge.
On windy evenings the sound of bottles clinking together becomes a gentle note, and the whole porch takes on a mood that’s equal parts calm and celebratory.
Steps
- Gather clean empty wine bottles, a strand of fairy lights long enough for the railing, and battery or plug power source.
- Thread the lights into the bottles, positioning bulbs evenly, and secure the bottle tops so lights stay in place.
- Space the lit bottles along the railing and fasten them with ribbon or twine to keep a steady, even arrangement.
Spring doormat painted with cheerful botanical motifs
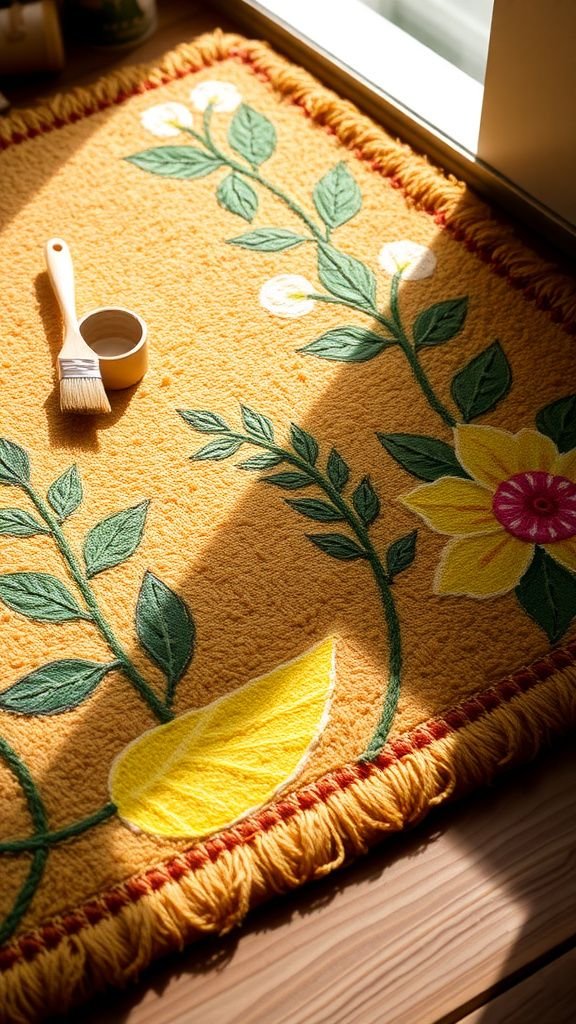
A doormat is the first tactile hello for anyone stepping in, and painted fibers have a textured, slightly bristly feel underfoot. I enjoy choosing small botanical shapes and laying them out in a loose, repetitive pattern.
The contrast between the natural coir and bursts of color feels friendly rather than formal. When morning light hits the fibers, the pigments look almost luminous for a moment.
After a few rainy days the colors soften, and the faded edges add to a lived-in charm that makes coming and going feel warmly human.
Steps
- Select a plain coir doormat and lay it flat on a protected surface outdoors or in a well-ventilated area.
- Sketch gentle botanical shapes with pencil, then fill them with outdoor acrylic paint using small brushes for detail.
- Allow the paint to dry fully and set it with a clear outdoor sealant before placing the mat on the porch.
Burlap bunting with lace and pastel ribbons

Burlap brings that slightly coarse, homespun touch that pairs well with delicate lace. I like the sound of the fabric when a breeze moves it, a soft rustle that feels like a page turning.
The combination of rough burlap edges and trailing pastel ribbons creates a pleasant contrast, and the lace adds a whisper of vintage femininity. Hung across a porch beam, the bunting sways and collects tiny bits of pollen and sunshine.
The whole effect is quietly festive without being showy, as if someone paused to decorate between chores and lingered.
Steps
- Cut equal-length burlap triangles and layer a thin strip of lace along the top edge of each piece, securing gently with fabric glue.
- Attach pastel ribbons between each triangle on a length of twine, spacing them evenly to create a flowing line.
- Hang the bunting across the porch beam or railing, adjusting ribbon lengths so pieces sway gracefully in the breeze.
Crate shelf planter with mixed succulents and herbs
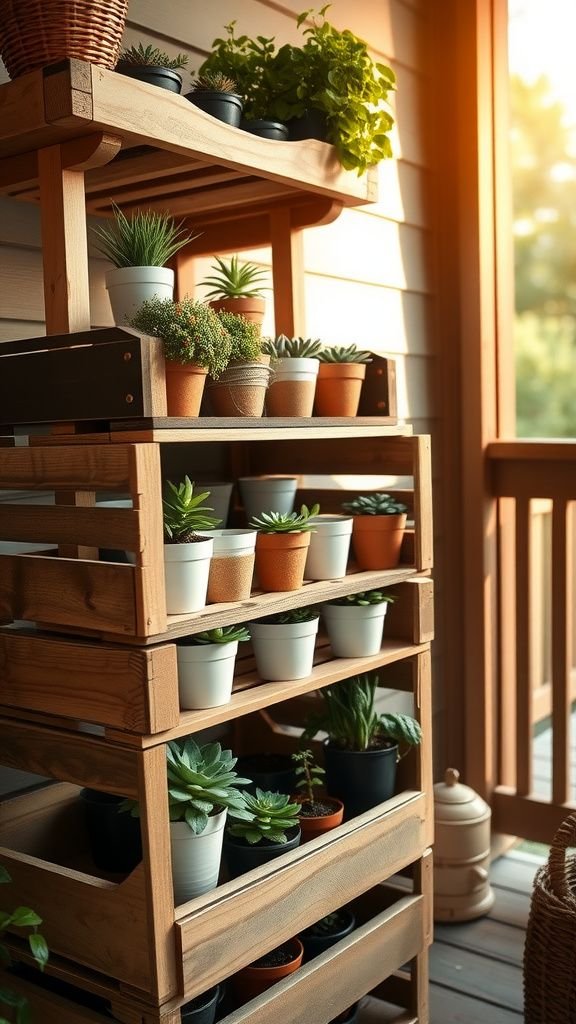
Wooden crates remind me of markets and the faint scent of old fruit stands. When stacked into a shelf they form cubbyholes perfect for small pots.
I prefer a mix of succulents and kitchen herbs so the textures run from glossy to feathered. The cool of the ceramic pots against my palms when I rearrange them is satisfying.
The porch becomes a living shelf where each cubby offers a tiny landscape. Sitting nearby, the combination of thyme perfume and dusty wood creates a quiet sensory patchwork that feels both lively and calm.
Steps
- Select one or more wooden crates and clean them to remove dust or splinters, arranging them into a stable shelf configuration.
- Place small pots of succulents and herbs into the cubbyholes, varying heights and textures for visual interest.
- Tuck in small decorative stones or moss around the pots and position the crate shelf where it receives gentle light.
Repurposed tire planter painted in spring tones

When I see an old tire turned into a planter, there’s a cheeky satisfaction in the transformation. The rubber’s matte black contrast with cheerful paint brings an element of surprise.
I usually pick spring tones that lift the eye and nest the soil so blooms feel like they’re spilling out. There’s a faint scent of rubber warmed by the sun and the rich smell of wet soil below.
Placed near the stairway, the round shape breaks up straight lines and invites a casual smile from visitors who notice the playful reimagining.
Steps
- Clean an old tire thoroughly and allow it to dry in sunlight to remove lingering residues.
- Apply exterior paint in the chosen spring colors, coating evenly and allowing full drying time between coats.
- Fill the painted tire with potting mix and plant colorful annuals or trailing plants, placing it where it catches light.
Seagrass wreath with tiny faux nests and eggs
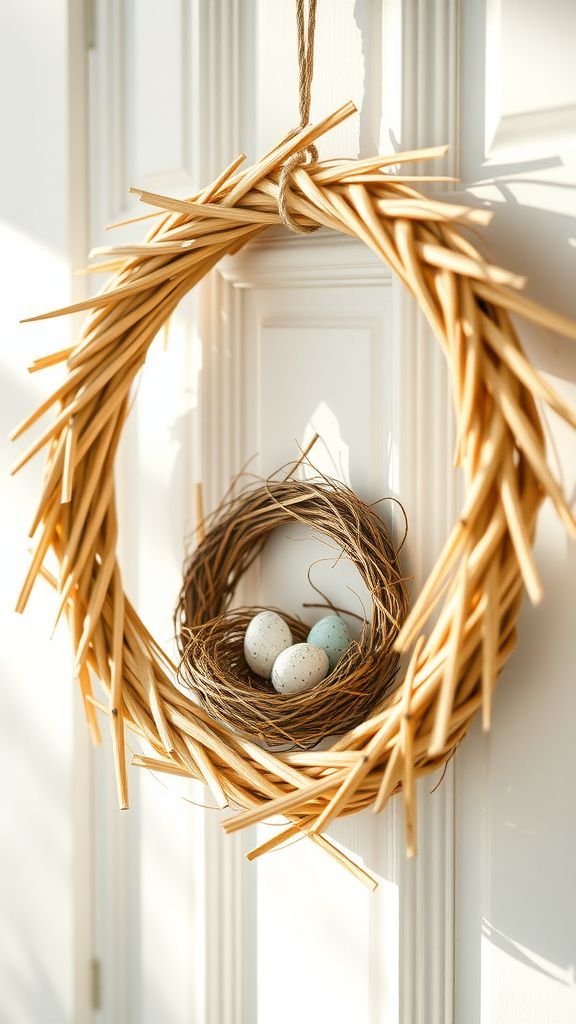
A seagrass wreath has a beachy, dried-scent aroma that feels both fresh and aged. Nestled within its loops I like to tuck small faux nests with speckled eggs, which look like a surprise left by birds.
The straw’s texture is crinkly beneath my fingertips and the light catches the weave in a way that looks almost woven from sunlight. Hanging on the porch door it reads as a quiet natural ornament, gentle and slightly whimsical, and every time I pass it I linger to admire the tiny, painted speckles on the eggs.
Steps
- Start with a round seagrass wreath base and select a few small faux nests and speckled eggs to place into the weave.
- Tuck the nests securely into the wreath so they sit snugly within the loops, adjusting for balance and visual flow.
- Add a subtle ribbon loop for hanging and place the wreath on the porch door at eye level.
Painted pallet sign with cheery block letters

Old pallet wood has an honest, rough-grain personality that makes any painted sign feel handcrafted. I like broad block letters in a soft color palette that read like a friendly note.
The uneven slats and the occasional nail hole give character, and the paint settles into grooves in a pleasing way. When I run a hand across the letters, the tactile contrast between the smooth paint and the weathered wood is satisfying.
Placed near the door, the sign feels like a neighborly wink, a small crafted invitation to slow down for a moment.
Steps
- Dismantle or select a pallet board with a flat surface, sand lightly to remove splinters while keeping the rustic grain.
- Paint a pale background color and once dry, stencil or freehand block letters in a contrasting soft tone.
- Allow paint to cure and hang the sign on the porch wall or lean it against a step for a casual look.
Clay sunburst wind chime with soft glaze finish

Tiny clay pieces clinking together make a sound that feels sunny and small-scale. I favor muted glazes that catch the light without glaring, and the coolness of clay in hand is soothing.
Hung by a twine loop, each shard moves independently so the melody is unpredictable in the best way. The glaze often develops fine, delicate crazing that looks like a web of memories.
When the wind is steady the chime plays a gentle, irregular song that seems to belong to the porch itself, like a private radio station for quiet afternoons.
Steps
- Shape several small clay sunburst or disc pieces and fire them according to clay type before glazing.
- Apply soft glazes and refire or follow glaze instructions to achieve a muted, slightly crackled finish.
- Drill small holes and string the pieces on twine in a balanced arrangement, then hang where breezes catch the chime.
Vintage watering can turned floral centerpiece
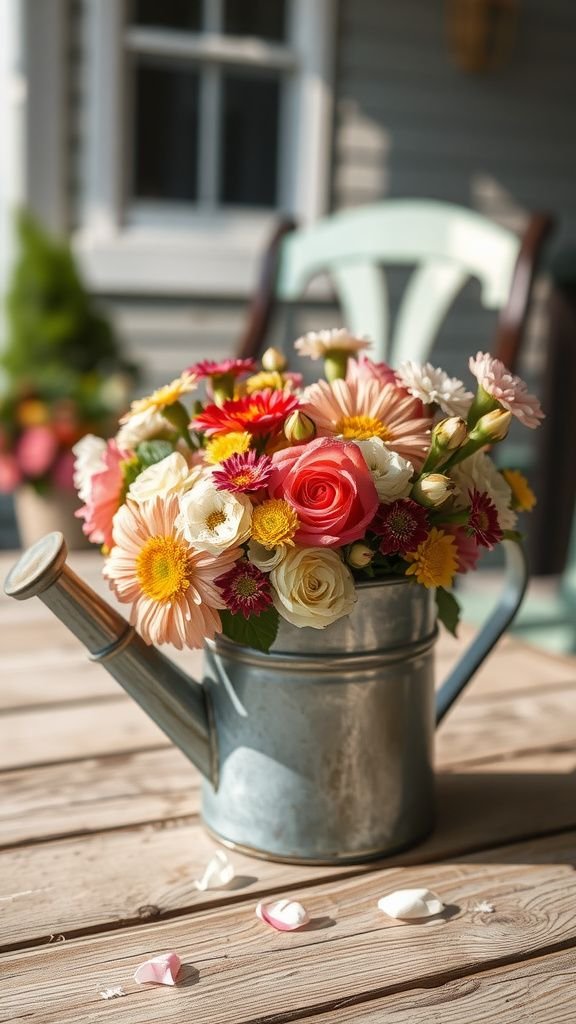
A metal watering can carries a faint cool, metallic scent and the memory of soil on hands. When repurposed as a vase it becomes unexpectedly charming.
I often fill one with a loosened bunch of garden-cut blooms that spill in a casual tumble. The weathered finish of the can and the freshness of blossoms create a lively contrast.
On sunny mornings the water inside glints and the petals lean toward the light. The piece reads like a snapshot from a slow summer morning, cheerful without fuss and pleasantly domestic.
Steps
- Select a vintage metal watering can and rinse inside to ensure a clean vessel for flowers.
- Trim and arrange a mixed bunch of garden flowers, allowing stems to spill naturally over the spout and rim.
- Place the filled watering can on a small porch table or step so blooms catch the light.
Penny tile stepping stones with colorful glass accents

Working with small round tiles on coarse concrete feels oddly satisfying under my fingertips. The penny-like tiles reflect light differently than glass, offering a soft shimmer when sun catches them.
I enjoy embedding colorful bits of glass for tiny bright flashes that wink as you walk. The surface warms in the sun and cools at night, a subtle seasonal thermometer beneath bare feet.
Scatter these stepping stones along a porch path and they create a mosaic story beneath shoes, a tactile detail that encourages small pauses and appreciative looks.
Steps
- Prepare a mold or shallow form for each stepping stone and mix concrete to a thick, spreadable consistency.
- Press penny tiles and colorful glass accents into the surface in a pleasing pattern while the concrete is still wet.
- Allow stones to cure fully, then remove from molds and place along the porch pathway where they can catch sunlight.
Herb window box with chalkboard plant labels
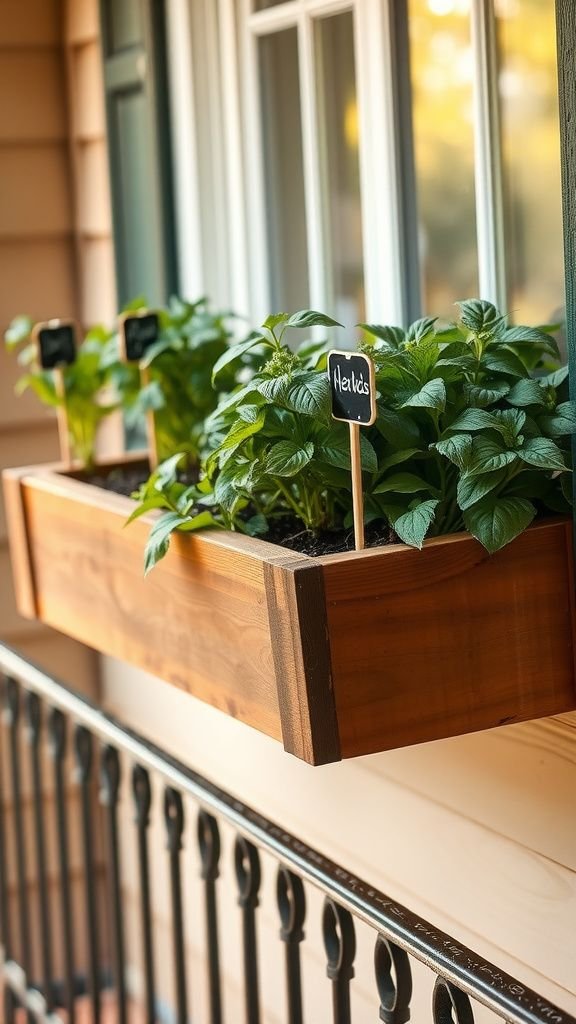
A window box overflowing with basil, parsley, and chives releases a peppery, green perfume that seems to lift the entire porch air. The mix of soft leaf textures and upright herb stems gives a lively, layered look.
Chalkboard labels tied to skewers add a handwritten charm, with slight smudges where fingers have brushed them. I often find myself rubbing a thumb over the names while deciding which leaf to snip for dinner.
The box sits like a small kitchen garden, practical and pretty, bringing usable freshness to the threshold.
Steps
- Fill a long window box with a rich potting mix and arrange small herb plants with complementary growth habits.
- Insert chalkboard plant labels on short stakes and write each herb name in chalk for a casual handwritten look.
- Position the box where it receives morning sun and water so the herbs stay lively and fragrant.
Fabric scrap wreath with layered pastel petals
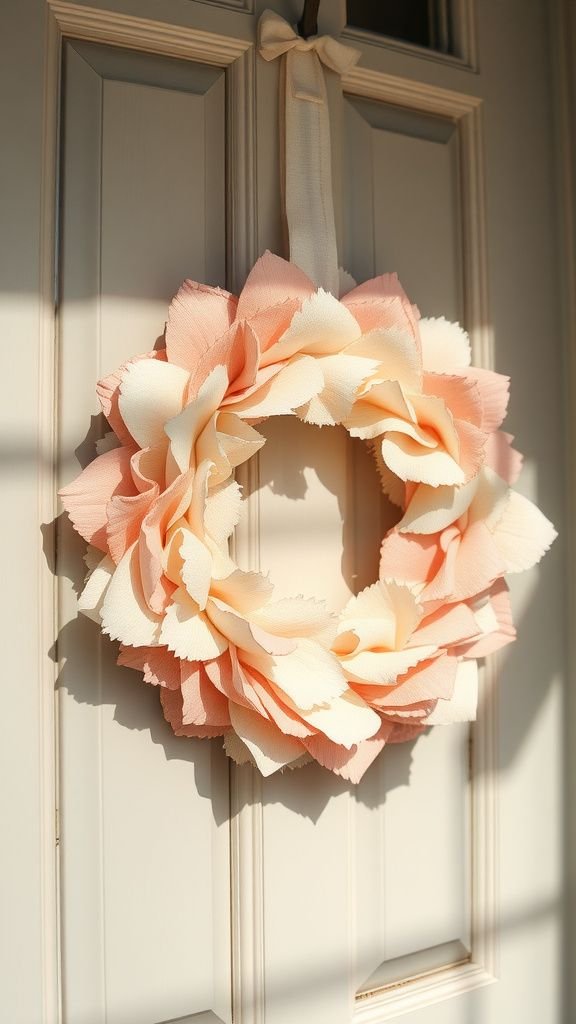
I keep a small stash of leftover fabric scraps that become tiny petals when layered into a wreath. The soft cotton and linen pieces fold into puffy textures and the edges fray in a way that feels tender.
Holding the wreath, the fabrics make a muffled rustle like old pages turning. The pastel palette reads like a watercolor wash from a distance, while up close each scrap shows its own weave and thread.
Hung on the porch, the wreath invites casual touch and has the comfortable look of something made with relaxed time.
Steps
- Cut fabric scraps into petal shapes and layer them around a wreath base, overlapping to create fullness.
- Affix the fabric pieces to the base with a hot glue gun or fabric adhesive, ensuring an even distribution of colors.
- Fluff and adjust petals for a balanced, full appearance and hang the wreath on the porch door.
Lantern cluster using painted glass jars on a tray
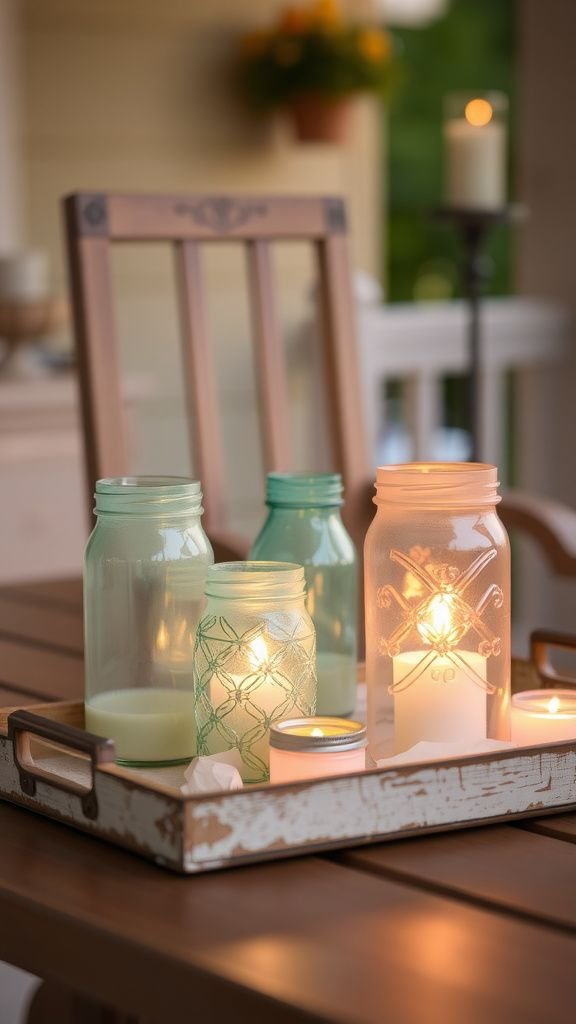
Painted jars catch and scatter light in a way that feels both primitive and delicate. I often gather mismatched jars, give them translucent washes of color, and group them on an old tray so their glow reads as a single composition.
The warm flicker of small candles inside creates layered hues on the porch floor. The mix of glass textures and the soft hum of flame combine into an agreeable hush.
Moving the tray around changes how the colors mingle, so the arrangement feels alive as shadows slide and mingle with light.
Steps
- Paint the outside of several glass jars with translucent glass paint or diluted acrylic for a soft stained effect and allow to dry.
- Place small candles or LED lights inside each jar and arrange them together on a shallow tray for a composed cluster.
- Position the tray where the light can reflect off nearby surfaces and enjoy the layered glow.
Mini topiary cones made from preserved moss

Hand-formed moss cones have an unexpectedly plush feel that’s almost like soft velvet. The preserved moss keeps a deep green and a faint woodland scent that is calming to the senses.
Placed in small pots, each cone feels sculptural and quiet, a little green punctuation on a porch step. The texture invites a gentle press of the fingertips, and the compact form reads as tidy without being overly formal.
Clustered with a tiny scatter of stones or a small companion bloom, the cones bring a contained slice of landscape to the entry.
Steps
- Shape a cone form from light floral foam or paper and cover evenly with preserved moss, pressing gently for good adhesion.
- Place the moss-covered cone into a small pot or dish and tuck moss around the base for a finished look.
- Arrange a few cones of varying heights together on the porch to create a miniature topiary grouping.
Napkin decoupage tray for morning coffees outdoors
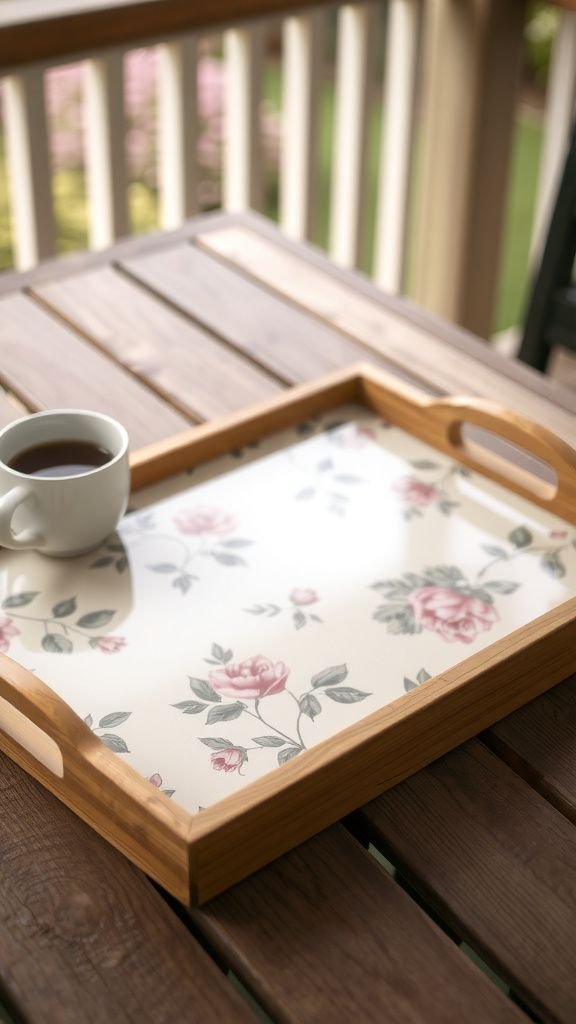
A decoupaged tray feels personal because the napkin patterns often carry small moments of taste. The glossy surface that forms over the paper catches the light in a cheerful way, and the faint residue of adhesive has its own odor that reminds me of slow afternoons.
I like floral or geometric napkins that look bright against wooden trays. When I carry cups out, the tray’s edges keep things steady and the pattern makes the whole moment feel curated.
It’s practical and pretty, a tiny stage for porch rituals.
Steps
- Select a wooden tray and a decorative napkin pattern, separating the top printed layer of the napkin for application.
- Smooth a layer of decoupage medium onto the tray, lay the napkin gently on top, and smooth out wrinkles with a soft brush.
- Seal the surface with additional coats of medium until glossy and fully dry before using for drinks or decor.
Twine-wrapped letters spelling seasonal greetings
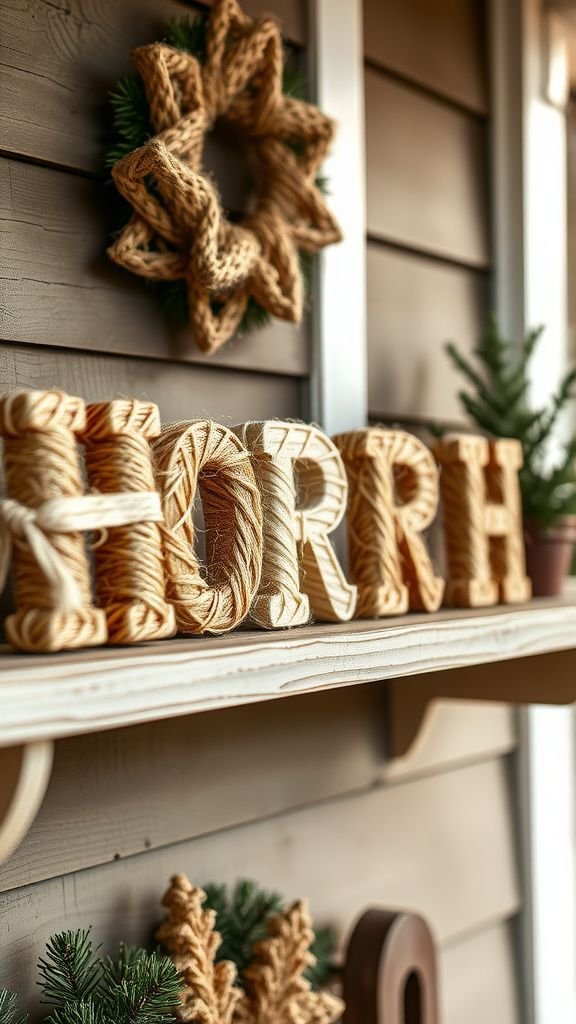
Cardboard or wooden letters wrapped in twine have a homespun, slightly nautical air. The twine’s roughness contrasts with smooth letter edges, and the rhythmic pattern of winding creates a satisfying visual texture.
I like to place a short greeting on a small shelf or lean it against a pot, where the letters look casual and friendly. The scent of twine and the faint dust from handling lend the letters an artisanal presence.
They seem to say hello without shouting, a small, hand-made punctuation to the porch’s welcome.
Steps
- Choose letter shapes in cardboard or thin wood and a length of natural twine to wrap each letter snugly.
- Secure the twine at the back and wrap evenly, keeping the twine close for a consistent textured surface.
- Tuck the ends neatly at the back and place the finished letters on a shelf, step, or hang them for display.
Mini chalkboard easel for welcoming notes

A tiny chalkboard easel brings a playful, almost theatrical quality to the porch. I enjoy the whisper of chalk on the board and the soft dust that gathers on my fingertips.
Messages change with mood: a simple hello, a flower doodle, or a scribbled weather note. The matte black surface makes colors pop, and the wood easel has a small weight that feels stable in hand.
Positioned near a pot of blooms, the easel becomes part of a little scene that reads like a casual, handwritten postcard left on the step.
Steps
- Select a small wooden easel and a mini chalkboard or paint a small board with chalkboard paint until the surface is smooth.
- Season the board by rubbing chalk and wiping it off, then write a short welcoming message or doodle with colored chalk.
- Place the easel among porch decor where it can be easily seen and refreshed as desired.
Herb wreath with lavender and rosemary sprigs
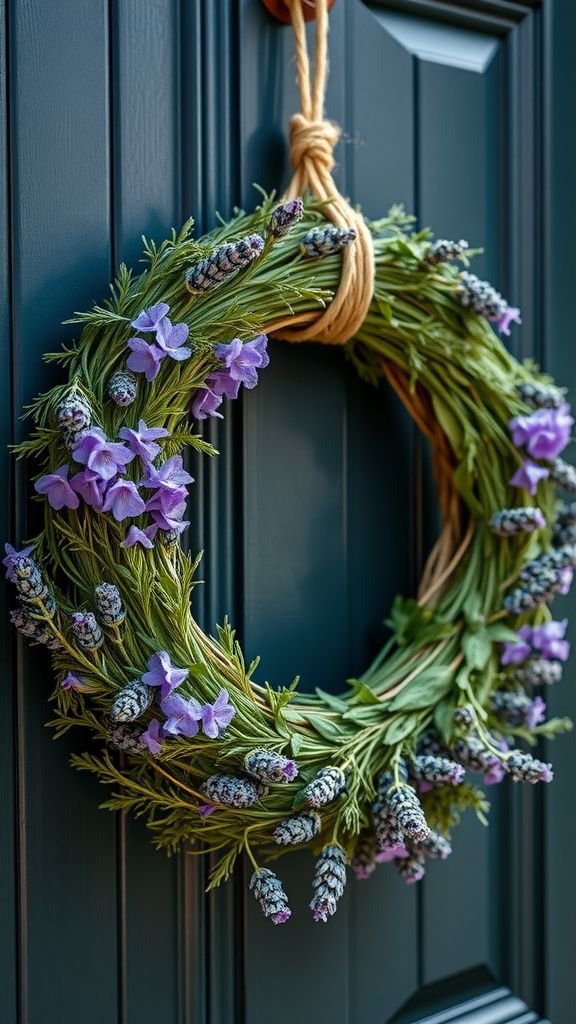
Herb wreaths feel aromatic and intimate; the lavender offers a calm floral perfume while rosemary adds a resinous, green note. The contrast between the fine lavender blooms and rosemary’s needle-like leaves is tactile and pleasing.
I hang one near the door so the scent brushes past whenever someone passes. Over days the fragrance subtlety shifts as oils release into the air.
The wreath’s compact shape and evergreen tones feel grounding, like a small living scent sachet that nods to hospitality in a quiet, fragrant way.
Steps
- Start with a round wreath base and gather fresh lavender and rosemary sprigs, trimming stems to tidy lengths.
- Attach sprigs to the base in overlapping bunches using floral wire, working around the circle for even coverage.
- Finish by securing loose ends and hanging the wreath where its fragrance can greet visitors.