I’ve always been drawn to simple shapes that spark big smiles around kids. Heart Shaped Kids Crafts have been my go-to when a rainy afternoon needs a pick-me-up; there is something gentle about cutting curves and layering color that feels like a tiny celebration.
When I talk about Heart Shaped Kids Crafts I picture sticky fingers, glitter dust, and proud wide eyes holding up a finished heart.
I love how a single shape can become suncatcher, plush toy, garland, or keepsake in a heartbeat.
Sparkly tissue paper heart suncatchers for windows

I remember a sunlit morning where tiny hands fussed over translucent scraps and the table smelled faintly of marker. The tissue paper hearts caught the light in jewel-like shards, colors bleeding softly into one another.
Glitter drifted like tiny stars and left a faint sparkle on the kids’ fingertips. There was a quiet thrill when each heart was held to the window and afternoon light painted the room in rosy tones.
The tactile crinkle of tissue and the glossy shine against the glass made these hearts feel like little stained-glass windows made by small artists.
Steps
- Cut heart shapes from clear contact paper or laminate sheets to create a sticky surface.
- Tear or trim tissue paper into small pieces and sprinkle them onto the sticky heart shapes until coverage looks pleasing.
- Add a light dusting of fine craft glitter across the tissue for sparkle, then cover with another layer of contact paper to seal.
- Trim the edges to neat heart shapes and punch a hole for ribbon or suction cup for hanging.
Soft felt heart plushies for tiny hands

There was a quiet satisfaction in holding a plump felt heart that smelled faintly of wool and memories. The felt had a warm, slightly fuzzy texture under my fingertips while the stuffing made each heart feel comforting and squeezable.
I could hear the soft rustle of thread as a child ran a finger along decorative blanket stitches, and the colors — rosy pink, deep cranberry, mint — felt like tiny hugs. Small button eyes or embroidered initials turned plain shapes into keepsakes that stayed tucked into pockets and backpacks, collecting scuffs and stories over time.
Steps
- Trace matching heart shapes onto felt and cut out two pieces for each plush heart.
- Place decorative elements like small felt hearts or embroidered initials on one piece before stitching around the edge.
- Sew around the perimeter with a simple blanket stitch, leaving a small opening for stuffing.
- Stuff gently with fiberfill until the heart feels cuddly, then finish stitching the opening closed.
Handprint heart collage keepsake to treasure

That afternoon of smudged paint and giggles produced a collage that felt oddly like a little time capsule. The wet paint left shiny ridges where fingers pressed, and the scent of tempera paint lingered in the air.
Each handprint curved into a heart shape, overlapping with other colors and creating a layered, painterly effect. The edges were delightfully imperfect, with stray drips and a proud thumbprint at the corner.
When dried flat, the collage had a satisfying weight and reminded everyone who touched it of that particular messy moment of making.
Steps
- Paint each child’s palm with washable tempera paint and press them onto heavy paper so fingers point inward to form a heart outline.
- Allow the paint to dry, then add background colors or patterned paper around the handprint heart for contrast.
- Glue small keepsake items like ribbon scraps, tiny buttons, or a dated label near the edge.
- Frame the finished collage or laminate it to preserve the texture and color.
Rainbow crayon hearts made from old crayons
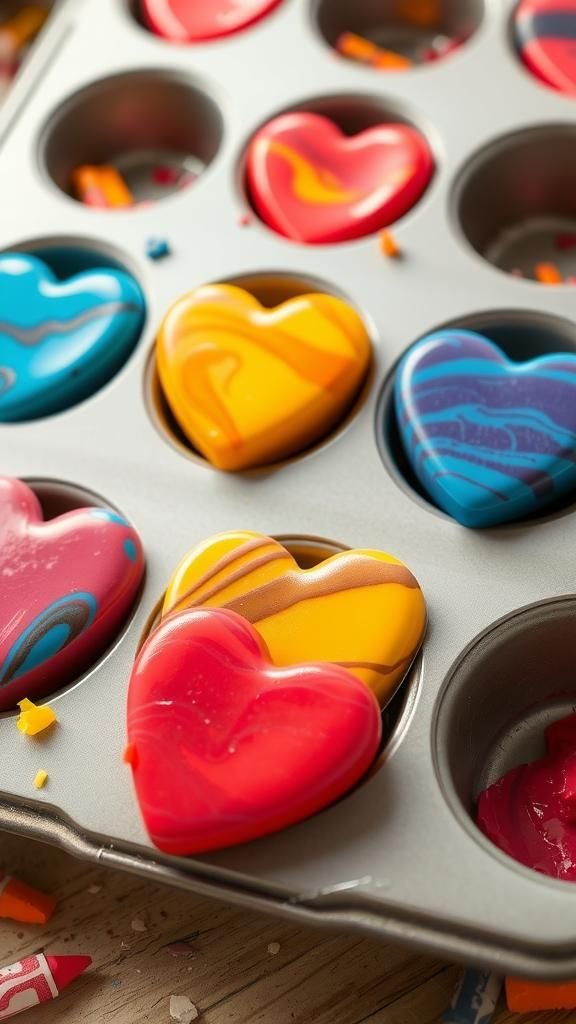
There was a satisfying smell of warm wax in the room as the old stubs transformed into something new. The colors blended into each other with a soft marbled look where reds met blues, and the finished hearts had a smooth, glossy finish that begged to be held.
Each heart felt cool and solid at first, then warmed slightly in small palms. Crayon dust left a faint ghost on fingers, a reminder of the recycling turned playful.
Seeing favorite colors melt together made even the pickiest child grin at the little rainbow result.
Steps
- Peel paper wrappers off old crayons and break them into small chunks sorted by color palette.
- Arrange crayon pieces into silicone heart molds to create layered or marbled effects.
- Melt the molds gently in a low oven or double-boiler until wax becomes liquid and smooth.
- Allow the wax to cool and harden fully before removing the solid crayon hearts from the molds.
Paper plate heart masks for imaginative play
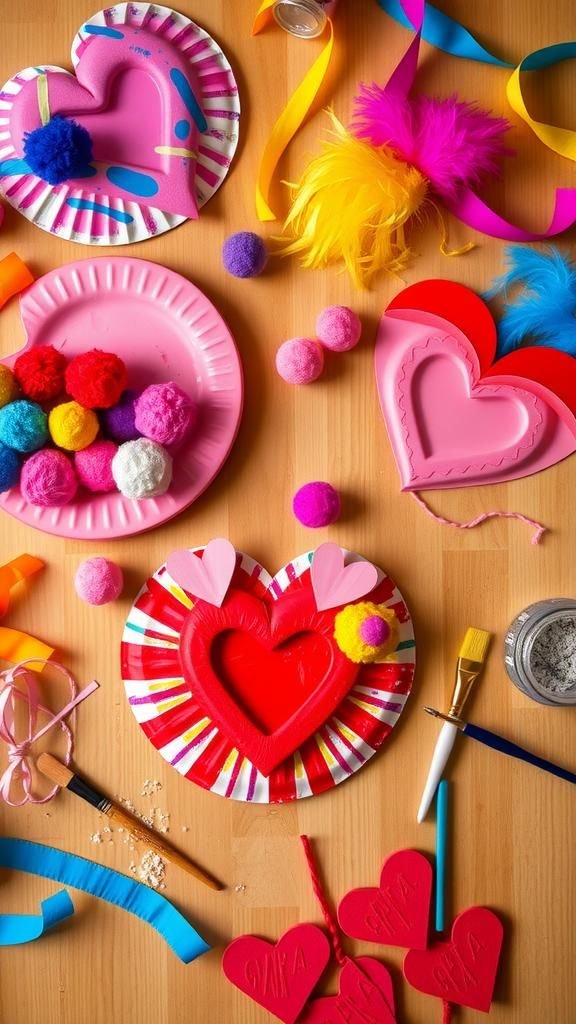
The crackle of stiff paper plate edges and the soft whisper of crepe streamers created a playful soundtrack while children fashioned heart-shaped masks. Paint dried with tiny glossy spots and glued-on pom-poms added texture that begged to be explored.
Wearing a heart mask shifted the atmosphere: voices grew theatrical and small feet tapped as pretend play took over. The variety of materials left each mask with personality — a glitter fringe here, a feathered plume there — and the masks held up to enthusiastic running around, collecting smudges and stories that felt effortless and bright.
Steps
- Cut a heart outline from a paper plate and cut eye holes to create a wearable mask base.
- Apply paint or markers over the plate surface to add color and pattern.
- Decorate with pom-poms, feathers, crepe streamers, or stickers around the edges.
- Attach a craft stick or elastic band to hold the mask in front of the face.
Button heart mosaics on recycled cardboard

The cardboard had a faint woody scent and a gentle bend that made each mosaic feel handcrafted. Buttons of all sizes clattered pleasantly as little hands arranged them into a heart outline, searching for the right shade to balance the pattern.
The hard plastic buttons contrasted with the softness of felt backing or scrap paper, and the overall effect was pleasingly tactile. When finished, the heart mosaics caught the eye with their layered textures and playful symmetry.
The children loved tapping the buttons with a fingernail and watching light catch the glossy surfaces.
Steps
- Cut a heart shape from sturdy recycled cardboard to serve as a backing.
- Arrange an outline of buttons along the heart shape to establish the design.
- Adhere buttons in rows or patterns until the heart feels filled and balanced.
- Add a ribbon loop to the back for hanging or mount onto colored paper for display.
Salt dough heart ornaments that air dry well
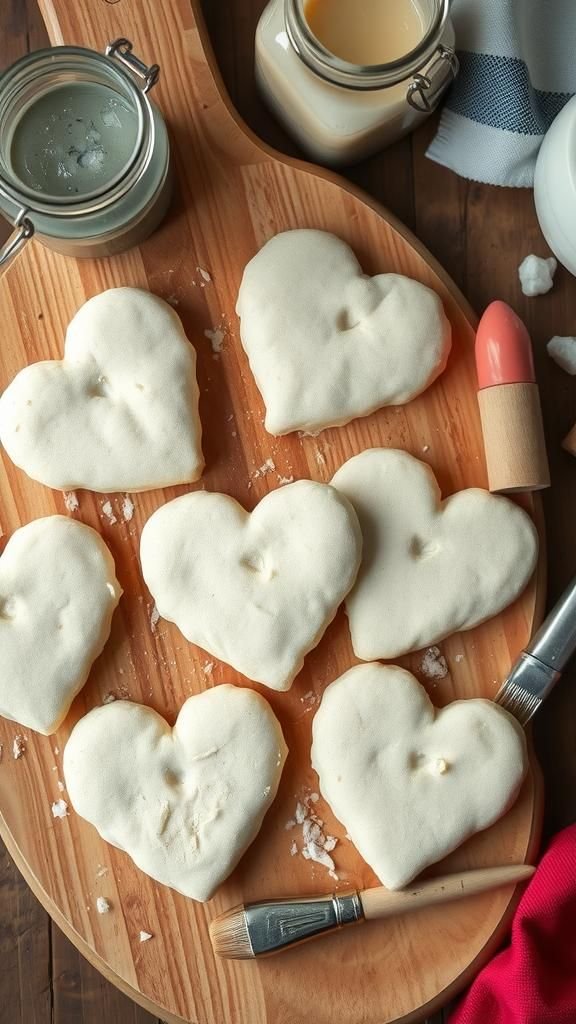
The dough had a warm, yeasty smell and yielded under small palms with a satisfying smoothness. Fingerprints left faint impressions around the edges that felt intimate and charming after baking.
The surface was matte before paint and took on bright, cheerful hues that popped against holiday greenery. Tiny holes made for hanging produced neat shadows when the ornaments were displayed, and the finished pieces carried the faint grit of salt that reminded me of seaside afternoons.
Each heart ornament seemed to hold a little memory, making tree branches look friendlier and more personal.
Steps
- Mix flour, salt, and a small amount of water to form a soft salt dough that holds its shape.
- Roll out the dough to an even thickness and use a heart-shaped cutter to make ornaments.
- Create a small hole near the top of each heart for hanging, then allow them to air dry or bake gently until firm.
- Paint or varnish the dried ornaments and thread ribbon through the holes for display.
Recycled magazine heart garland brightens rooms
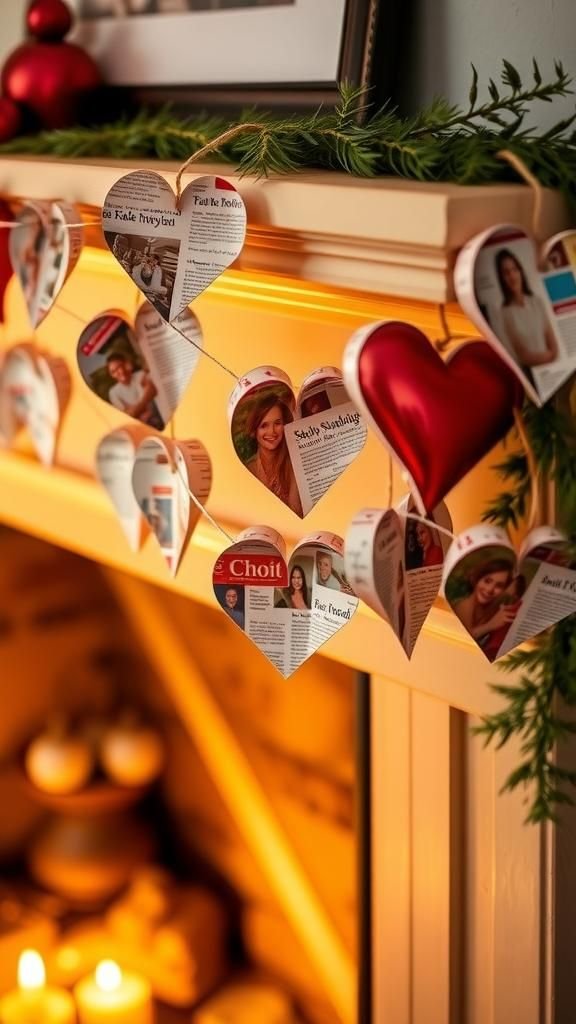
There was a quiet thrill in turning glossy magazine pages into a string of cheerful hearts. The cut edges shimmered with photo gloss and text fragments peeking through, giving each heart a collage-like personality.
When strung together, the garland swayed gently with a breeze, and the scattered headlines and imagery became a playful patchwork of color. The paper had a tactile crispness that crinkled softly when handled, and the whole length of the garland looked like a parade of tiny paper flags.
It felt resourceful and joyful, perfect for draping over a shelf or mantel.
Steps
- Cut heart shapes from colorful magazine pages, mixing photographic sections and bold print for visual interest.
- Layer or glue two hearts back-to-back for sturdiness if desired.
- Punch small holes along the top and thread hearts onto twine or ribbon with even spacing.
- Hang the garland along a shelf or across a window to let the light catch the glossy pages.
Fingerprint family tree with tiny heart leaves
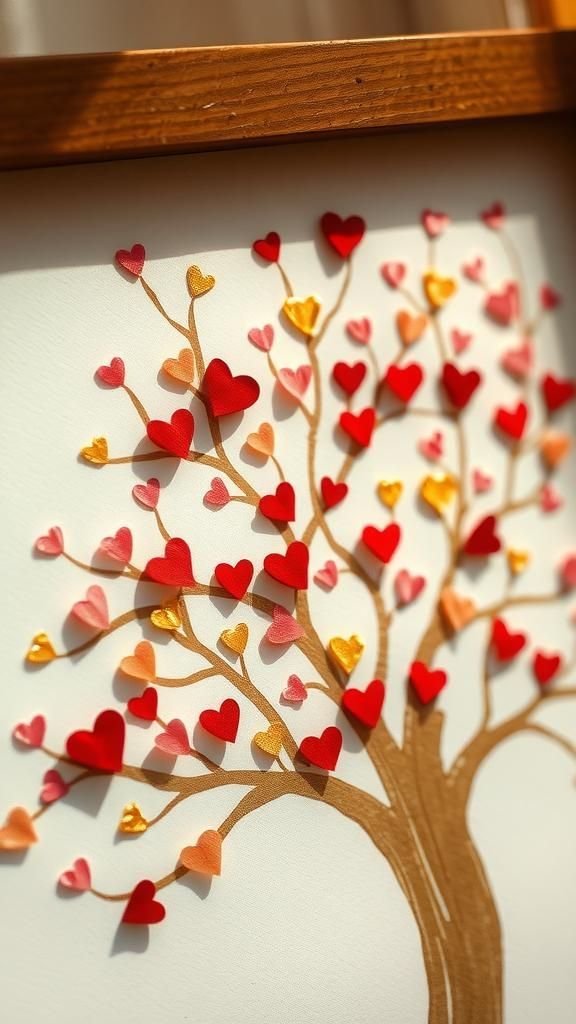
The table smelled faintly of ink as each fingerprint pressed into the soft paint, leaving a pattern of tiny heart-shaped leaves clustered on drawn branches. Each print held a personal rhythm — a small smudge here, a bold oval there — and the mix of sizes created a lively canopy.
The tree felt alive somehow, with overlapping colors and little gaps that invited the eye to wander. When framed, the piece had a quiet intimacy, like a snapshot of hands at a moment in time.
Visitors lingered, squinting at the tiny ridges that made up each leaf.
Steps
- Paint a simple tree trunk and branches on heavyweight paper to serve as the base.
- Dip each participant’s fingertip into washable paint and press onto the branches to form heart-shaped leaves.
- Vary colors and positions to build a full canopy, leaving space for names or dates near each print.
- Allow the piece to dry completely before framing or labeling with names.
Coffee filter heart flowers with watercolor bloom

The filters soaked in water like little petals, releasing color in soft rings that blended in dreamy gradients. Their thin paper texture puckered slightly as they dried, producing gentle ruffles that resembled natural petals.
The watercolor edges bled with halos and soft veins, and the smell of damp paper mingled with faint paint odor. When the filters were gathered into bouquets, they rustled with a papery whisper and looked unexpectedly delicate despite their humble origins.
Little stems of green pipe cleaner transformed the blooms into a playful, everlasting posy that brightened tabletops.
Steps
- Flatten coffee filters and apply drops of liquid watercolor or diluted food coloring to create blooming patterns.
- Blot excess water and allow the filters to dry until slightly crinkled and set.
- Gather several filters and secure them at the base with a twist of green pipe cleaner to form a flower.
- Arrange multiple flowers into a small bouquet for display.
Yarn-wrapped heart hangers with fuzzy texture

The yarn felt warm and fibrous under fingers, and wrapping it around a heart-shaped base created a comforting, banded surface. Color changes made striped patterns that looked cozy and handmade, and stray fibers caught the light with a muted sheen.
Hanging them on a peg introduced soft movement so the hearts swayed and brushed against one another, producing a faint whisper. Each heart had a slight weight that felt pleasing when picked up, and tiny knots at the back added character.
They seemed well-suited to tuck into a nursery corner or dangle from a bookshelf.
Steps
- Cut a heart shape from sturdy cardboard to create a base for wrapping yarn.
- Tie the yarn to the cardboard and wind it around the shape, changing colors as desired to make stripes.
- Continue wrapping until the cardboard is fully covered and the heart feels plush.
- Secure the yarn end with a knot and add a loop for hanging.
Potato heart stamps for curious little artists
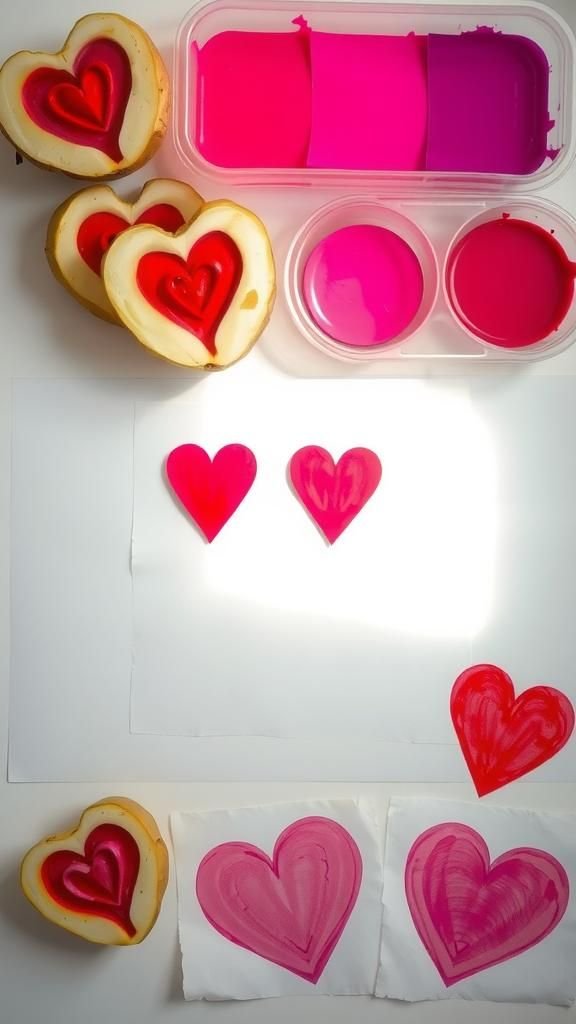
The simple, earthy scent of potatoes filled the air as kids pressed their stamps into paint. Each potato surface held a slightly uneven imprint that produced charming, rustic hearts on paper.
Paint pooled in the creases and left faint rings that gave each print character, like tiny fingerprints of the process. There was playful experimentation with pressure and paint thickness, and the table soon showed a joyful mess of dotty hearts.
The stamped sheets had a lively rhythm when laid side by side, perfect for wrapping paper or a chunky art display.
Steps
- Slice a potato in half and carve a simple heart shape into the flat surface to form a stamp.
- Pour tempera paint onto a shallow tray and press the potato stamp lightly into the paint.
- Press the painted stamp onto paper with even pressure to transfer the heart shape.
- Repeat with different colors and papers to build a patterned collection.
Playdough heart impressions that invite touch
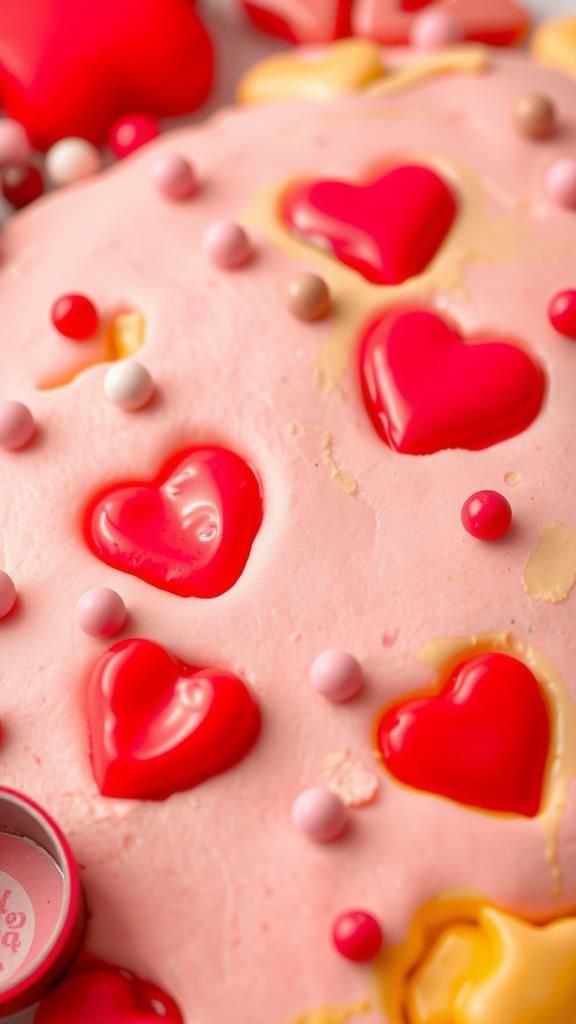
The playdough had a faint sweet scent and a soft give under fingers, leaving neat heart impressions that retained their edges. Pressed shapes bore the glossy sheen of fresh dough and tiny cracks where the surface stretched.
Children admired the way the impressions caught crumbs of glitter or sprinkled beads in the crevices, adding tactile interest. When left to air, the edges hardened into slightly firmer silhouettes that still felt pleasant to handle.
There was a meditative quality to repeating the same heart shape, each press offering a small, colorful satisfaction.
Steps
- Roll a smooth sheet of playdough to an even thickness on a nonstick surface.
- Press heart-shaped cutters or found objects into the dough to create impressions.
- Decorate impressed areas with small beads or glitter for texture.
- Allow pieces to air for a little while if a firmer finish is desired before playing again.
Origami heart bookmarks for tiny bookworms
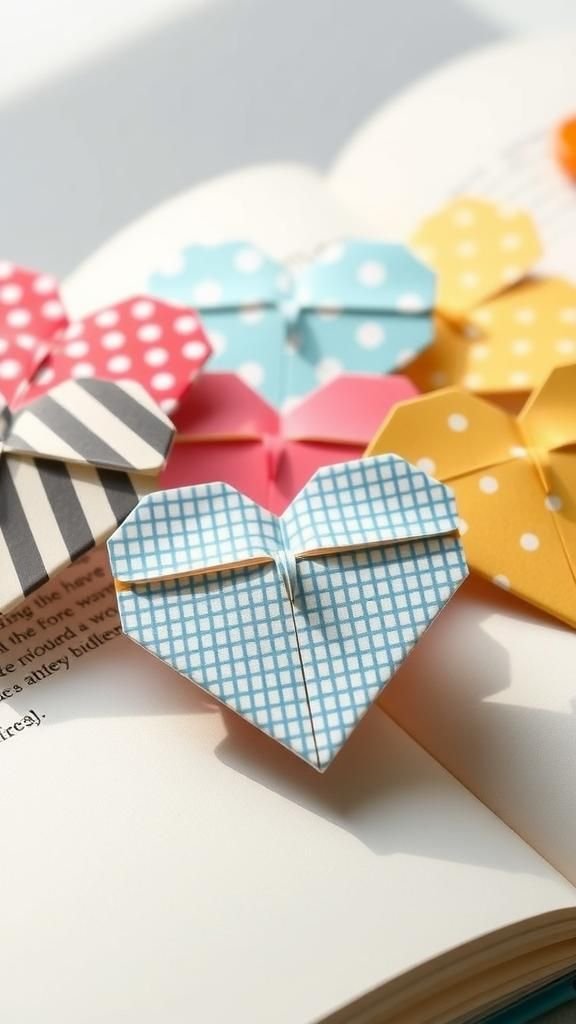
The crisp fold lines of the paper created clean edges that felt precise in little hands, and the small triangular pocket fit snugly over a page corner. Patterned paper added playful motifs like polka dots and florals that peeked above the pages, and the slight stiffness of the folded paper gave the bookmark a pleasant, tactile quality.
Children took pride in sliding the heart onto their favorite stories and tapping the heart to find their place. The simplicity of the shape made returning to a book feel a bit more ceremonial, with a little heart marking where imagination paused.
Steps
- Start with a square of patterned paper and fold it into a small triangular pocket following simple origami folds.
- Form the heart shape by creating two small curved flaps from the top of the triangle and tucking edges neatly.
- Press creases firmly so the bookmark holds its shape and slips easily onto a page corner.
- Optionally add a tiny sticker or drawn face to personalize the heart.
Pressed flower hearts with vintage charm
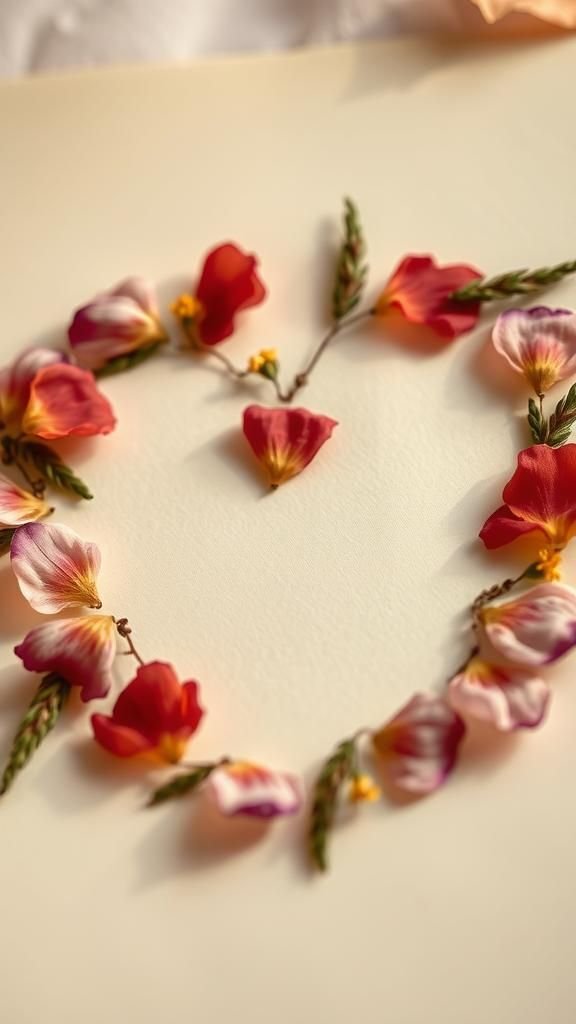
The pressed petals made a delicate collage against cream paper, their translucence revealing veins and tiny freckles of color. There was a faint dry scent of flowers and paper that hinted at summer afternoons.
Each heart combined soft blossoms and slender leaves into a gentle, layered image that felt fragile and cherished. When set behind glass, the petals seemed to float and the colors deepened toward antique tones.
The finished hearts had a quiet, reflective mood, perfect for tucking into letters or framing on a narrow shelf where they could be admired slowly.
Steps
- Collect small flat flowers and leaves and press them between absorbent paper under a heavy weight for several days.
- Arrange the pressed botanicals into a heart outline on archival paper to compose a pleasing layout.
- Affix the petals with a tiny dot of archival glue or place between glass for preservation.
- Frame the piece or insert it into a card for a delicate keepsake.
Silly sock heart puppets for storytelling fun
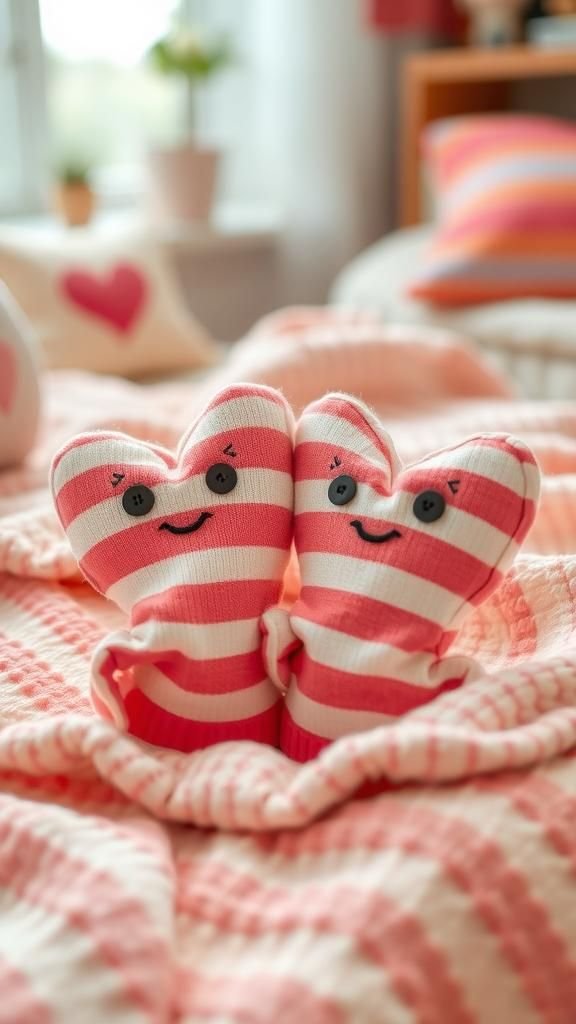
The soft cotton of an old sock offered instant comfort and a slight stretch that made each puppet feel alive. Marker-drawn faces added personality, while button eyes jutted slightly and made faint clacking sounds during energetic puppet shows.
The sock hearts bobbed and leaned as stories unfolded, their fabric absorbing the warmth and tiny tugs of imagination. Filling the socks with a few scraps of fabric or soft stuffing produced a pleasing plumpness that children loved to hug between scenes.
These puppet hearts had a homespun charm that encouraged giggles and impromptu performances.
Steps
- Trim the toe area of a clean sock to form the top of a heart-shaped puppet body.
- Fill the sock with soft stuffing or fabric scraps to create a plump shape.
- Sew or tie the open end closed, then add marker details, buttons, or felt shapes for facial features.
- Perform short stories with the sock heart puppets, encouraging playful voices and movements.
Heart-shaped pop-up cards full of surprises
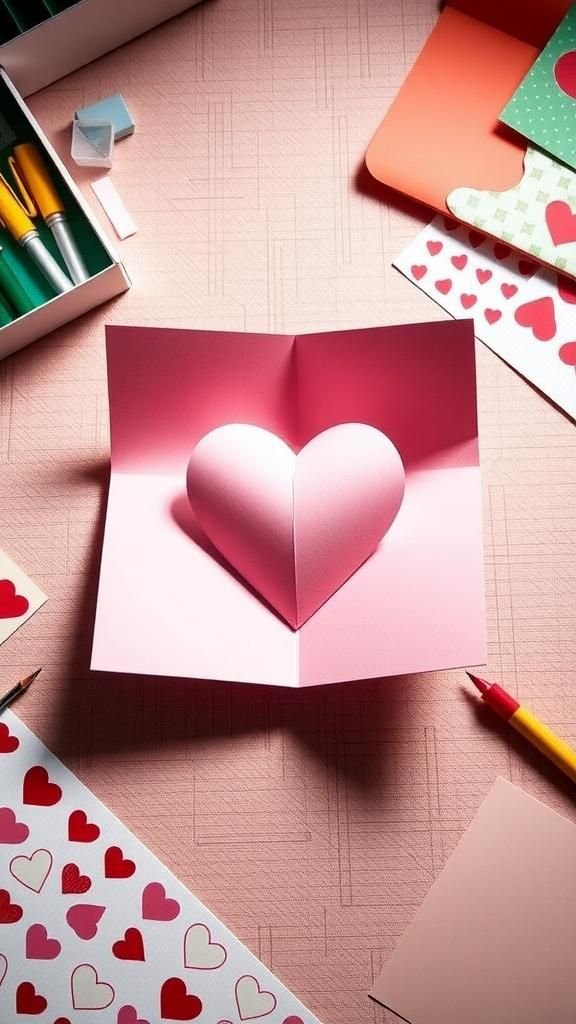
The tiny surprise that sprang up when a card opened was always greeted with delighted gasps. The paper layers folded into a heart that rose with a crisp little snap, casting a sweet shadow inside the card.
Patterned paper and hand-drawn doodles framed the pop-up heart and lent a personal voice to the greeting. The sound of the fold and the way the heart anchored itself in three dimensions added a theatrical moment to an ordinary exchange.
These cards held a small, tangible joy that lingered after the recipient smiled and tucked it onto a shelf.
Steps
- Fold a piece of cardstock in half to form the card base and cut a small slit where the pop-up will be anchored.
- Create a heart pop-up by folding a separate heart-shaped piece of paper and inserting its base into the slit.
- Secure the pop-up with adhesive tabs so it stands upright when the card opens.
- Decorate the interior and exterior with drawings, stickers, or patterned paper for added charm.
Beaded heart wind chimes with tiny jingles

The soft tinkle of beads hitting one another filled the air with a playful song when a breeze passed. Glass beads caught sunlight and threw tiny specks of color around the space, while metal hoops added a faint metallic ring that complemented the chiming.
Each heart dangling from the frame moved with a gentle rhythm and showed off layered textures of beads, feathers, and painted wood. The overall sound was light and whimsical, and the visual movement gave the porch or window sill a lively, handmade presence that invited repeated listening and quiet smiles.
Steps
- Thread colorful beads and small charms onto lengths of string, knotting at intervals to create decorative strands.
- Attach the beaded strands to a circular base such as an embroidery hoop or sturdy branch.
- Add small heart-shaped charms or wooden hearts along the strands for visual anchors.
- Hang the wind chime outdoors where light and breeze can set it gently in motion.
Sensory rice bins with hidden heart surprises
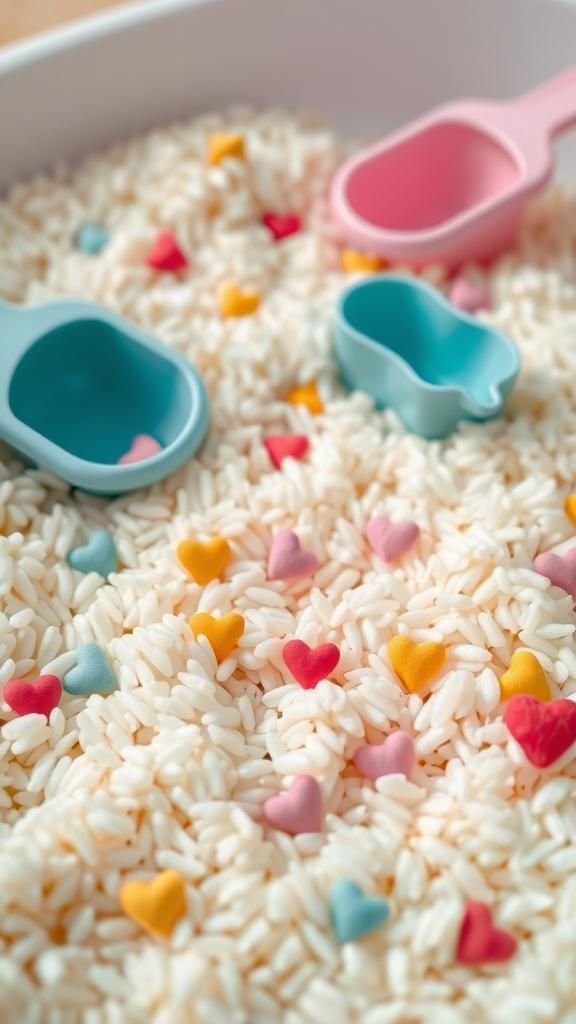
The rice moved with a soft susurration as hands sifted through it, revealing tiny heart shapes tucked inside. Colors were muted and warm, and the tactile contrast between smooth rice grains and the solid hearts created a pleasing exploration.
Little scoops and cups left faint trails in the rice that filled back in, offering a satisfying, almost meditative rhythm. Children delighted in hunting for the hidden hearts and trading them like small treasures.
The bin smelled faintly of rice and a hint of playdough scent from nearby activities, forming a safe, engrossing corner of sensory play.
Steps
- Fill a shallow bin with colored or plain rice as a base for tactile exploration.
- Bury small heart-shaped objects such as foam hearts, wooden hearts, or plastic tokens within the rice.
- Provide scoops, cups, and small sifters for searching and sorting the hidden hearts.
- Rotate the hidden items occasionally to refresh the sensory experience.
Glow jars with heart silhouettes for soft night light

The jar glowed with a gentle, warm luminescence that felt soothing in a dim room. The heart silhouette at the center cast a soft shadow that lengthened and shortened depending on the jar’s placement.
There was a faint, comforting hum from the tiny LED source and a smooth glass coolness to the touch. The glow felt friendly rather than bright, and the jar made a small pocket of calm when bedtime stories began.
Positioning the jars on a bedside shelf created a cluster of soft stars that seemed to watch over sleepy heads.
Steps
- Place a small battery-operated LED light or glow stick inside a clean glass jar to serve as the light source.
- Cut a heart shape from opaque paper or adhesive vinyl and affix it to the inside or outside of the jar to create a silhouette.
- Add decorative elements around the jar such as tissue paper or translucent paint to diffuse the glow.
- Close the jar with a lid and set it on a bedside table for a subtle night light.
Vellum heart lanterns that glow through paper
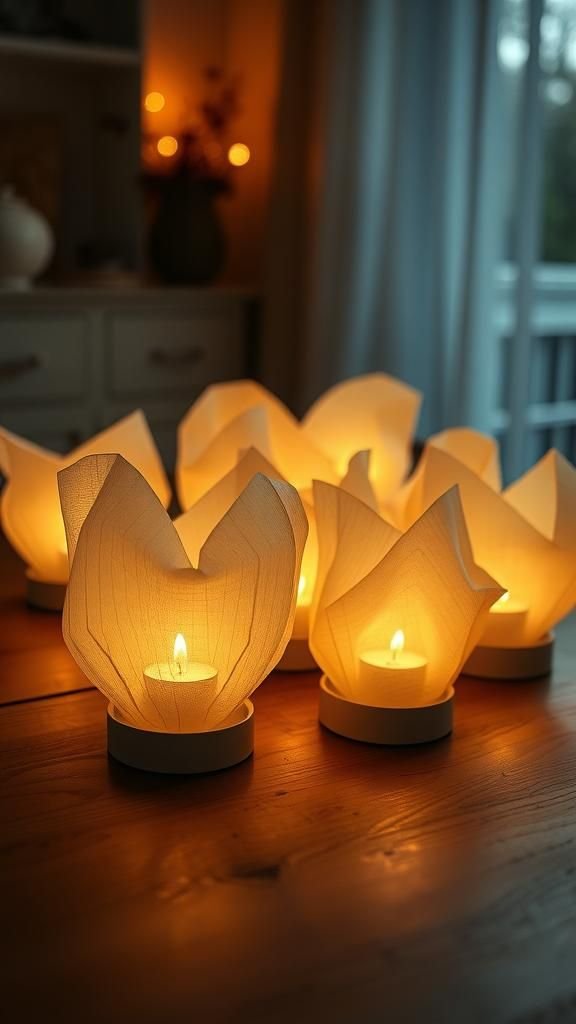
The translucent vellum diffused candlelight into an amber wash that felt calm and intimate. Heart cutouts cast soft, rounded shadows that moved subtly with any air currents, lending the lanterns a quiet sense of life.
The edges showed the slight tooth of hand-cut paper and the glow emphasized delicate fibers in the vellum. Arranged down a hallway or clustered on a table, the lanterns produced a gentle procession of warm light.
Their fragile look invited careful handling, and the soft luminance seemed to slow conversations into quieter tones.
Steps
- Cut heart shapes from vellum or translucent paper and decorate the sheets with markers or stamps if desired.
- Form a cylinder by joining the vellum edges and secure the seam to create a lantern body.
- Place a battery-operated tealight inside the cylinder on a safe base to illuminate the heart pattern.
- Arrange multiple lanterns to create a soft glowing display.