I kept a jar of wine corks on my windowsill for years, saving them after laid-back dinners. They felt warm to the touch and oddly comforting.
One afternoon I began turning that jar into tiny projects, and DIY Wine Cork Crafts became a pleasant habit.
Making small objects from cork brings a quiet satisfaction: the gentle give beneath fingers, the soft woody aroma, the patchwork of colors. These simple ideas for DIY Wine Cork Crafts grew out of slow afternoons and a cupboard full of corks.
Cork coaster mosaic with warm neutral palette

I love how a handful of wine corks can create a honeycomb of small, sun-warmed tones on a coffee table. The rounded discs offer a soft, slightly springy surface under a mug, while faint wine stains and tiny grain lines tell short stories about different evenings.
When grouped together the coasters read like miniature landscapes, each slice carrying a different brown, tan or cream. Running a thumb across the finished surface reveals tiny ridges and a cozy, handcrafted look that invites lingering conversation.
Steps
- Slice corks into even discs and sort by tone.
- Lay discs onto a round backing in a tight honeycomb layout.
- Secure discs by pressing a liquid adhesive across the underside.
- Trim any overhang and allow the adhesive to cure fully before gentle handling.
Oversized trivet made from concentric cork rings
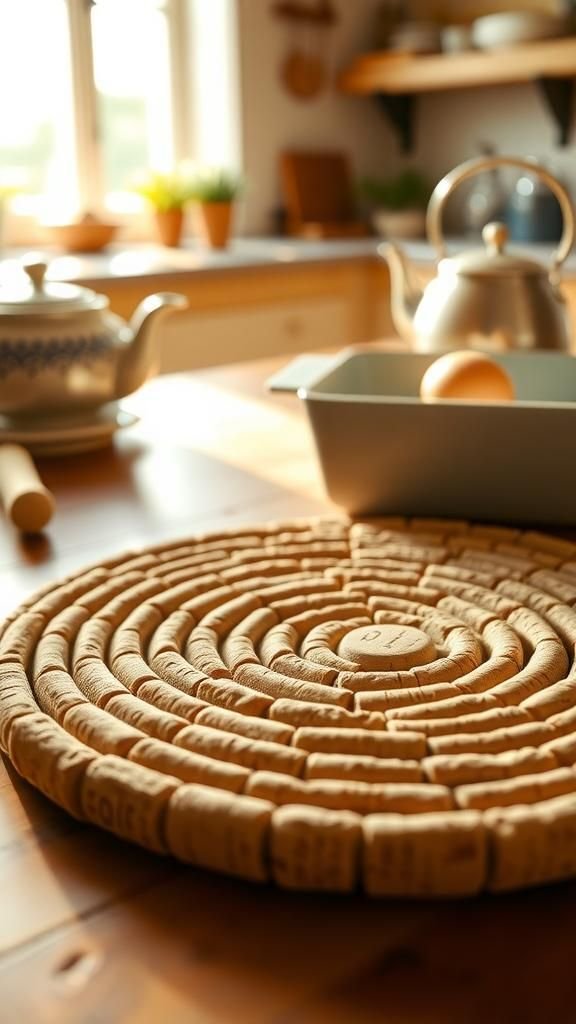
There is a peaceful rhythm when cork rounds spread outward in concentric circles, each ring echoing the last like ripples in a quiet pond. The surface feels pleasantly cushioned under a heavy casserole dish, and the muted palette of beige and honey brings subtle warmth to a kitchen counter.
My memories of slow weekend dinners mingle with the scent that clings to corks, a soft oak whisper that suggests long evenings. The finished trivet looks like a simple mandala, quietly practical and slightly rustic.
Steps
- Cut corks lengthwise to create long strips and shape into rings.
- Arrange rings concentric from smallest to largest on a heat-resistant backing.
- Adhere rings with a high-temperature adhesive and allow to dry.
- Optionally add a thin heatproof backing for extra insulation.
Framed cork bulletin board with character

A framed block of cork has a relaxed, lived-in personality when populated with old postcards, faded tickets and a few handwritten notes. The small dimples from tacks and the scatter of tiny stains read like a map of past days, and the scent of cork sits somewhere between paper and old cellar.
I enjoy the way pins sink a little and then spring back, the soft resistance beneath fingertips. The frame, whether painted a muted hue or left raw, gives the whole piece a tidy edge against the wall.
Steps
- Fit a sheet of cork into a wooden picture frame, trimming to size if needed.
- Secure the cork inside the frame using staples or brad nails at the back.
- Add a hanging wire or bracket to the frame and check alignment.
- Pin photos, notes, and postcards for an instantly personalized display.
Personalized cork keychains with stamped initials
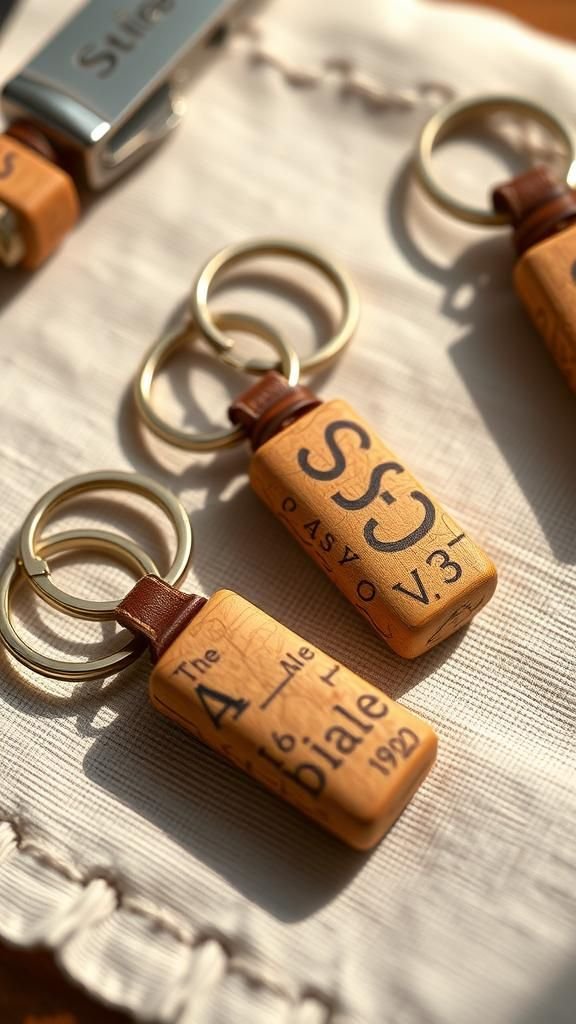
Cork keychains feel unexpectedly soothing in a pocket: they are soft, notably light, and they pick up a little of one’s life in tiny scuffs. Hand-stamped initials on a flat cork slice give each piece identity, and the contrast between dark ink and pale cork looks quietly elegant.
I keep one tucked beside my keys and it rattles with a mellow sound against metal. The leather loop or a brass ring adds a hint of shine while the cork itself remains warm and tactile against fingertips.
Steps
- Slice cork into flat oval or round tags and smooth edges lightly.
- Stamp initials or simple designs using an ink pad and firm pressure.
- Punch a small hole near the top of each tag and add a split ring.
- Attach a short leather or fabric loop to finish the keychain.
Petite cork plant markers for potted herbs

Tiny cork plant markers tuck quietly into a pot and bring a gentle charm to a windowsill garden. The surface picks up a little soil dust and the ends darken slightly from damp, making each marker feel lived-in.
Lettering in black ink or a soft indigo gives a handwritten, informal line that blends with green leaves. I keep a few in mason jars between plants, and they seem to catch the light differently through each leaf, adding a small human touch to a scattering of new growth.
Steps
- Slice corks lengthwise to create flat surfaces for writing.
- Write plant names on the flat side with a waterproof fine-tip marker.
- Insert a thin wooden skewer or wire into the rounded back to form a stake.
- Place markers gently into soil beside each herb.
Seasonal cork wreath with layered textures

A cork wreath feels quietly festive without shouting. Rings and stubs nestle into a soft, neutral ring with small accents like dried orange slices, twine loops, or tiny wooden beads adding contrast.
The smell is faintly woody, and the round silhouette casts calm shadows on a front door. I recall the slow, soothing way I arranged each piece while holiday music played low in the background.
Hung against a painted door the wreath reads as welcoming and handcrafted, a modest signal that the season has shifted.
Steps
- Form a circular base and begin fitting cork ends around it in a dense pattern.
- Fill gaps with smaller cork pieces and decorative accents like dried botanicals.
- Secure pieces with a strong adhesive and allow the wreath to cure flat.
- Add a hanging loop of ribbon or twine and hang on a door.
Cork pendant necklace with rustic twine cord

A tiny cork pendant hangs light against the chest, a quiet token from an evening that lingers. The cork’s warm grain and faint wine stain read as both casual and slightly sentimental, and a thin twine or soft leather cord keeps the mood low-key.
The pendant moves with a hush, the cork’s soft surface contrasting with the cord’s fibrous texture. I remember wearing one to a small gathering and catching glints of lamplight on the necklace while holding a warm cup, feeling oddly comforted by such a small object.
Steps
- Slice a thin cork disc or create a small drilled pendant from a cork stub.
- Thread a cord through the hole and knot securely to form the necklace.
- Add small beads or a metal accent if desired and adjust the length.
- Trim excess cord and tuck knot into a neat position for wear.
Charming wine glass charms crafted from cork

Little cork charms loop around a stem and instantly ease the business of hosting. Each charm has a soft, muted weight and a cozy, handcrafted personality when paired with a small bead or painted dot.
They make glasses easier to tell apart in a quiet, unobtrusive way, and the tactile softness contrasts with the cool glass rim. I enjoy the small ritual of choosing a charm before pouring a glass, the clink of cork against crystal somehow easing conversation into a calmer rhythm.
Steps
- Cut small cork slices and drill tiny holes near the edge of each piece.
- Thread a thin wire or small ring through the hole and add beads.
- Close the ring to form a charm that slips onto a glass stem.
- Optionally seal markings with a clear varnish for longevity.
Textured cork bath mat for barefoot comfort

Stepping onto a mat of glued cork discs feels warm and slightly springy, a small treat after a quick shower. The surface warms beneath the feet and the natural porosity gives a faint sponge-like resilience, while the cluster of tones reads like a calm, earthy mosaic.
I picture slow mornings when a mat like this cushions a quiet stretch, the muted aroma of cork blending with steam. Its handcrafted quality makes the bathroom feel a bit softer, less clinical, like a room that invites small rituals.
Steps
- Cut corks into uniform discs and lay out a mat pattern on a waterproof backing.
- Apply a suitable adhesive to the backing and press cork discs into place.
- Fill any visible gaps and let the assembly cure completely.
- Optionally apply a water-resistant sealant to extend the mat’s life.
Hand-stamped cork gift tags with inked patterns

Gift tags cut from cork bring a gentle, tactile note to wrapped presents. The slight resilience of cork holds impressions from a rubber stamp in a soft way, and dark ink settles into grain lines for a pleasing contrast.
Tags feel reassuringly light to the touch and add texture against kraft or patterned paper. I recall preparing a stack for a small holiday pile, the slow rhythm of stamping one by one turning the task into a calm, almost ceremonial activity that made the pile of parcels feel more personal.
Steps
- Slice cork into rectangles or tag shapes and punch a hole for ribbon.
- Ink a rubber stamp and press firmly onto the cork surface for a clear impression.
- Thread ribbon or twine through the punched hole and tie to a package.
- Optionally add a brief handwritten note with a fine-tip marker.
Cork place card holders for intimate dinners
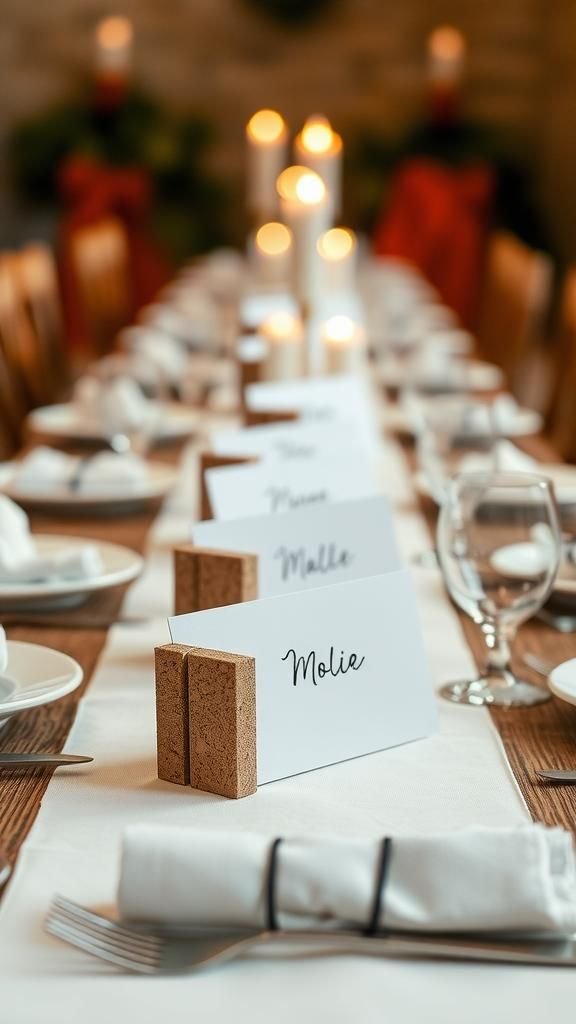
A short row of cork slits holds small cards upright with a charming, casual air. The sawed groove accepts a name card and lends a tactile, handcrafted feel to a table setting.
Cork’s warm tones balance candlelight and ceramic plates, and that tiny bit of height gives each place a moment of focus. I associate these holders with evenings where the table stays set long after dessert, friends lingering as the light dims.
They read as thoughtful but not fussy, a gentle way to mark presence.
Steps
- Slice a shallow slit along the top of each cork for card insertion.
- Stand corks upright and insert small folded cards or name tags into the slits.
- Arrange holders along a table setting in pleasing intervals.
- Replace or refresh cards as guests arrive.
Cork herb labels for neat garden pots

Cork herb labels slip quietly into soil and keep a windowsill tidy. Their lightness means they rarely tip, and the soft texture wears a little soil and sunlight in a friendly way.
Hand-lettered names in dark ink feel warm and domestic, while the modest size leaves room for lush leaves to curl around the markers. I often find myself smiling at the small, informal script and the way a batch of matching labels gives a tiny garden a sense of order without feeling stiff or manufactured.
Steps
- Cut corks lengthwise to create a flat writing surface and smooth edges.
- Write herb names with an archival, waterproof marker.
- Insert a wooden skewer or thin stake into the back of each cork.
- Place the labels into pots beside the matching herbs.
Cork candle holder clusters for cozy tabletops

Clusters of corks arranged around a pillar candle create a soft, rustic ring that filters light into warm speckles. Close to flame, the corks read as sheltering companions, their muted colors absorbing and reflecting amber light.
The tactile mix of smooth and slightly porous surfaces offsets the candle’s glow, and a faint, familiar scent rises when a candle warms the surrounding air. I remember arranging a small cluster for a dinner and noting how the table felt unexpectedly intimate, the little ring of corks framing the flame like a tiny audience.
Steps
- Arrange corks in a circular pattern around a candle on a heat-resistant base.
- Secure corks together at their sides with a strong adhesive, leaving airflow for the candle.
- Test stability before burning and keep a safe clearance from the flame.
- Replace or refresh corks after extended heat exposure.
Brass-accented cork drawer pulls for cabinets
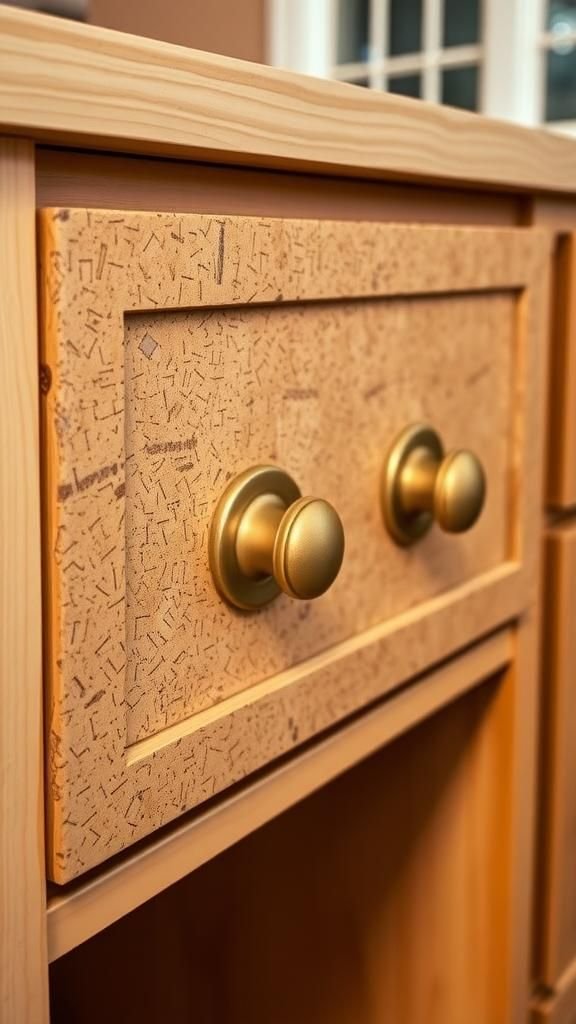
Cork drawer pulls soften a kitchen or desk front with a tactile, warm presence. Paired with small brass caps or washers, the contrast between pale cork and muted metal feels quietly refined.
Grasping a cork pull offers a gentle, yielding touch that reads as comfortable and welcoming, and the slight organic variance in color keeps a cabinet run from looking too uniform. I once swapped a set of knobs for cork pulls and enjoyed the subtle shift in mood—a room that had felt practical took on a softer, handcrafted note.
Steps
- Drill a centered hole in each cork to accept a screw or bolt.
- Thread a screw with a washer through the cork and add a brass cap where desired.
- Mount the cork pulls to drawer fronts with matching screws.
- Check for secure fastening and adjust tightness for smooth operation.
Mini cork planters for tiny succulents
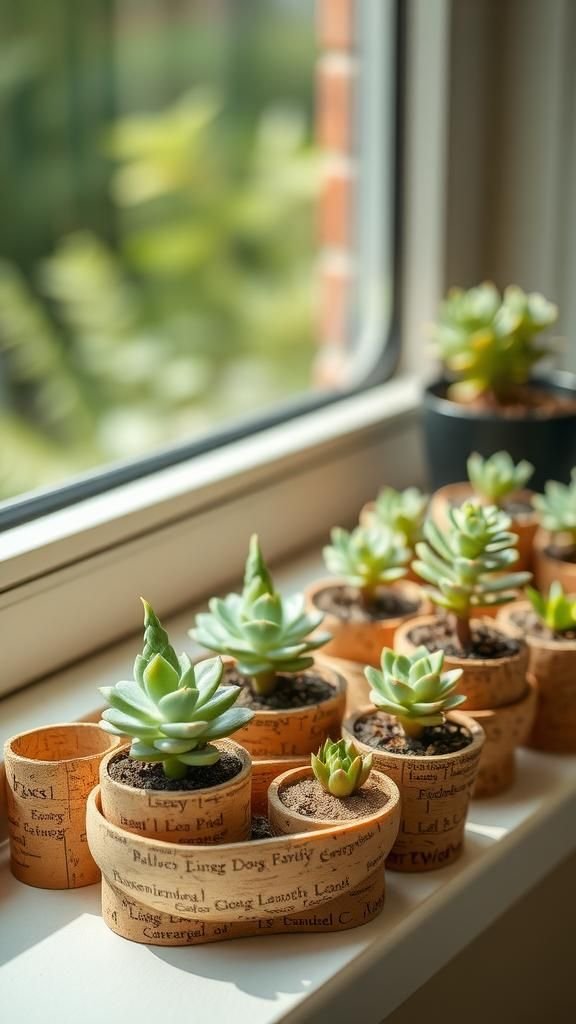
Small cork planters cradle a tiny rosette or a baby succulent with the gentlest footprint. Their porous make gives a subtle breathability and the soft brown tones complement green leaves in a serene, almost miniature landscape.
I like the way a line of these little planters sits along a sill, each one a small, self-contained world. Over time a faint patina can form where soil meets cork, making each pot feel more lived-in, like a tiny companion in an otherwise large room.
Steps
- Hollow out the center of a cork stub with a slender tool to form a small cavity.
- Fill the cavity partially with a tiny amount of well-draining soil or sand.
- Nestle a small succulent cutting into the soil and press gently.
- Place the mini planter on a bright windowsill and water sparingly.
Festive cork ornaments with tiny tassel accents

Cork ornaments hung on a tree read as quietly festive, catching light without glitter. A small tassel or loop of thread gives movement, and the cork’s muted surface plays nicely with twinkling bulbs.
I like ornaments that balance modesty and charm, objects that feel like memories more than displays. Each cork can carry a tiny dab of color or a stamped motif, and when clustered they turn a branch into a little village of warm neutrals and soft shapes that melt into the glow of an evening tree.
Steps
- Drill a small hole at one end of a cork and thread a loop of twine or ribbon.
- Add a decorative tassel, bead, or stamped motif to personalize the ornament.
- Knot the loop securely and trim excess string.
- Hang ornaments spaced along branches for a balanced look.
Geometric cork wall art with honeycomb pattern

A grid of cork hexagons makes a quiet architectural statement on a wall, like a small hive of handcrafted tiles. The slight color shift between corks creates depth, and the matte surface absorbs light in a restful way.
I find it satisfying to stand back and watch the pattern resolve from a few inches away into a calm field of texture. The piece reads as both decorative and approachable, a large-scale object carried by modest materials, offering a tactile surface that invites casual inspection.
Steps
- Cut corks into uniform hexagons or purchase pre-cut cork tiles.
- Lay out the honeycomb pattern on the floor to establish the arrangement.
- Adhere each tile to a rigid backing or directly to the wall in sections.
- Patrol edges for alignment and press firmly during the bonding process.
Cork photo frame border with layered corks

A photo frame lined with cork stubs feels like a slow scrapbook margin, each stub a small cylinder of memory. The layered ends give depth and cast tiny shadows that shift with the light, creating a subtle, moving border around the image.
I often choose a single cherished snapshot and let the frame’s understated texture amplify its intimacy. Cork brings a softness that contrasts with glass and paper, and the whole object reads as thoughtful rather than flashy, like a quiet celebration of a single moment.
Steps
- Arrange cut cork ends tightly around a plain picture frame to form a consistent border.
- Secure each cork with an adhesive suitable for hollow cores and wood surfaces.
- Trim edges for an even outer profile and fill small gaps if needed.
- Clean any surface residue and allow the frame to cure before hanging.
Cork napkin rings for relaxed dinner settings

A small ring of cork wrapped with twine or ribbon transforms a napkin into something tactile and inviting. The soft touch of cork contrasts pleasantly with crisp linen, and a tiny sprig of herb tucked into the loop adds a fragrant note.
I enjoy the economy of this detail: it feels humble but thoughtful, the sort of thing that nudges a meal into a slower rhythm. When plates are cleared and tea arrives the napkin rings still sit like quiet witnesses to an easy evening.
Steps
- Slice corks into thin rings and sand edges smooth if necessary.
- Wrap a decorative ribbon or twine around each ring and secure the ends.
- Slide a folded cloth napkin through the ring for presentation.
- Add a small herb sprig or paper tag for a finishing touch.
Handmade cork stamps for fabric patterns
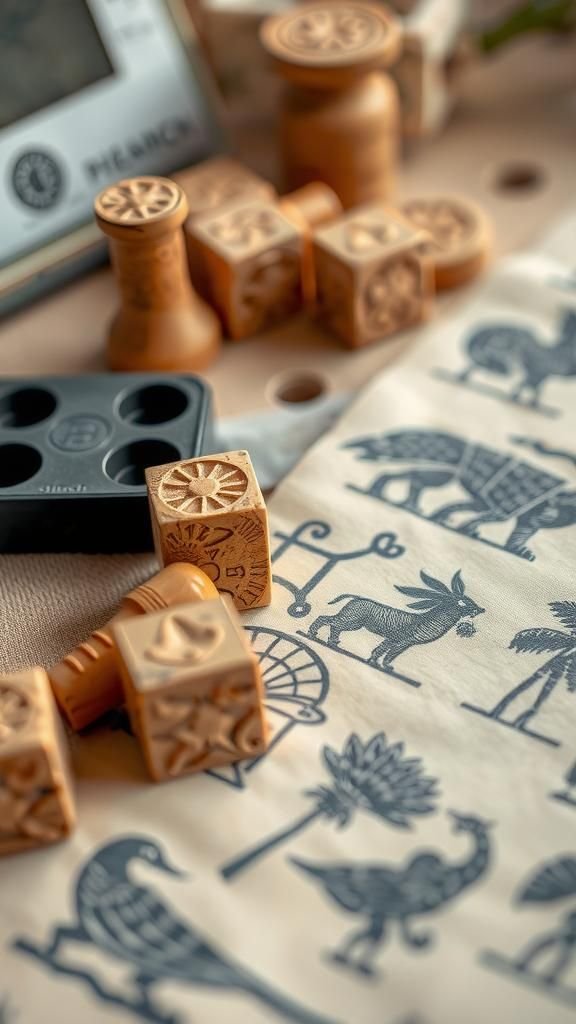
Cork can be transformed into blunt, charming stamps that leave a soft, irregular impression on fabric or paper. The slightly porous surface holds ink in an organic way, creating marks that read as warm and human-made.
I remember testing a small design on scraps, watching the ink settle into cork grain and then transfer with a hint of unevenness that felt intentional. A row of stamped motifs on tea towels or napkins feels homespun in a gentle, unforced way, like a quiet signature across everyday textiles.
Steps
- Cut a cork into a flat surface suitable for carving a simple motif.
- Carve the desired design lightly into the cork to create a raised stamp area.
- Press an ink pad onto the cork stamp and test on scrap fabric.
- Stamp repeating patterns on textiles and allow ink to dry fully.
Cork boat race toys for sunny afternoons

Tiny cork boats bob on a backyard tub or a calm creek with a delightful innocence; they are light, buoyant, and they catch wind in little unexpected ways. A thin mast and a scrap of fabric for a sail give each tiny hull personality, and the soft sound of a cork skimming water is oddly satisfying.
I remember a sunny afternoon when a line of them drifted lazily, each carrying a small painted dot or stripe that made them look like a tiny fleet. They read as playful and simple, an easy pleasure.
Steps
- Hollow out the underside of a cork slightly to improve stability in water.
- Insert a small mast made from a skewer and add a fabric sail.
- Optionally decorate the hull with non-toxic paint or markers.
- Float the boats in a tub or shallow water and watch them drift.