I have a soft spot for small projects that quietly tame the chaos around the house. Over the years I’ve collected a handful of favorite DIY Home Organization Crafts that rescued cluttered drawers, crowded countertops, and the mysterious tangle of cords behind the TV.
Each craft felt like a tiny victory: the satisfying clack of a drawer that finally has dividers, the calm sight of labeled jars lined up on a shelf.
These little projects became part of weekend rituals, with coffee cooling on the table and scraps of fabric or wood scattered like confetti. DIY Home Organization Crafts turned ordinary objects into tiny helpers, and sharing those discoveries always feels like swapping a good recipe with a friend.
Mason jar wall spice rack for tiny kitchens
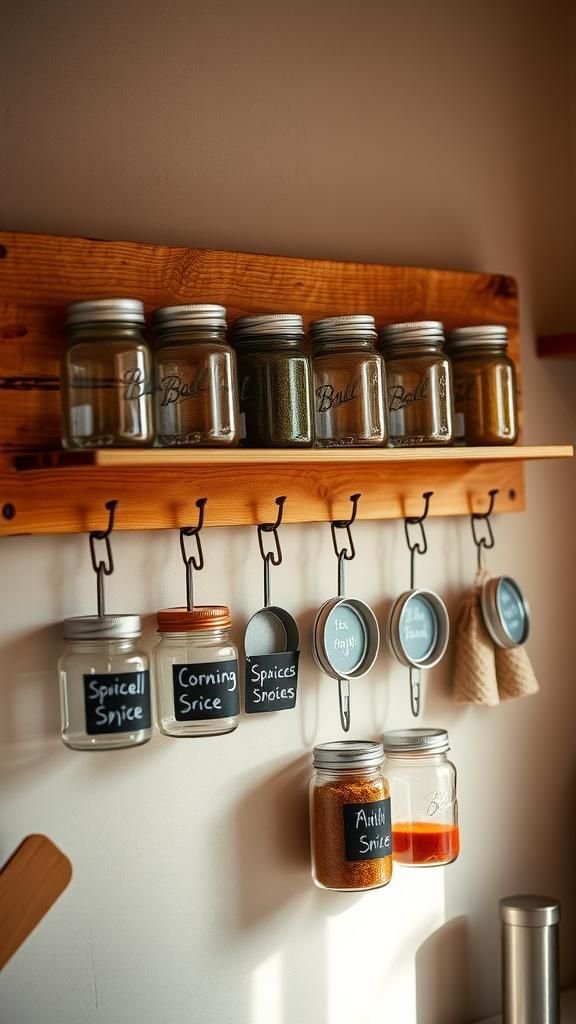
I love how the clink of glass and the scent of oregano brings warmth to a small kitchen. A row of glass jars against reclaimed wood creates rhythm and color, each lid reflecting morning light.
I remember standing back and smiling at the tidy lineup, spices labeled in my handwriting and the chaos of mismatched packets suddenly tamed. The texture of the weathered board paired with smooth jars feels comforting.
It’s the kind of project that turns an overlooked wall into a neat, aromatic display that makes cooking feel lighter.
Steps
- Gather empty mason jars, matching lids, a wooden board, screws, and jar holders designed for vertical mounting.
- Arrange jars across the board to find spacing that allows lids to rest securely and leaves room for labels.
- Secure jar holders to the board at the chosen spacing using screws and a drill, keeping alignment straight.
- Label each jar, fill with spices, and hang the board on a wall with sturdy hooks or anchors.
- Adjust labels and jar positions for balance and easy reach.
Pegboard command center — calm chaos control

There’s something satisfyingly orderly about a pegboard filled with everyday tools and papers. When I set one up near my desk, the room felt instantly more intentional.
Hooks with a soft click, a small clipboard for appointment cards, and a row of colorful pens gave the wall a cheerful personality. The mix of metal, wood, and paper offered contrast that made each item stand out.
On busy mornings I appreciated scanning the board and finding what I needed without digging through drawers. It turned a blank wall into a little organized ecosystem.
Steps
- Choose a pegboard panel size to fit the wall space and gather pegs, hooks, baskets, and small shelves.
- Mount the pegboard to the wall with spacers so hooks can hang freely, ensuring level placement.
- Group items by function, placing writing tools, mail slots, and small baskets in zones that match daily routines.
- Attach labels or a small chalkboard for quick notes and shift pegs until the layout feels balanced.
- Add personal touches like a calendar or small plant to make the space inviting.
Drawer dividers from felt and cardboard
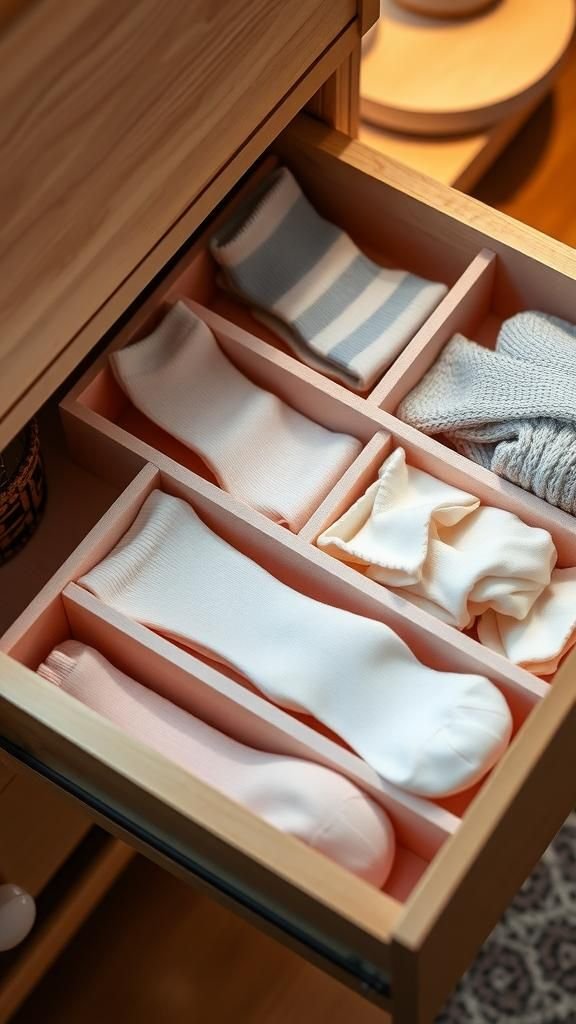
Opening a drawer that presents items in neat compartments brings a small thrill. Felt edges soften the view and keep socks or delicate items cozy.
I liked the quiet contrast between textured felt and the smooth inner drawer, and the muffled sound when things are shifted around. Using cardboard cores gives a lightweight structure that also reduces the heavy clunk of plastic.
The look is pleasantly handmade — imperfect lines and warm fabric — and it transforms drawers into small, calm gardens of folded things where everything has a place and rummaging becomes rare.
Steps
- Measure the drawer interior and plan the divider layout to create compartments for desired items.
- Cut cardboard strips to fit the drawer height and wrap them with felt for a soft finish.
- Slide wrapped strips into position, creating snug channels and adjusting spacing for different item widths.
- Secure ends with low-profile adhesive tabs inside the drawer if extra hold is needed.
- Arrange folded items into each compartment for an orderly visual and gentle tactile experience.
Upcycled wine crate shelving with character
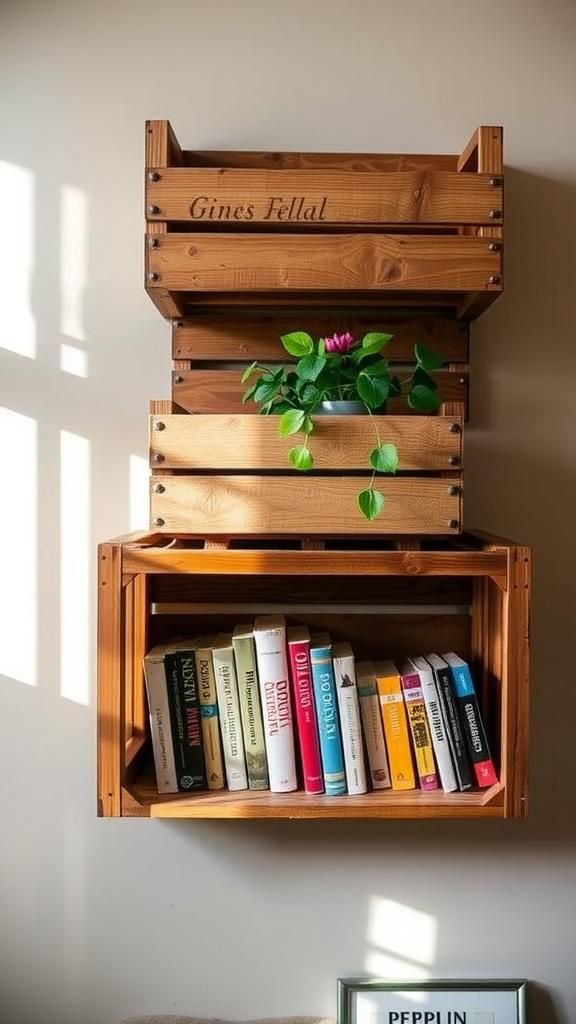
I remember finding a couple of old wine crates on a flea market stroll and imagining shelves full of paperback books and jars. The rough-sawn wood smelled faintly of cedar and history, and when mounted the crates created little cubbies that felt both rustic and refined.
Stacked asymmetrically they made a playful geometry on the wall. Each shelf invited small vignettes: a stack of postcards, a plant with trailing leaves, a glass bottle catching the light.
The wood’s dents and nail holes felt like honest marks that added warmth to a tidy room.
Steps
- Collect clean wine crates and test different stacking arrangements on the floor to find a pleasing composition.
- Secure mounting hardware into the crate backs and ensure anchors are used on drywall for stable support.
- Fasten crates to the wall from the top down, checking level alignment as each crate is attached.
- Style shelves with books, jars, and small plants to balance weight and visual interest.
- Reposition or add crates later to refresh the arrangement.
Cord organizers hidden behind furniture
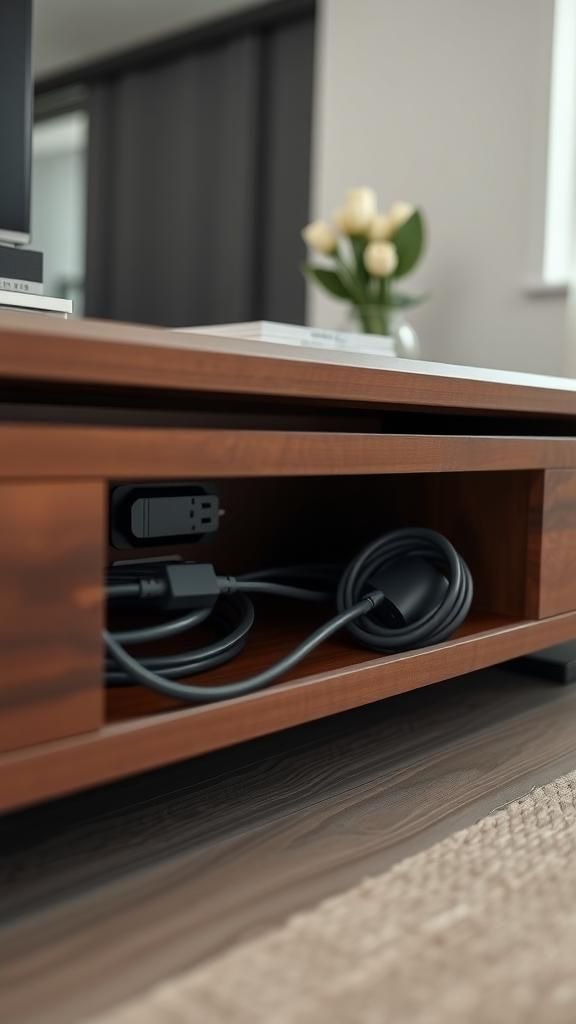
There’s a quiet satisfaction in seeing the back of a TV or a desk without a jungle of cables. I once tucked everything into a shallow box behind the console and the difference felt like clearing the air.
The scent of warm plastic and the soft hush of coiled cords became less intrusive when they were contained. A single opening allowed cables to breathe while keeping the visual field calm.
The scene was tidy, with only purposeful lines running from devices, and the relief of a cleaner silhouette across the room was immediate.
Steps
- Gather a shallow wooden box or cable raceway, adhesive cable clips, velcro ties, and a small power strip.
- Place the power strip inside the box and route device cables through a single tidy opening at the back.
- Secure cables to the box interior with adhesive clips and bundle excess with velcro ties for neat coils.
- Position the box behind furniture, allowing airflow and easy access to plugs.
- Label cable ends for easy identification when devices are unplugged.
Chalkboard pantry labels that feel homey
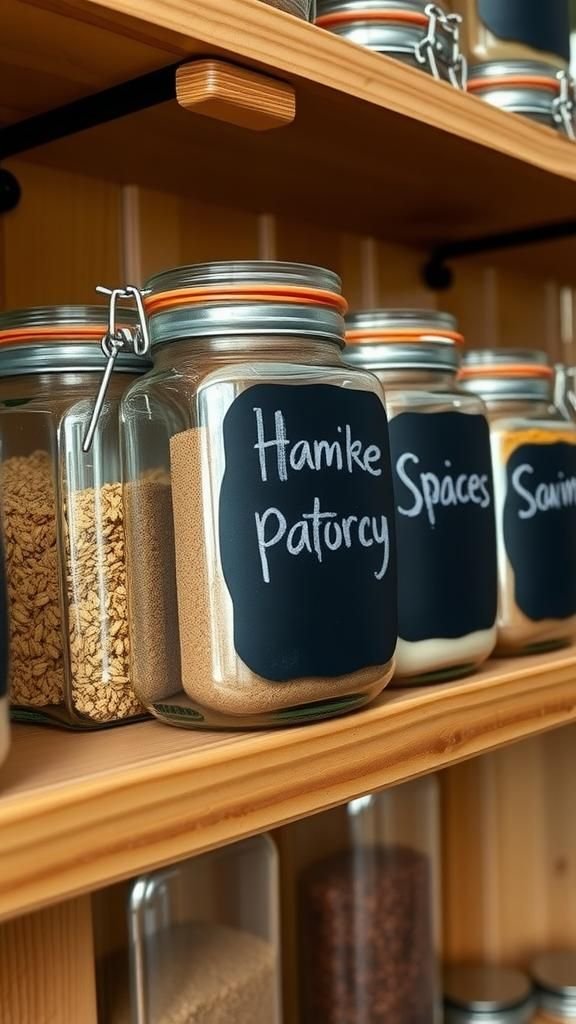
There is a small pleasure in seeing messy jars suddenly dressed in handwritten chalk. The matte black surface atop the glass refracts light differently and makes the jars feel deliberate.
I enjoyed the tiny flourishes in my handwriting; smudged letters would be wiped clean and rewritten like little reminders. The tactile feel of chalk across the label and the faint dusty residue when the lid turned were oddly comforting.
Labels brought order without erasing personality, so cooking felt like reading a friendly list on a board that anchored the pantry.
Steps
- Choose jars for pantry staples and clean lids or surfaces to ensure labels adhere smoothly.
- Cut chalkboard label material to size and attach to jars or lids, smoothing out any air pockets.
- Write contents on each label with chalk or a chalk marker and gently wipe for a vintage look.
- Place jars in the pantry grouped by use and refresh handwriting when needed.
- Swap labels quickly as pantry contents change.
Magnetic strips for tiny metal tools
A thin magnetic strip mounted near the workbench turned a cluttered drawer into a neat display. The click as small metal tools snapped into place felt almost musical.
Tools lined up horizontally created a visual rhythm, and the contrast between shiny metal and a painted wall added clarity. I appreciated reaching for a small screwdriver that was visible and held firmly instead of fishing through a box.
The space gained a purposed look, like a small workshop corner that was both practical and pleasing to the eye.
Steps
- Select a strong magnetic strip of the right length for the wall area and choose tools to display.
- Mount the magnetic strip securely to the wall at a comfortable working height using screws or anchors.
- Arrange metal tools along the strip, spacing them for easy reach and visual balance.
- Keep heavier tools near support points and lighter items toward the center for safety.
- Periodically check the strip’s attachment to the wall for continued stability.
Hanging shoe organizer repurposed for supplies
I once draped a fabric shoe organizer over the back of a closet door and found pockets full of art supplies, scissors, and curling ribbons. Each pocket became a tiny treasure chest with textures and colors peeking through mesh.
The soft sway when the door opened felt playful, and the lightweight fabric muffled clattering sounds. This vertical solution turned unused door space into an orderly patchwork, where small items lived in their own little homes.
It made finding glue sticks or ribbon ends a quick, almost joyful routine instead of a scavenger hunt.
Steps
- Choose a hanging shoe organizer with pockets suitable for craft tools and fit it over a door or on a wall hook.
- Group items by use and slide them into pockets, placing frequently used supplies within easy reach.
- Reinforce heavier pockets with small cardboard inserts if needed to keep shape.
- Rotate and tidy pockets weekly to prevent overfilling and maintain visibility.
- Label pocket rows with small tags for fast identification.
Magnetic spice tins that float on the fridge?
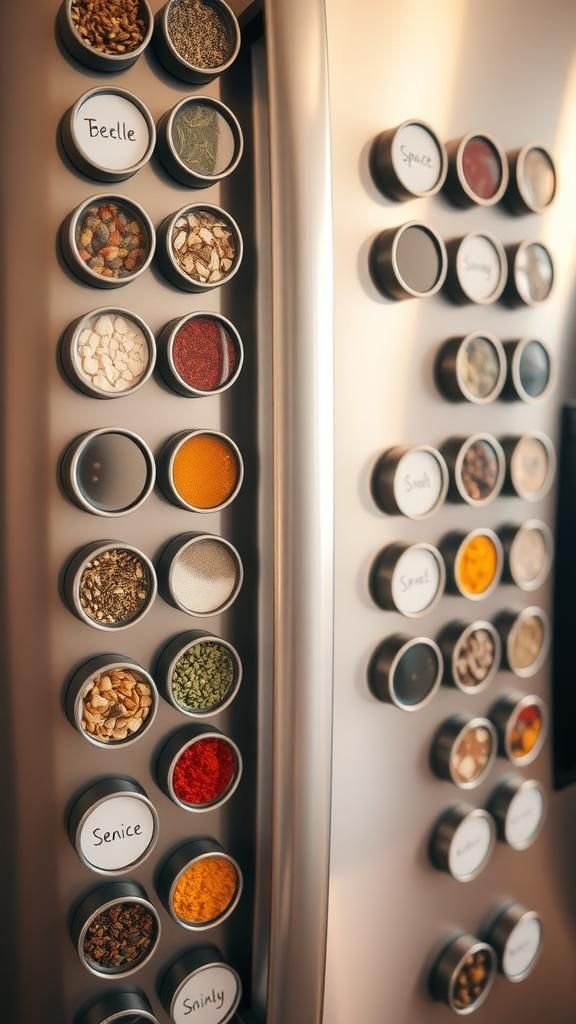
Seeing tiny metal tins arranged like a constellation on the fridge brought a playful order to my culinary corner. The tins’ metallic sheen caught kitchen light and the pop of colorful lids added cheer.
Each time I reached for a spice it was visible and accessible without opening a cupboard. The magnets held the tins flush to the surface, creating a neat mosaic that made the fridge feel more like a tool board than a random appliance.
I liked how the arrangement invited small experiments with placement, swapping tins like tiny ornaments.
Steps
- Purchase small magnetic spice tins and labels that match the kitchen aesthetic.
- Attach magnet-backed tins to a fridge or magnetic board in a pattern that suits available space.
- Fill tins with spices and affix readable labels to the lid or side.
- Rearrange tins as desired to keep frequently used spices within easy reach.
- Clean the magnets and tins periodically to maintain a tidy appearance.
Clipboard wall for rotating lists and art

A wall lined with clipboards became a living gallery in my house. Each clipboard held a rotating collection of grocery lists, kids’ drawings, or bills awaiting attention.
The crisp clip sound when a new sheet was added felt like turning a page in a living book. The wooden boards introduced warmth against a painted wall, and switching out papers was a quiet ritual that kept things current without visual clutter.
This setup made paper visible but not chaotic, offering a tidy way to honor small things that needed attention while keeping them stylishly on display.
Steps
- Gather clipboards in matching or complementary finishes and plan a grid or staggered layout on the chosen wall.
- Mount each clipboard using small screws or picture hooks, ensuring consistent spacing between boards.
- Place everyday lists, calendars, artwork, or receipts on the clipboards for easy swapping.
- Update the contents regularly to reflect current needs and remove outdated papers.
- Add a small pen holder nearby to keep writing tools accessible.
Upcycled tin can herb planters on a window ledge
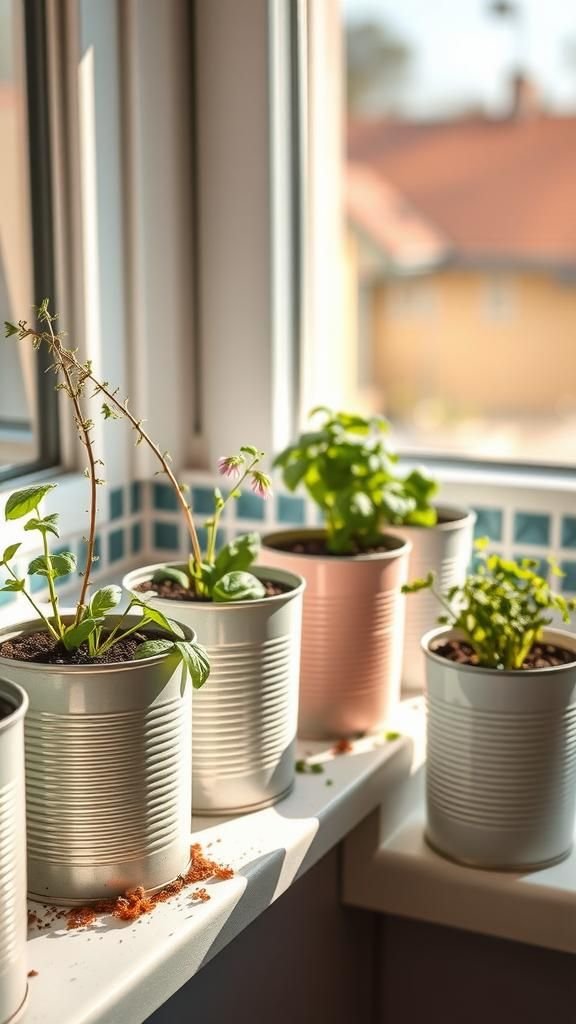
Cleaned tin cans lined up on a sunny sill brought a kitchen garden into easy reach. The soft clink of metal, the fresh scent when soil was disturbed, and tiny green shoots poking through made mornings feel revived.
I liked painting a few cans with chalky hues for personality and leaving a few raw for contrast. The ledge became a miniature landscape with herbs swaying slightly in a breeze.
Snipping a sprig for dinner felt casual and immediate, and the row of cans lent a humble, lived-in charm to the windowsill.
Steps
- Clean tin cans and create drainage by adding small holes in the bottom if necessary.
- Fill cans with potting mix and plant culinary herb seedlings, spacing for healthy growth.
- Place the cans on a sunny window ledge and water lightly until established.
- Rotate cans occasionally for even sunlight and trim herbs to encourage bushier growth.
- Label each can with small tags for quick identification.
Clear jar bathroom storage that feels spa-like
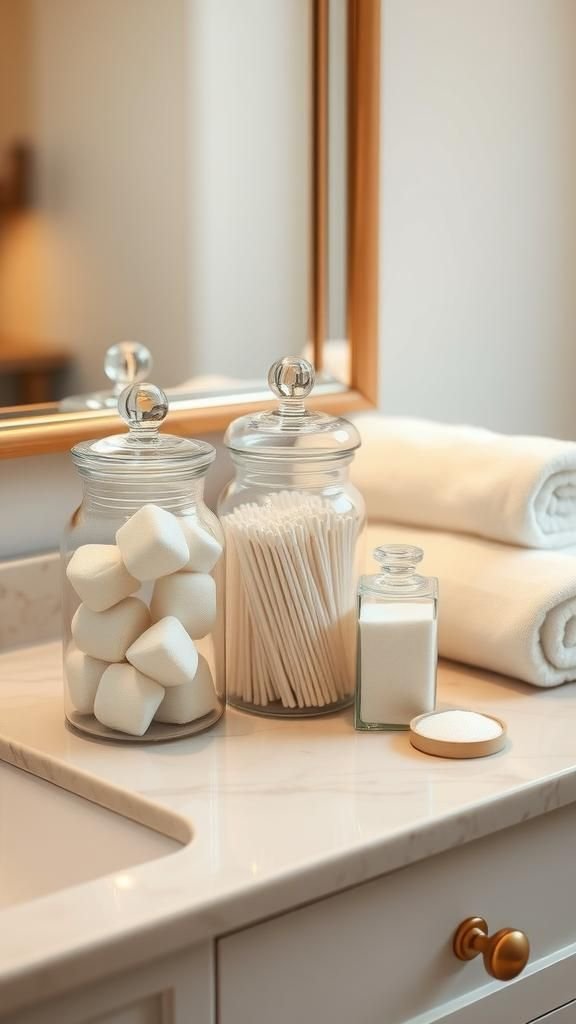
A trio of clear jars on the vanity turned everyday toiletries into a calm display. Cotton pads sat like puffy white pebbles, while bath salts glittered faintly under the bathroom light.
The glass reflected warm bulbs and added elegance to small routines. I liked how each jar’s lid gave a satisfying seal and the visual cue of fullness kept me from overbuying.
The scene felt curated: a little cluster that made a rushed morning feel more measured. The jars’ cool smoothness contrasted with soft towels nearby, creating a pleasant tactile tableau.
Steps
- Select clear glass jars with tight-fitting lids and clean them thoroughly before use.
- Group items like cotton pads, q-tips, and bath salts by size and fill the jars neatly.
- Place jars on a vanity tray to keep surfaces dry and corral loose items.
- Refresh contents as needed and wipe glass to maintain clarity.
- Rearrange jars seasonally for a fresh visual touch.
Magazine holders turned into vertical file towers
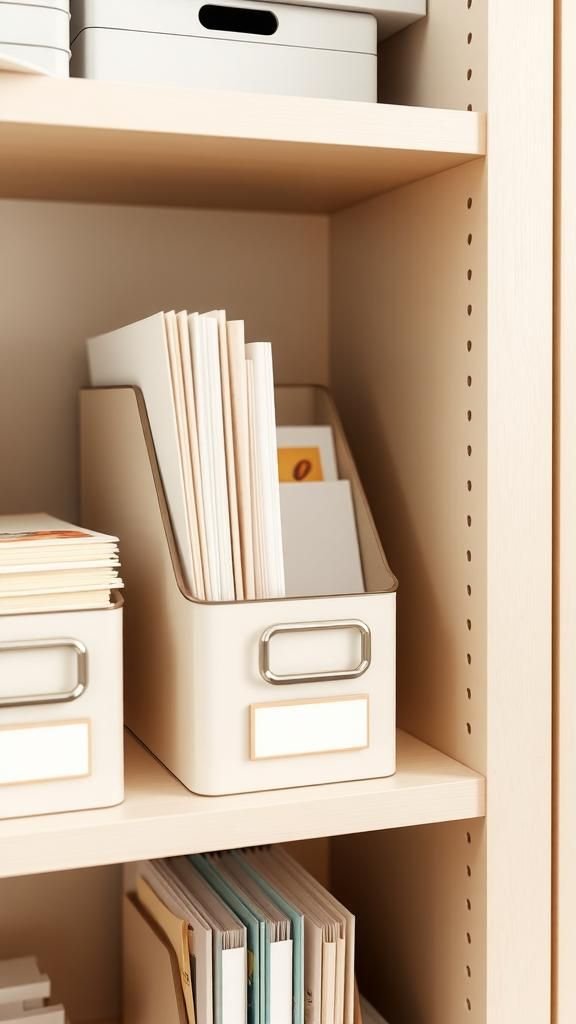
Cardboard magazine holders lined up on a shelf turned paperwork into a tidy parade. Each holder had a little label and a different texture, from smooth white to kraft brown.
Sliding a folder into its own tower felt like tucking a book into a favorite shelf. The vertical arrangement made reference material visible and easy to flip through, and the soft paper edges against fingertips had a reassuring tactile quality.
Clutter that had once pooled at the bottom of a desk became ordered columns, making the workspace breathe a little easier in the middle of busy days.
Steps
- Collect magazine holders in matching sizes and label each with categories for bills, manuals, and receipts.
- Arrange holders on a shelf at arm’s reach from the workspace for quick filing.
- Slide documents upright into the appropriate holder, keeping similar materials together.
- Periodically sort through the towers to archive or recycle old papers.
- Adjust labels or add dividers if categories change.
Corkboard jar lids make tiny pinboards
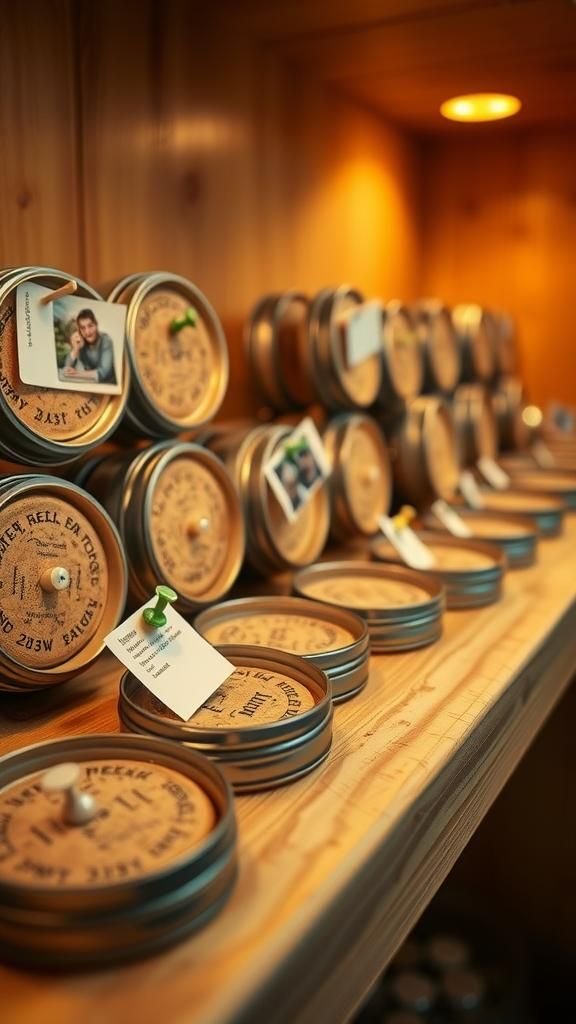
I once discovered the delight of cork discs glued to metal lids, turning empties into tiny pinboards for notes and small photos. The rough warmth of cork contrasted with smooth metal and held a single thumbtack with ease.
A cluster of these lids on a shelf became a playful collection of reminders and paper keepsakes that looked like small medals. They carried the faint scent of cork and left a quiet, tactile way to display thoughts.
The little boards honored small moments without overwhelming wall space, like snapshots inside a tidy frame.
Steps
- Gather metal jar lids and cork discs sized to fit comfortably within each lid.
- Affix cork to the inside of the lid using strong craft adhesive and press until set.
- Once dry, use thumbtacks to pin small notes, photos, or receipts to each lid.
- Arrange lids on a shelf or mount them on a board for a grouped display.
- Replace pins and swap contents as reminders change.
Floating shelf with hidden charging station

A slim floating shelf with a shallow compartment below became my favorite bedside helper. The soft whirr of charging phones felt less intrusive when devices were slipped behind a neat face.
The shelf kept glowing screens out of sight, while a small notch allowed cords to pass like quiet whispers. I liked the clean line across the wall and how the top surface could hold a lamp and a cup, leaving the lower space tidy.
The whole setup made winding down feel steadier, with devices tucked away but ready at a gentle reach.
Steps
- Choose a floating shelf with a hollow compartment or modify one by adding a shallow box beneath the top surface.
- Drill a small notch or opening at the back for charging cables to pass through safely.
- Place a power strip inside the compartment and route device cords through the notch to the top surface.
- Arrange devices inside the compartment while keeping ventilation for chargers.
- Top the shelf with a lamp or small decor to blend the unit into the room.
Washi tape cable labels with personality
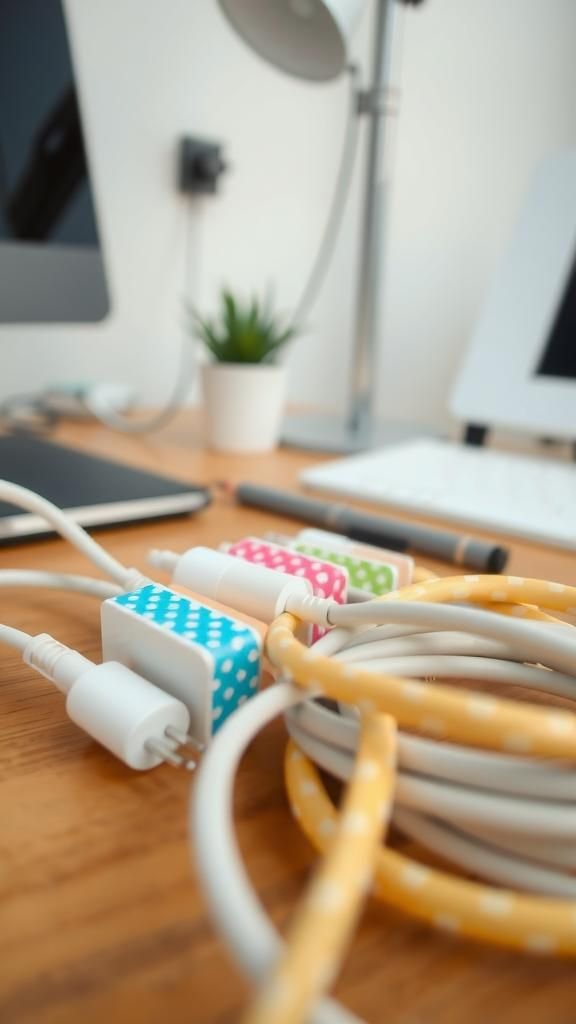
Colorful washi tape wrapped around cord ends turned identification from a chore into a playful act. Each tape’s pattern added a little personality so chargers could be recognized at a glance.
The tape’s slight texture felt nice between fingers when unplugging devices, and swapping patterns became an easy way to freshen cords. I appreciated how the small bands prevented accidental unplugging of the wrong cable during morning rush.
The cords looked friendlier too, like tiny ribbons on a bunch of electronics, and the visual cue made the tangle easier to navigate.
Steps
- Collect rolls of washi tape with distinct colors or patterns for each device type.
- Cut small lengths and wrap them near the plug ends of cords, pressing smoothly to adhere.
- Create a simple key chart or hang a labeled sample near charging stations for quick reference.
- Replace tape if it peels or when updating device assignments.
- Keep a small roll nearby for new cords and ad hoc labeling.
Painted pegboard trays for desk odds and ends
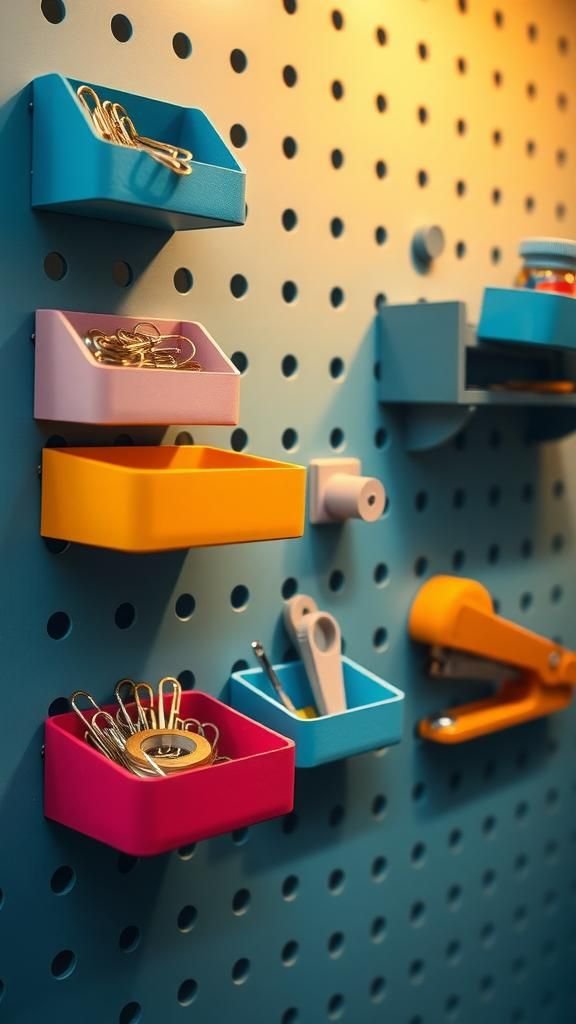
Small trays clipped to pegboard changed loose desk items into curated pockets. The painted trays popped against the board and the matte finish felt soothing under fingertips.
I liked the way different tray depths created a small topography: shallow dishes held paper clips while deeper trays cradled a stapler. The color choices made each zone feel intentional, and reaching for a tool became an easier, almost automatic motion.
Sounds were softened too, with little clinks landing in trays instead of tumbling across a desk. The whole wall felt like a tidy, joyful map of daily tasks.
Steps
- Paint small metal or wooden trays in coordinating colors and allow them to dry fully.
- Attach tray hooks to a pegboard and hang trays in an arrangement that groups similar items together.
- Place desk odds and ends into appropriate trays, keeping frequently used pieces within easy reach.
- Repaint or rearrange trays to refresh the look when desired.
- Clean trays occasionally to keep surfaces neat.
Ribbon and twine organizer from a towel bar
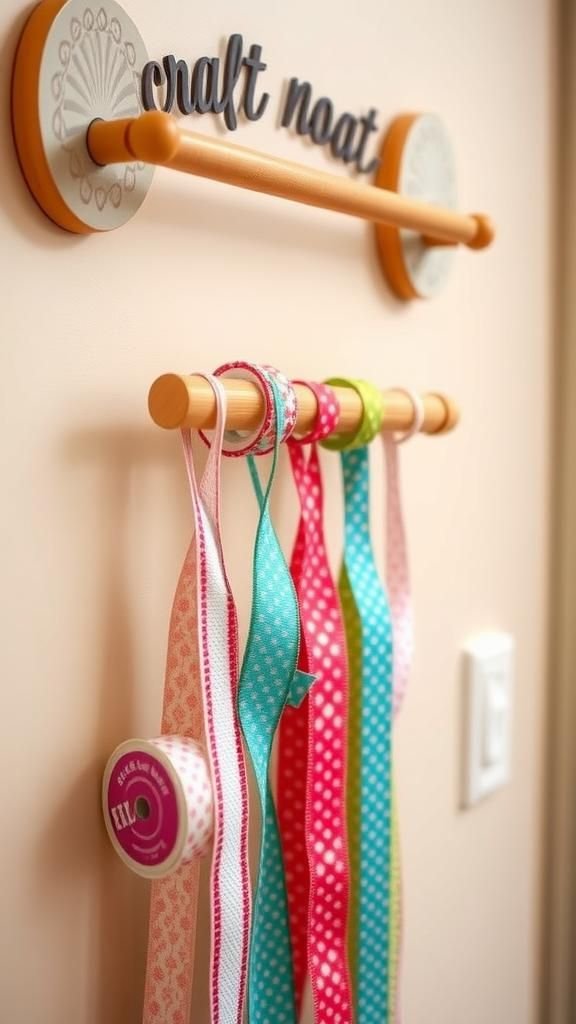
A simple towel bar turned into a ribbon display made wrapping gifts feel almost ceremonial. Rolls of ribbon lined up like tiny flags, showing edges of color and pattern.
The soft rustle when a ribbon was unwound was comforting, and the tidy row eliminated the usual scramble through a tangled pile. Wooden dowels added a pleasant, warm touch, and the sight of the bar full of color brightened a corner.
It became easy to match ribbon to wrapping paper and the whole process felt more like a hobby than a last-minute chore.
Steps
- Install a towel bar or wooden dowel horizontally on a wall or inside a closet at a comfortable height.
- Slide ribbon spools onto dowels, spacing them to allow free rotation when pulled.
- Add small end caps or brackets to keep spools from sliding off.
- Group ribbons by color or pattern for quick selection and rotate stock as used.
- Keep scissors nearby for convenient cutting.
Built-in shoe cubbies under the bench

A bench with cubbies underneath accepted shoes like a patient host. Slipping sneakers into their own little alcoves removed the morning scramble and kept the entryway floor breathing.
The cool wood underfoot and the soft echo of shoes sliding into place added a gentle rhythm to daily exits. I enjoyed the sight of matched pairs peeking out from their compartments and the ease of sweeping the floor without obstacles.
The bench top doubled as a seat for tying laces, making the whole area feel thoughtful and ready for the day.
Steps
- Choose a bench with an open base or modify an existing bench to create cubby spaces beneath the seating surface.
- Measure compartments to accommodate typical shoe sizes and reinforce dividers as needed.
- Sand and finish cubby edges for smoothness and install non-slip pads on the bottom.
- Place shoes neatly into each cubby and adjust spacing for larger footwear if necessary.
- Keep the top of the bench clear for seating and occasional storage baskets.
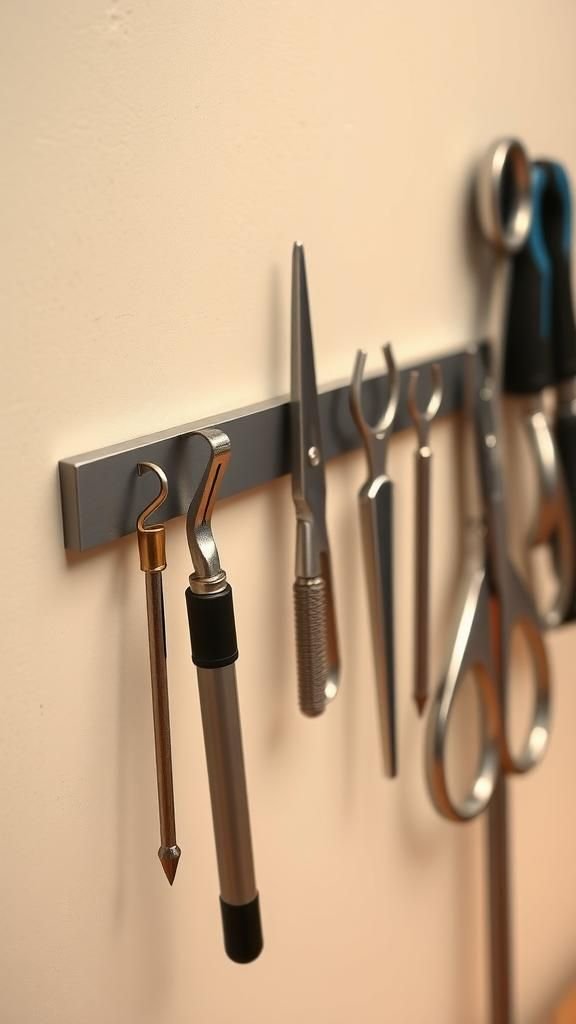
Magnetic knife strip for craft scissors and tools
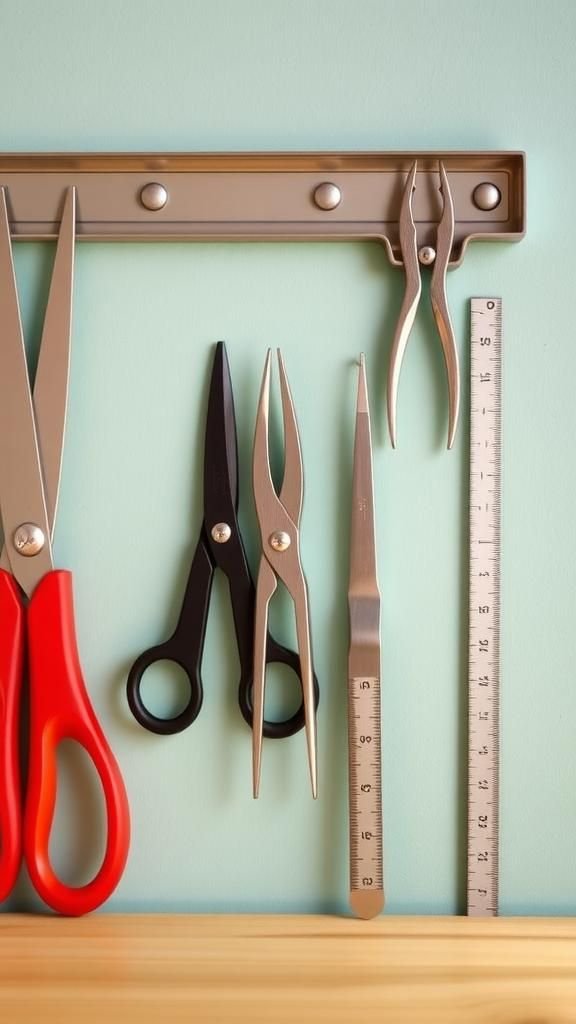
Replacing a cluttered drawer with a magnetic knife strip brought tools into view and into easy reach. Scissors, tweezers, and a small ruler lined up like a tidy chorus.
The metallic glint against a painted wall created a clean silhouette and the slight magnet hum felt oddly reassuring. I liked the way tools were displayed with pride rather than hidden away, and the morning task of finding scissors became an instant memory.
The arrangement encouraged care because each tool had its spot; returning them felt natural and made the workspace look calm.
Steps
- Select a strong magnetic knife strip suitable for holding scissors, metal rulers, and other small tools.
- Mount the strip at a comfortable working height using appropriate wall anchors and screws.
- Arrange tools on the strip with handles facing out for quick access and balance heavier items with lighter ones.
- Keep sharp tools at a safe distance from high-traffic areas and check magnet strength periodically.
- Wipe the strip and tools to remove dust and maintain a clean display.
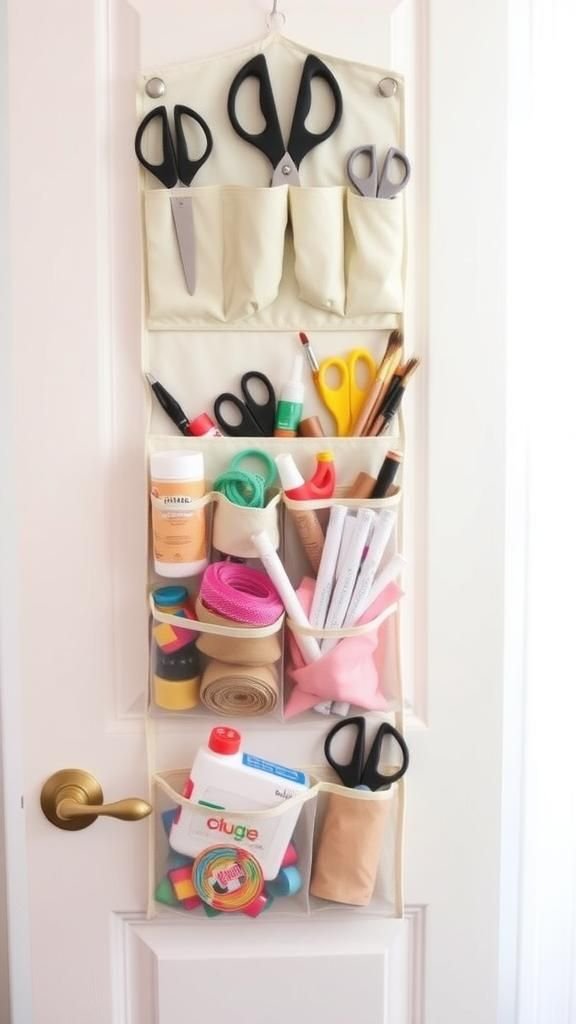
Clear pocket shoe rack for art supply sorting

Replacing drawer chaos with clear pockets made an instant difference for small supplies. The see-through pockets showed everything at a glance, from washi tapes to bundles of embroidery floss, and the soft plastic shimmer under light added a playful texture.
I appreciated being able to reach for a color and feel the pocket’s flexible give. The rack’s vertical presence took up little space while offering generous storage.
Over time it became a habit to return bits to their pockets, and the once-scattered supplies developed a neat, almost museum-like order in a corner of the studio.
Steps
- Hang a clear pocket shoe rack on a door or wall in the craft area using sturdy hooks.
- Sort small art supplies into pockets by type or color for easy visual access.
- Avoid overfilling pockets to keep items visible and reachable.
- Reorganize pockets seasonally or when supplies are replenished to maintain clarity.
- Clean the pockets occasionally to remove dust and keep transparency.