I still remember the first time I made a paper cherry blossom and felt unexpectedly moved by how fragile layers of paper could feel so alive. My kitchen table turned into a little spring laboratory, with pink bits scattered like confetti and a mug of tea growing lukewarm while I fiddled with tiny petals.
DIY Cherry Blossom Paper Crafts became my go-to calm project on slow afternoons.
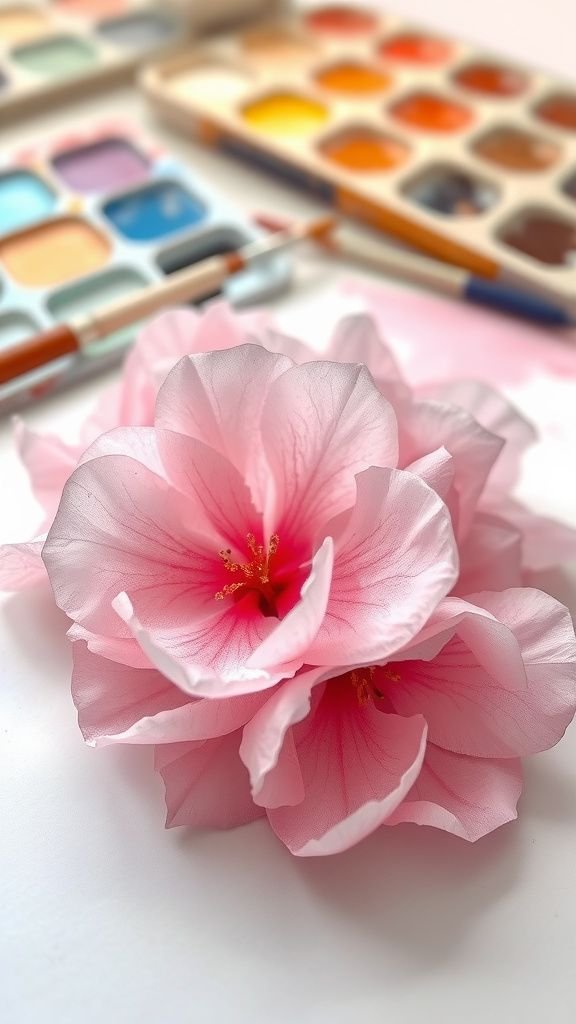
Trying a handful of styles revealed how different papers and textures changed the mood from wistful and translucent to bold and sculptural without needing much space.
Delicate tissue paper cherry blossoms on twigs

Tissue paper petals always bring a light, ethereal quality that made me smile the moment I unfolded one. The thin layers take on a translucent blush when backlit by a window, and the soft crinkle offers a gentle, tactile whisper when fingers brush petals.
Arranged on bare twigs, the blossoms read like a borrowed spring; the contrast between rough bark and feathery petals adds a quiet drama. I often left a few petals scattered on the table, enjoying the way they caught stray light and reminded me of slow, thoughtful afternoons.
Steps
- Gather lightweight tissue paper in several pink shades, bare twigs, floral wire, and adhesive.
- Stack sheets into small rectangles, trace a petal shape lightly, then snip individual petal layers.
- Thread petal layers onto thin wire or wrap wire around the petal bases to form clusters.
- Secure clusters along twigs, distributing bloom sizes for a natural look and fluffing layers gently.
Origami sakura blossoms in a hanging garland

Folding tiny origami blossoms became a quiet ritual that reminded me of pressing my focus into small, neat movements. The crisp folds create charming geometric petals that catch light differently from softer papers, and a row of blossoms on a string offers rhythmic repetition that looks calming across a mantel.
When hung near a doorway the little shapes cast gentle, dancing shadows. I liked mixing patterned and plain papers so the garland felt lively without being busy, and the sound of paper lightly tapping was oddly soothing on breezy days.
Steps
- Select lightweight origami or double-sided paper and cut into uniform squares in complementary colors.
- Follow a simple five-petal fold for each blossom, creasing sharply for defined edges and opening centers slightly.
- Thread a fine cord through blossom centers or tie tiny loops behind each bloom to secure.
- Space the blossoms along the cord, knotting or adding small beads between blooms for rhythm.
Crepe paper cherry blossoms with gentle texture

Crepe offers a tactile stretch that always surprised me with how lifelike petals could feel. The subtle grain in crepe catches highlights and creates soft ridges reminiscent of real blossoms.
A small cluster of crepe flowers in a ceramic cup brought a warm hospitality to my desk that no store bouquet matched. The paper’s flexibility made each petal bend and curve in a slightly different way, giving the whole arrangement a natural, unforced look.
I loved how crepe tones deepened when layered, adding a richness that stayed soft to the touch.
Steps
- Choose crepe paper in gradient pinks and select thin floral stems and adhesive.
- Cut petal shapes with rounded edges, stretching the crepe gently at the center to create curvature.
- Wrap petal bases around stem tips and layer multiple petals to form a full blossom.
- Add small crepe centers and lightly fluff petals for a lifelike silhouette.
Paper quilled sakura medallions on cards

Quilling brought a patient focus that felt almost meditative as thin strips curled into tiny coils. The assembled medallions had a lacy dimension that looked delicate against a matte card, and the play of light on curved paper edges created tiny highlights that made the blossoms lively.
Sending one of these cards felt personal in a way store-bought notes never did. I remembered the hush of concentration while rolling each strip and the quiet pleasure of arranging coils into petal shapes until the overall composition felt balanced and tender.
Steps
- Gather quilling strips in pastel shades, a slotted quilling tool, cardstock, and adhesive.
- Roll strips into tight coils and release slightly for teardrop petal shapes, pinching ends where needed.
- Arrange coils into blossom clusters on the card surface and adhere each piece carefully.
- Allow adhesive to dry fully, then add subtle painted dots for stamen accents if desired.
Layered watercolor paper blossoms with painted edges
Using watercolor paper gave blossoms a satisfying weight and absorbent softness that responded beautifully to pigment. The painted edges bled slightly into the paper, creating haloed color shifts that read like a soft sunrise.
When the petals were layered, the shadows between sheets looked like whispered depth, and the whole blossom felt like a tiny, painted study. I enjoyed how each bloom seemed to hold a small landscape within its petals, and the slightly rough deckled edges added a handmade charm that invited closer inspection.
Steps
- Prepare heavyweight watercolor paper and choose a palette of diluted pinks and light ochres.
- Paint petal shapes with a loose wash, varying intensity at the edges and letting colors feather naturally.
- After drying, layer painted petals from largest to smallest and secure at the base for dimension.
- Add tiny graphite or ink dots in centers to suggest stamens and gentle aging.
Sakura paper lantern garland for evening glow

Paper lanterns shaped into blossom forms introduced a warm, diffuse glow that turned my living room into a cozy nook. The light passed through petal seams and created soft shadows that felt intimate and calm, almost like a contained sunset.
Watching the lanterns sway slightly with a breeze made the whole room feel gently alive. I liked the contrast of paper fragility with the steady warmth of bulbs, and the way the garland moved attention along a mantel, creating a rhythm of light and color that invited slow conversation.
Steps
- Select thin rice paper or lantern paper, string lights with small bulbs, and floral-shaped templates.
- Form petal panels and construct rounded lantern shells that can house the small bulbs safely.
- Thread or drape the lit lanterns along a cord, spacing for balanced illumination.
- Test the setup in low light, adjusting petal overlaps to soften or intensify the glow.
Pressed paper blossom shadowbox keepsake

Creating a little shadowbox with pressed paper petals felt like trapping a gentle moment for later. The delicate flat petals lay against a neutral backing, and the glass gathered tiny reflections that turned the display into a soft jewel.
I enjoyed arranging compositions that read like frozen sketches of spring mornings, each petal placed to suggest movement without overcrowding the box. The result had a quiet archival quality, like a private museum piece, and seeing it on a bookshelf offered a contemplative pause between busier objects.
Steps
- Choose sturdy backing board, glass-front shadowbox, and paper blossoms pressed flat and dried.
- Arrange petals and small branches on the backing to create a balanced composition.
- Adhere elements with archival-safe adhesive, keeping pieces slightly raised for subtle depth.
- Seal the box and place it upright where soft light enhances the layered shadows.
Kirigami window sakura silhouettes on glass

Cut paper silhouettes applied to windows created a charming interplay of shadow and light across my breakfast nook. The crisp negative spaces of kirigami blossoms transformed passing sunlight into delicate patterned shadows on the table.
Watching the shapes shift throughout the day felt like a small, slow performance. I enjoyed choosing papers with a faint texture so the silhouettes read as hand-made rather than flat decals.
The overall effect gave windows a gentle seasonal update without overwhelming the view beyond.
Steps
- Select lightweight yet sturdy paper and sketch simple cherry blossom silhouette patterns.
- Carefully cut the silhouettes with a sharp blade or scissors, maintaining clean negative spaces.
- Mount the cut pieces onto glass with repositionable adhesive or double-sided film.
- Step back to observe how sunlight casts patterned shadows and adjust placements if needed.
Pop-up sakura card with layered depth

A pop-up card felt like a tiny stage where paper petals could leap forward in space. The layered components created a surprising three-dimensional moment that delighted both giver and receiver.
I noticed how the card’s fold produced shadow lines that emphasized the blossom forms, and opening one felt theatrical in a comforting way. The tactile click of the fold snapping into place and the soft rustle of petals added to a sensory greeting that felt more intimate than a flat note.
Those little internal scenes always drew an appreciative smile.
Steps
- Prepare sturdy cardstock for the card base and lighter paper for blossom layers.
- Design tabbed pop-up supports and attach layered petals to the tabs to create depth.
- Test the pop mechanism by folding the card closed and opening to ensure smooth motion.
- Embellish interior with small details like painted dots or a handwritten message around the pop-up.
Paper blossom centerpiece for a low vase

A compact centerpiece with paper blossoms changed the mood of my dining table without needing water or upkeep. The arrangement sat low and approachable, inviting conversation and leaning into tactile charm rather than floral volume.
Paper petals retained a collectible crispness that looked intentional beside place settings, and warm indoor light revealed tiny shadows between layered petals. I liked pairing soft pinks with a single accent color to avoid visual clutter, producing a quiet focal point that felt both festive and restrained.
Steps
- Choose a low, wide vase or shallow bowl and select matched paper blossoms in complementary tones.
- Place foam or floral oasis in the vessel to anchor stems and arrange blooms at varying angles.
- Tuck a few small paper leaves or buds to fill gaps and soften edges.
- Adjust heights so the centerpiece remains low enough for unobstructed conversation.
Mini paper blossom bonsai for a shelf

A tiny paper blossom bonsai offered a playful take on traditional miniature trees, blending sculptural form with handmade petals. The scaled-down branches carried a surprising level of charm, and the compact silhouette fit neatly on a crowded shelf.
Choosing a textured pot added an earthy counterpoint to the delicate paper blooms, and I appreciated how the little tree held its shape indefinitely compared with living plants. The bonsai felt like a whimsical companion, often catching my eye on evenings when the room quieted and small details became more meaningful.
Steps
- Select a small planter, wire or twig armature, and a collection of tiny paper blossoms.
- Shape the armature into a bonsai silhouette and anchor it in the planter with foam or clay.
- Attach blossoms at branch tips and stagger clusters to suggest natural growth.
- Add miniature moss or pebbles at the base for visual grounding and texture.
Sakura corner wall mural from layered paper

A corner wall mural made of layered paper petals transformed a plain nook into a quiet focal point. The gradation from creamy whites to saturated pinks read like a slow color wash climbing up the wall, and stepping back revealed an almost painterly effect.
The tactile layering created shifting shadows depending on the hour, which made the space feel dynamic without overwhelming it. I found satisfaction in working gradually across the surface, feeling the project grow in scale as blossoms collected, and enjoying how the mural softened the room’s angles.
Steps
- Plan a simple layout on kraft paper to map petal placement and color transitions.
- Cut petal shapes in graduated tones and assemble small clusters before mounting.
- Adhere clusters to the wall with removable adhesive, starting from the base and building upward.
- Step back periodically to refine density and ensure a natural flow along the corner.
Paper sakura hairpins and decorative clips

Creating small blossoms for hairpins delivered an unexpected delight when they were tucked into a bun or clipped to a scarf. The petite scale made each piece feel like jewelry, and the petals’ gentle movement added a playful accent to simple outfits.
I liked mixing matte and slightly glossy papers so the clips caught light without being flashy. Seeing the tiny flowers against hair or fabric brought a handcrafted sweetness that often prompted compliments, making them a favorite quick way to dress up an ordinary day.
Steps
- Make small layered petals from lightweight paper and prepare metal hairpins or clips.
- Secure petals together at the base and attach to the pin surface with strong adhesive.
- Reinforce the join with a small paper backing and trim excess for a neat finish.
- Let adhesive cure fully before wearing to ensure durability.
Sakura bookmarks that feel like a quiet gift

Bookmarks shaped like cherry blossom branches made reading feel ceremonious on slow evenings. The flat forms slid between pages without bulk, and the soft paper corners peeked out like a gentle reminder of time spent with a book.
I enjoyed gifting a small set paired with a paperback, watching the recipient smile at the little handmade flourish. The tactile paper edges and the careful choice of color made each bookmark feel thoughtful; sometimes I would trace the petal outline with a fingertip while pausing mid-chapter.
Steps
- Cut bookmark-sized strips from sturdy cardstock and design blossom motifs along the edge.
- Layer small paper petals onto the motif and secure with adhesive for subtle dimension.
- Laminate or apply a protective coating if desired to increase lifespan.
- Punch a topped hole for a thin ribbon or tassel to finish the piece.
Cherry blossom confetti for table scatter

Tiny blossom-shaped confetti felt celebratory without being loud, scattering a delicate carpet of pink across a table for casual gatherings. The small cutouts added playful movement between plates and glasses, and their presence turned an ordinary meal into something a little more festive.
I liked mixing matte and slightly glossy papers so light caught some pieces while others sat softly. Picking up a stray petal later on the floor always prompted a smile, a quiet reminder of a gathering that had lingered long enough to leave traces.
Steps
- Choose a mix of paper weights in complementary pink tones and prepare a small blossom punch or template.
- Punch or cut many tiny blossoms and collect them in a shallow bowl for easy scattering.
- Distribute confetti lightly across the table surface or around centerpieces for a gentle effect.
- Gather leftovers after the event by sweeping them into a decorative envelope for keepsakes.
Paper sakura mobile with gentle motion

A suspended mobile of paper blossoms introduced a slow ballet of movement that felt endlessly calming. Each petal caught a sliver of air, turning a quiet room into a place with subtle rhythm.
I enjoyed listening to the faint sound of paper brushing paper and watching the interplay of shadow and form on the ceiling. The mobile’s vertical lines drew the eye upward, and arranging blooms by size created a sense of measured balance.
It became a favorite piece to watch while lying on the couch and letting thoughts ease.
Steps
- Select a sturdy hoop or branch to serve as the mobile frame and prepare dozens of lightweight paper blossoms.
- Attach blossoms to varied-length threads and secure them around the frame at balanced intervals.
- Hang the mobile from a ceiling hook and test its spin, making small adjustments for even motion.
- Ensure all connections are secure and free from sharp edges before final placement.
Sakura-themed gift toppers for small packages

Using cherry blossom shapes atop gift boxes added a handcrafted note that felt intimate and personal. The little paper flowers sat like crowns on kraft paper packages, and their presence turned a simple parcel into a present that hinted at care inside.
The combination of coarse twine and soft petals created a pleasing contrast, and the act of tying a bow around a blossom felt like a small ritual. Watching a friend untie the parcel and discover the handmade detail was consistently rewarding.
Steps
- Prepare small paper blossoms in chosen hues and gather gift boxes, twine, and adhesive.
- Arrange one or a cluster of blossoms on the package top and secure with adhesive or twine.
- Add a small tag tucked beneath the blossom for a cohesive look.
- Finish with a neat bow, testing that the topper sits flat and secure.
Layered cardstock sakura for framed art

Building a layered cardstock blossom composition for framing felt like creating a small, permanent bloom garden. The stacked layers produced a sculptural relief that cast delicate shadows, and the clean edges of cardstock offered a contemporary take on floral art.
Hanging a framed piece in a narrow hallway introduced a bright punctuation that made daily comings and goings feel lighter. Each viewing revealed new details in the layering; I often paused to notice how the colors read differently under morning versus evening light.
Steps
- Cut multiple petal layers from heavyweight cardstock in coordinated shades and plan the overall composition for the frame size.
- Adhere layers with small spacers between sheets to create readable depth.
- Mount the finished piece on a neutral backing and place into a frame with museum glass if available.
- Hang the framed art where changing light reveals layered shadows and color shifts.
Embossed paper sakura with delicate texture

Embossing added a refined tactile quality that elevated simple paper into something almost sculptural. The raised petal veins caught light and created subtle plays of highlight and shadow that made each blossom feel refined.
I enjoyed running my fingertips across an embossed sheet, noticing how the touch matched the visual delicacy. Framing a single embossed bloom in a small square frame created an elegant vignette that felt quiet and deliberate.
The finish read handcrafted yet refined, lending a small sense of ceremony to ordinary wall space.
Steps
- Choose thick paper suitable for dry embossing and design petal veins or patterns on a template.
- Use an embossing tool and soft mat to press the design into the paper, creating raised textures.
- Trim embossed shapes and arrange them on a backing for framing or mounting.
- Frame under glass or display as a standalone textured panel to highlight relief.
Folded paper sakura napkin rings for dinners

Napkin rings shaped like blossoms added a small theatrical touch to table settings, giving each place a handcrafted accent. The folded petals created gentle silhouettes that paired well with linen napkins and simple ceramic plates.
I liked how guests would lift a napkin and discover the little flower beneath, a quiet surprise that felt intimate. The rings also offered texture contrast against smooth cutlery and plate rims, and arranging them in repeating rhythm along the table produced a satisfying pattern that felt thoughtfully composed.
Steps
- Create small folded blossom motifs from medium-weight paper and prepare circular rings sized for napkins.
- Affix blossoms onto the rings securely, ensuring comfortable fit when slid over napkins.
- Place a finished ring at each setting, aligning blossoms so they face outward.
- Adjust for symmetry across the table for a unified look.
Sakura-themed wall clock face with paper petals

Applying paper petals around a clock face turned an ordinary timepiece into a seasonal memento. The petals gathered around the center like a softened frame, and the juxtaposition of delicate paper and mechanical hands felt whimsical.
Observing the hands move over the blossoms added a gentle animation to the room, as if time itself paused to admire the petals. I enjoyed the way the paper softened the clock’s edges and how the shadow of the hands sliding over petals created a layered, almost cinematic effect in quiet moments.
Steps
- Remove the clock mechanism from the face and plan petal placements around the dial.
- Adhere paper petals in a radial pattern, leaving the central mechanism area clear.
- Reinstall the clock hands and mechanism, ensuring petals do not obstruct movement.
- Hang the clock and observe the interplay of moving hands and static petals.