Delicate Pressed Flower Nail Designs bring a fresh, romantic touch to any manicure. These floral looks use tiny dried petals and leaves to create wearable art, pairing perfectly with sheer pinks, muted nudes, soft pastels, or bold jewel tones.
Delicate Pressed Flower Nail Designs work for short, medium, and long nails and suit almond, coffin, square, and oval shapes alike.
Spring and summer keep these pressed flower styles popular, but they also make lovely bridal or cozy autumn looks when paired with warm tones. The delicate nature of pressed petals makes each manicure feel handcrafted and gentle.
Tiny Dried Buds On Clear Glossy Tips
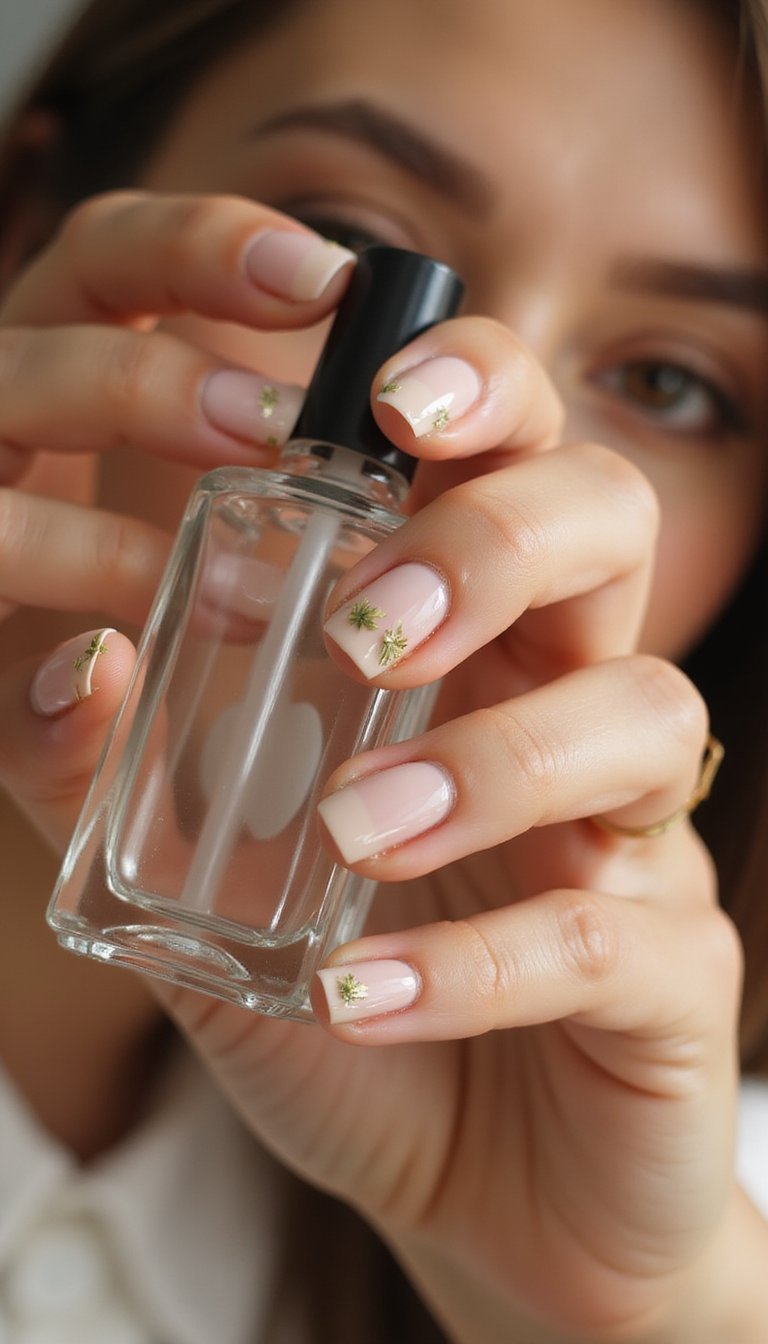
Clear glossy nails with tiny pressed buds tucked into the tip give a barely-there floral finish that feels airy and modern. Stick with medium-length square or oval shapes and a sheer nude or soft pink base so the petals float on the nail. A high-shine gel topcoat seals the blooms and keeps the look fresh and natural. This style reads minimalist but feminine, perfect for someone who wants floral detail without loud color.
Nail Tips
- Buff nails smooth, push back cuticles and file into a neat oval or square before applying a base coat.
- Use a thin layer of clear builder gel or gel polish, place tiny pressed buds with a dotting tool, then cure for 30–60 seconds per layer.
- Finish with two layers of glossy top coat, cure fully, and apply cuticle oil daily to keep edges hydrated.
Encapsulated Acrylic Blooms For High Shine
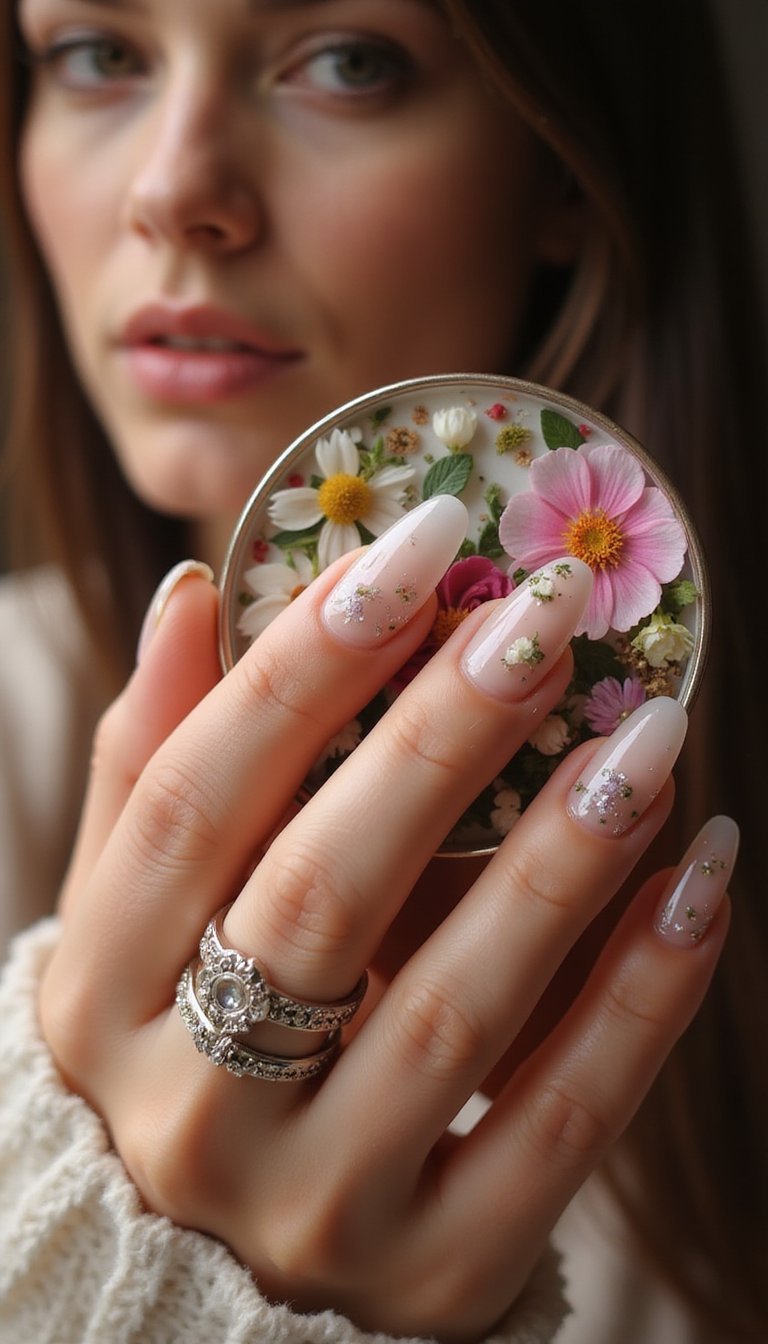
Encapsulated acrylic nails trap real pressed flowers beneath clear acrylic for a durable, museum-like effect. Choose medium to long coffin or stiletto shapes and a soft nude or clear base so the blooms remain the focal point. The high-gloss finish from buffing and polishing gives a glassy look that feels luxe. Encapsulation protects petals from chipping and lets you wear intricate floral arrangements without worry, making it ideal for events or everyday glam.
Nail Tips
- Prep natural nails, apply forms or tips, and sculpt with clear acrylic for a smooth bed before placing petals.
- Arrange pressed flowers on a slightly sticky acrylic layer, add clear acrylic over top, and shape with a file once set.
- Finish by buffing to a mirror shine, apply a non-yellowing top coat if needed, and use cuticle oil to keep surrounding skin healthy.
Minimal Single-Bud Accent On Nude Almonds
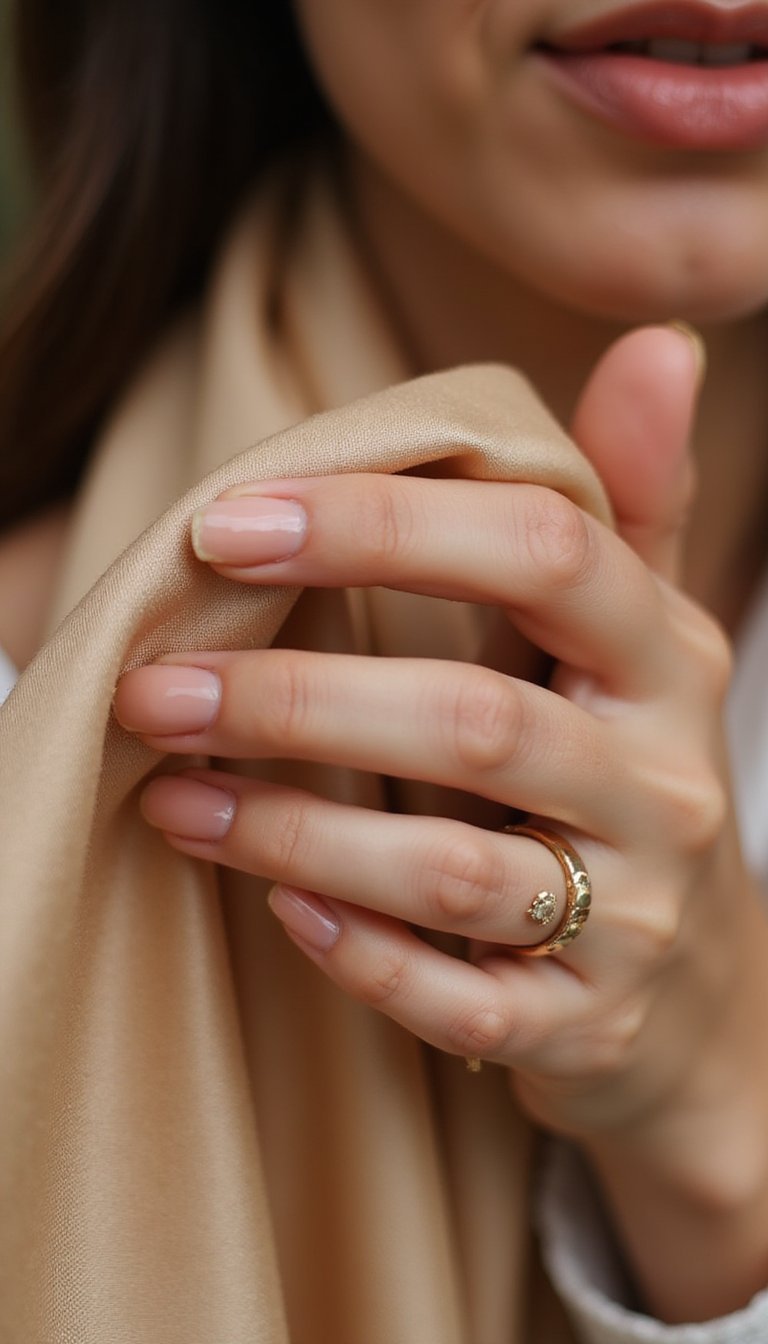
A single tiny pressed bud placed near the cuticle of a nude almond nail reads understated and chic. Keep nails short to medium for an elegant everyday look; a soft matte or satin finish enhances the minimalist vibe. Pair the single-bud accent with clean lines and neutral polish on other fingers for balance. This design flatters those who prefer low-maintenance beauty with a small handcrafted detail that elevates plain neutrals.
Nail Tips
- File nails into an almond shape, buff lightly, and apply a ridge-filling base coat to create a smooth canvas.
- Paint a nude gel polish, place a single pressed bud on the tacky layer, and cure for the recommended time.
- Apply a matte or satin top coat to set the bud, smooth edges with a fine file if needed, and use cuticle oil to hydrate daily.
Matte Wildflower Garden On Soft Squares
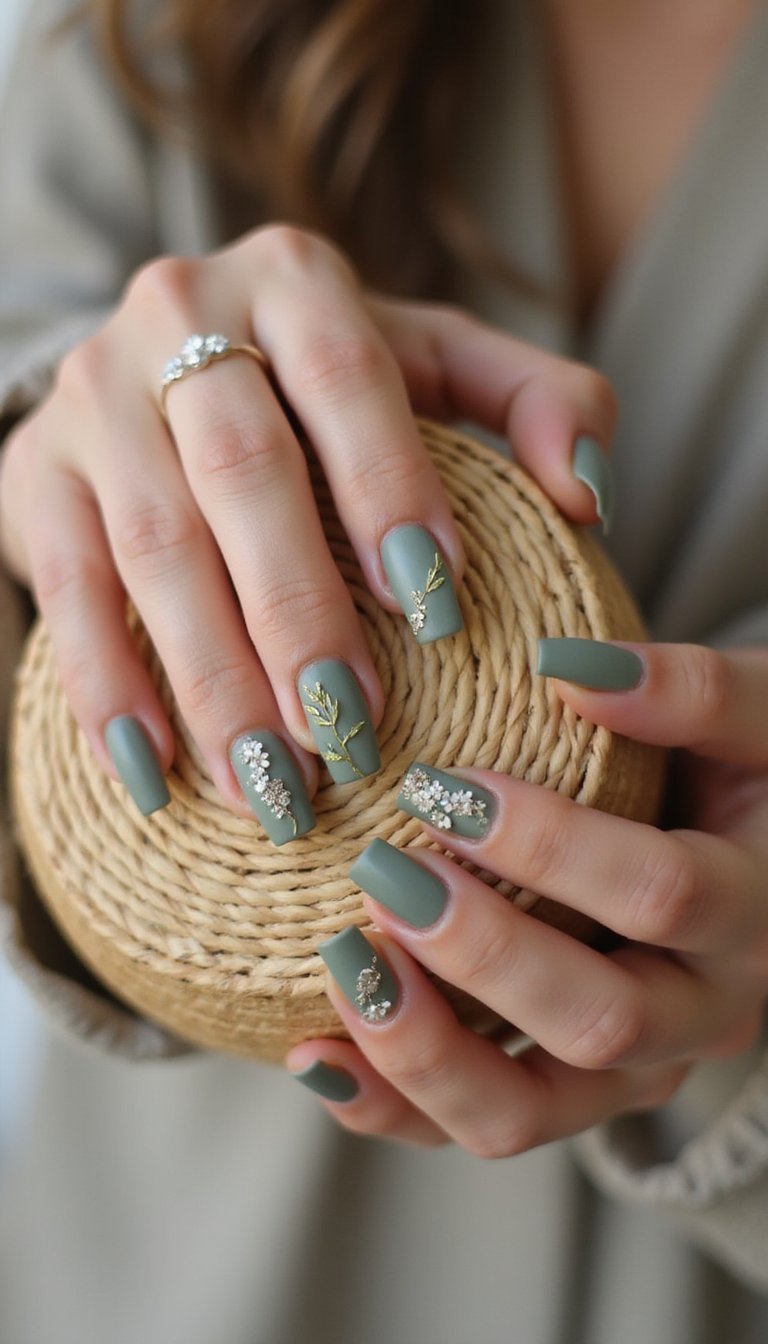
Matte finishes give pressed flower manicures a soft, whimsical look that reads cozy and artful. Use a muted sage, cream, or dusty rose base on medium square nails, and arrange tiny wildflower sprigs across accent nails. The matte topcoat mutes shine and lets textures of the petals stand out for a tactile feel. This look pairs well with boho outfits and layered jewelry, offering an effortless floral statement without high gloss flash.
Nail Tips
- Shape nails into neat squares, lightly buff the surface, and apply a base coat to prevent staining from pigments.
- Paint two thin coats of colored gel polish, place pressed flowers on a tacky layer, and cure each layer as instructed.
- Finish with a matte top coat to lock petals in place, cure fully, and massage cuticle oil into skin to prevent dryness.
Sunset Gradient With Golden Daisy Accents
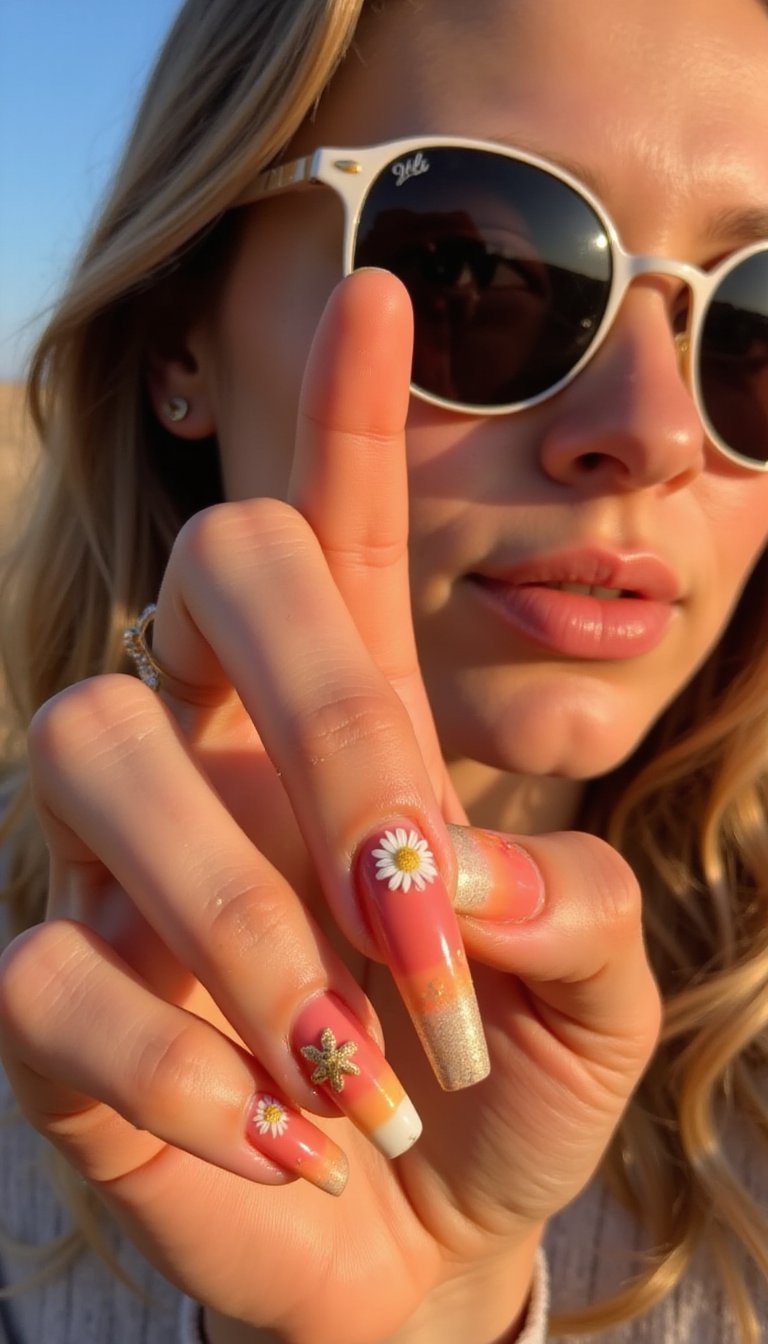
Warm sunset gradients — think coral, peach, and gold — make a vibrant background for tiny pressed daisy accents on long almond nails. A subtle shimmer or glossy finish enhances the warm glow, while tiny gold foil flecks around the petals add luxe contrast. This playful, sunny mani suits festival days or summer vacations and flatters warm skin tones and expressive style choices.
Nail Tips
- File nails into an almond shape, buff, and apply a thin base coat to create an even surface.
- Create the gradient using gel polish blending, place tiny pressed daisies on the tacky layer, and cure each layer thoroughly.
- Add a glossy top coat with a touch of gold foil around accents, cure fully, and apply cuticle oil daily to maintain softness.
Glitter Accent With Pressed Flower Inlay
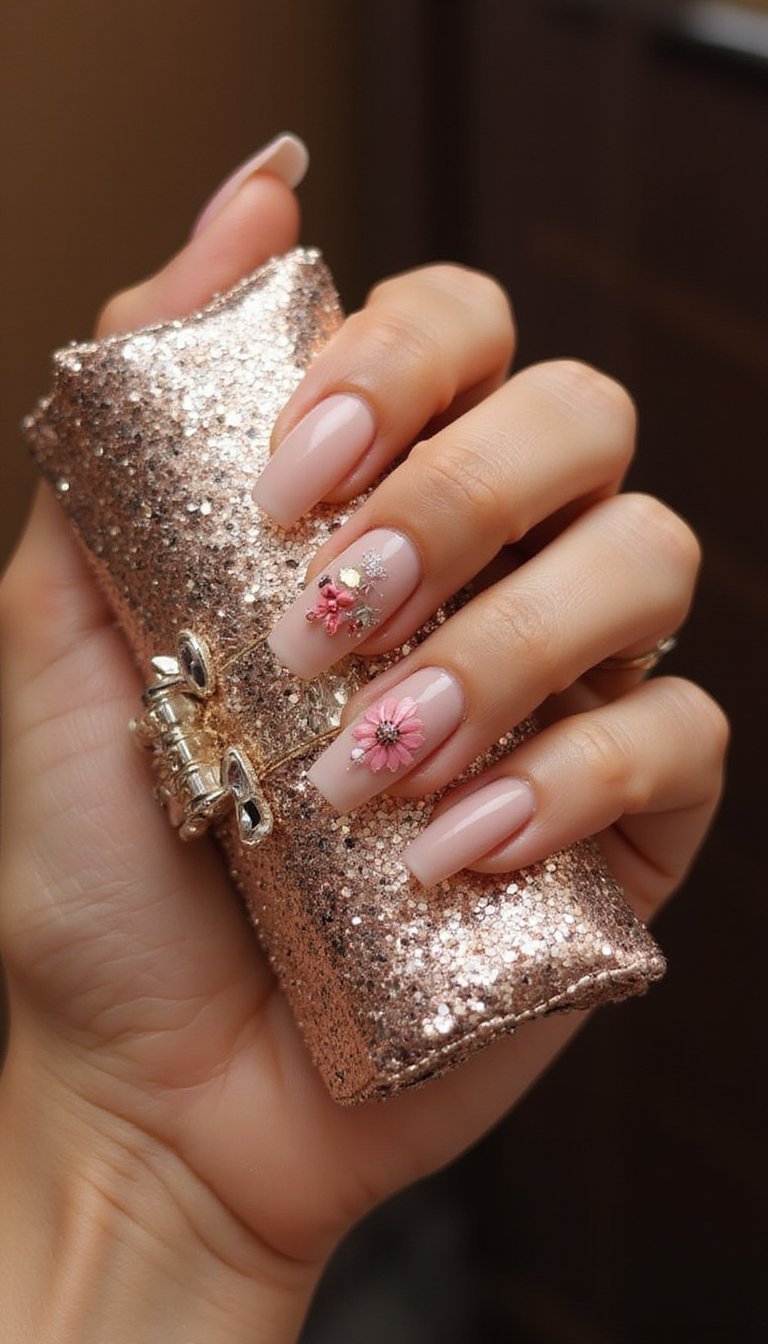
Combine sparkle and nature by placing a pressed flower inlay beside glitter accents on medium square or coffin nails. Use a soft nude or pale pink base, then reserve one or two nails for dense microglitter and others for delicate floral inlays. The contrast reads festive and feminine, striking the balance between glam and organic. This mani works for parties, photoshoots, or anyone who loves a touch of sparkle with handcrafted details.
Nail Tips
- Shape nails into squares or coffins, lightly buff, and apply a ridge-filling base coat for even application.
- Layer glitter on designated nails using gel or glitter dip, place pressed flowers under clear gel on inlay nails, and cure each layer carefully.
- Seal with a glossy top coat over both glitter and flower inlays, cure fully, and apply cuticle oil to maintain healthy skin around the nails.
Greenery And Ferns For Earthy Vibes
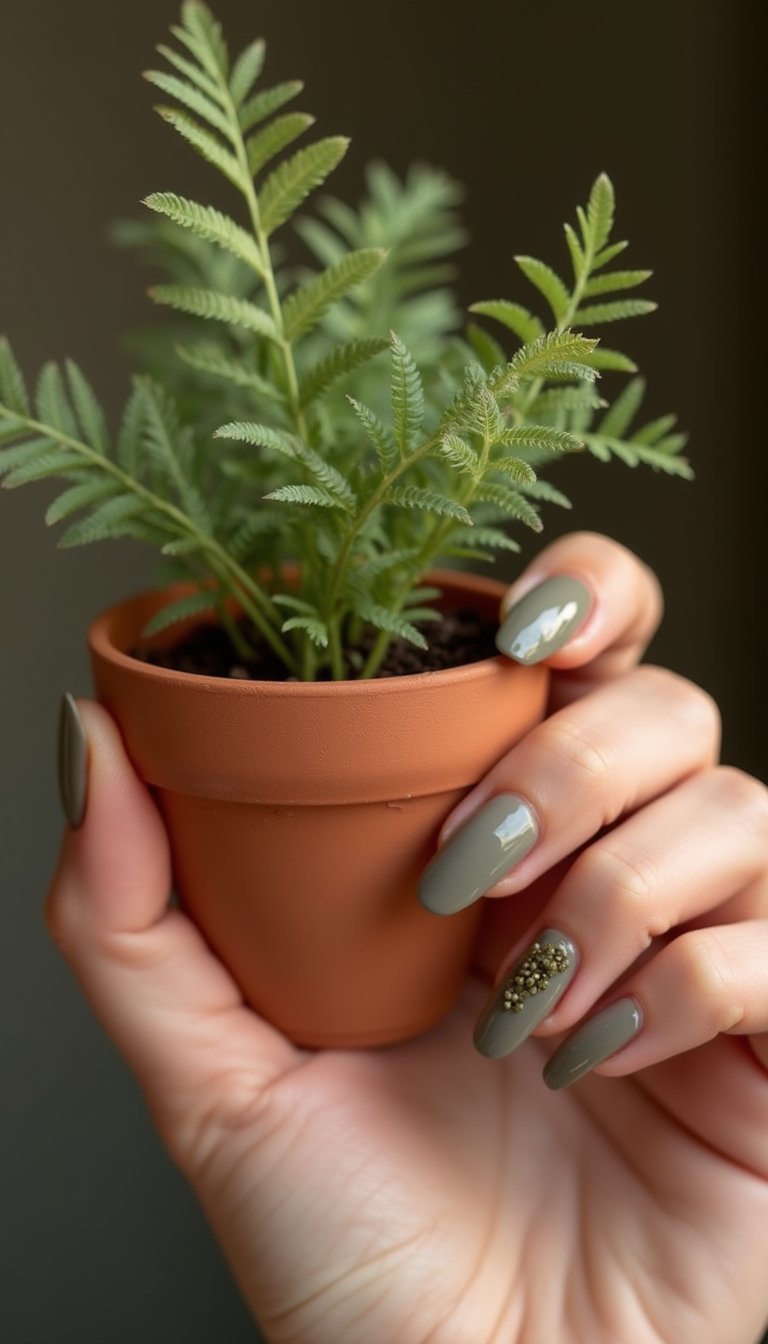
Pressed ferns and tiny green sprigs on a muted moss, cream, or beige base create a grounded, botanical manicure. Medium-length oval or natural square shapes work well, with a satin or glossy finish to highlight textures. This earthy take on pressed flower nails feels natural and sophisticated, making it a lovely choice for those who favor neutral wardrobes or eco-inspired aesthetics. Layering different greens adds depth while keeping the palette calm and cohesive.
Nail Tips
- File nails into oval or natural square shapes, buff lightly, and apply a base coat to prep the nail plate.
- Paint a muted base color with gel polish, arrange pressed ferns on the tacky layer, and cure each layer for full adhesion.
- Finish with a satin or glossy top coat depending on your preference, cure fully, and moisturize cuticles regularly to keep the look fresh.
Marble Swirl Backdrop With Petal Highlights
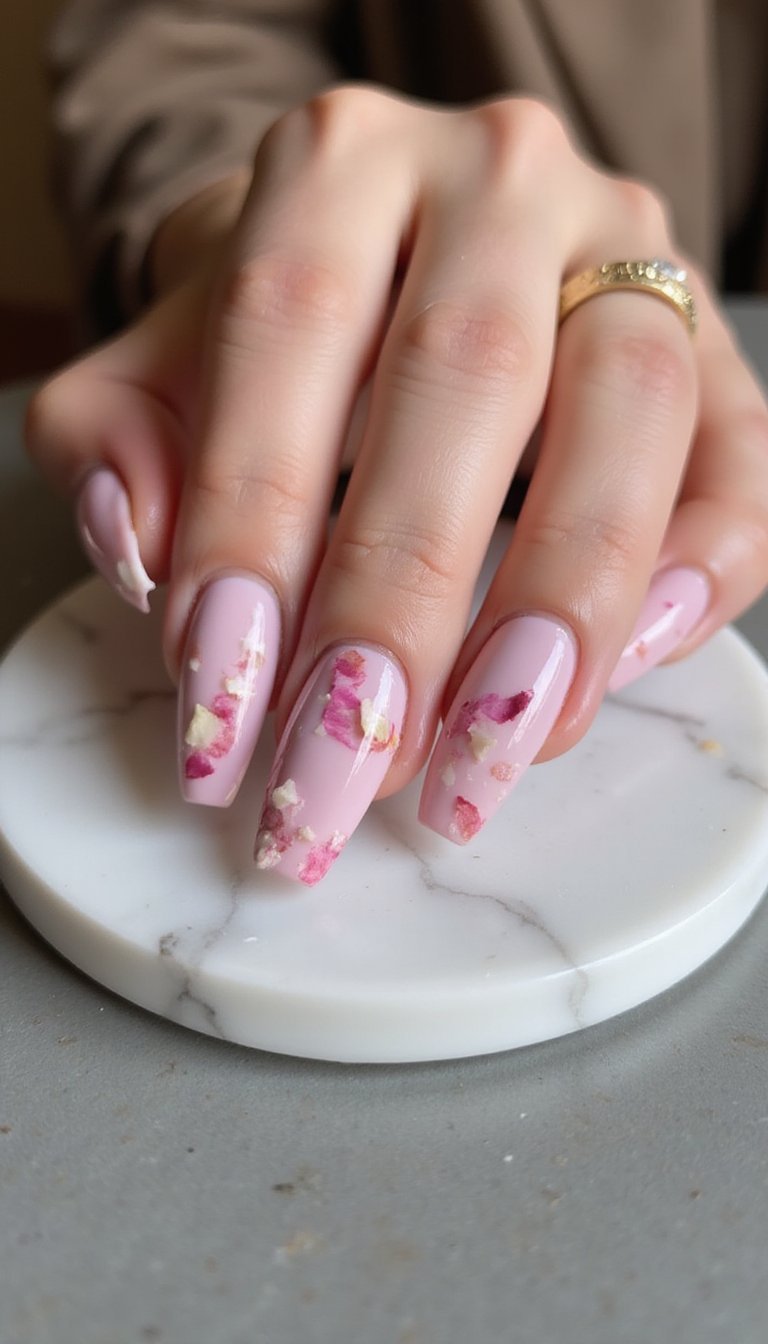
Marble swirls in cream, gray, or soft pink make a luxe backdrop for scattered pressed petals on medium-long coffin or almond nails. The contrast between the mineral-like marble and delicate flowers creates an artistic, magazine-ready manicure. Use a glossy finish to echo polished stone, and tuck petals into shallow swirls to look integrated rather than pasted on. This style reads modern and gallery-inspired, perfect for creative individuals who appreciate sculptural nail art.
Nail Tips
- Shape nails into coffin or almond, buff, and apply a tack-free base coat to create a smooth foundation.
- Create marble by blending gel polishes with a fine brush, place pressed petals into valleys of the design, and cure carefully.
- Top with a high-gloss top coat to mimic polished stone, cure fully, and use cuticle oil to maintain healthy surrounding skin.
Boho Tassel Photoshoot With Floral Nails
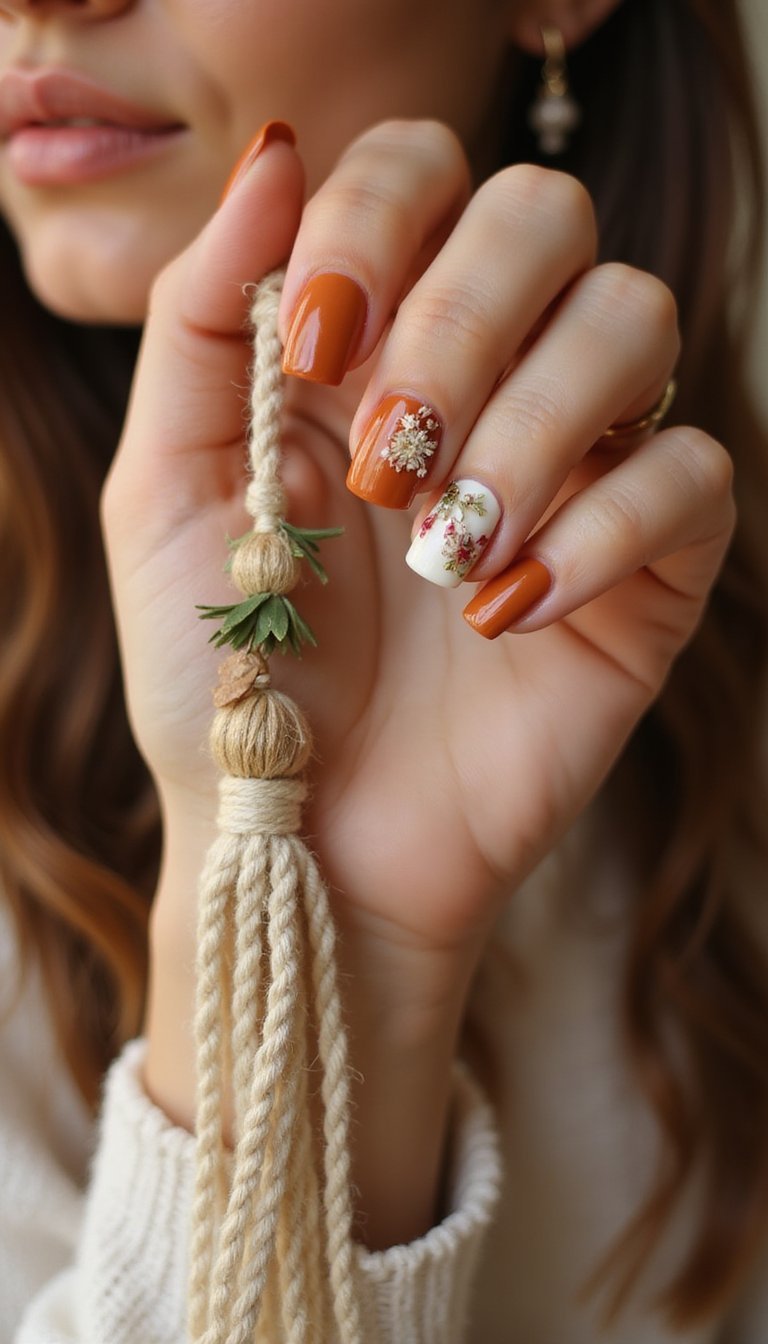
Boho-inspired manis feature warm terracotta, cream, and ochre paired with pressed wildflowers and tiny seed pods on medium almond nails. Add a subtle matte finish to reinforce the natural vibe. This look pairs beautifully with woven textiles, layered rings, and outdoor photoshoots. Flower placements can be asymmetric and layered for a free-spirited aesthetic that feels handcrafted and festival-ready without being fussy.
Nail Tips
- File nails into almond shapes, buff gently, and apply a base coat to smooth the surface for polish.
- Layer warm-toned gel polishes, position pressed wildflowers and seed pods on a tacky layer, and cure each layer thoroughly.
- Seal with a matte top coat to keep the boho texture, cure fully, and apply cuticle oil to prevent dryness and peeling.
Monochrome Lavender Petals On Soft Mauve
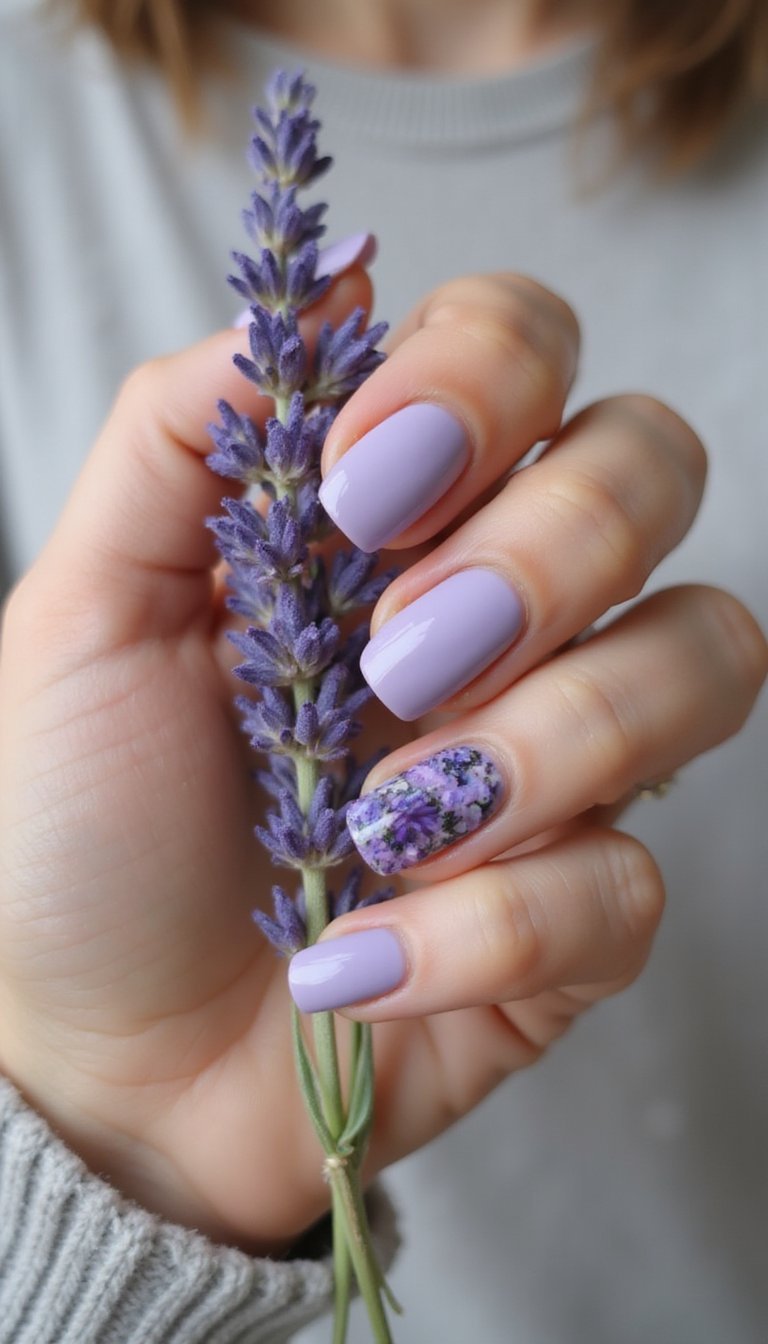
Monochrome palettes keep pressed flower designs calm and cohesive. Lavender petals on soft mauve or dusty purple nails create a tonal effect that feels soothing and refined. Choose medium oval nails and a semi-gloss finish to gently catch light without strong reflection. This manicure works for office or weekend and pairs well with silver jewelry. Keeping the color story tight makes the floral elements feel intentional and polished rather than busy.
Nail Tips
- File into oval shapes, buff lightly, and apply a base coat to ensure even color payoff.
- Paint two thin coats of mauve gel polish, place lavender petals on the tacky layer, and cure each layer per product instructions.
- Seal with a semi-gloss top coat, cure fully, and massage cuticle oil into surrounding skin daily to keep nails neat.
Tiny Orange Blossoms On Creamy Almond Nails
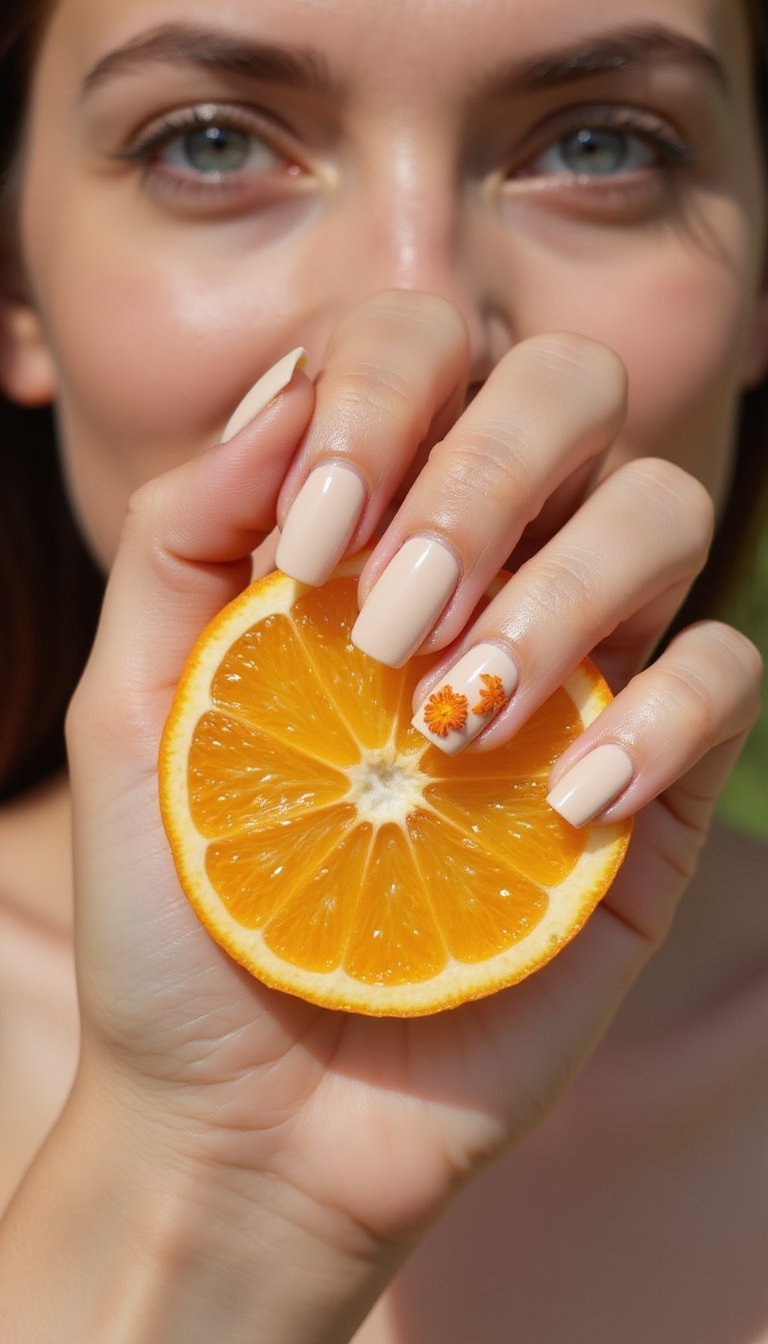
Bright tiny orange blossoms contrast beautifully against a creamy base on almond-shaped nails. Medium length gives enough canvas for arrangement without overpowering the look. A glossy finish makes the petals pop and reads fresh and cheerful — perfect for seasonal transitions or sunny outings. Pair with gold jewelry for a warm, curated effect that highlights the botanical detail while keeping the overall palette soft and wearable.
Nail Tips
- Shape into almond and buff surfaces for a smooth base coat application to prevent lifting.
- Paint two thin coats of creamy gel polish, position tiny orange pressed blossoms on the tacky layer, and cure each layer thoroughly.
- Finish with a glossy top coat to protect petals, cure fully, and use cuticle oil regularly to maintain softness around the nails.
Marigold Accent Nail With Neutral Set
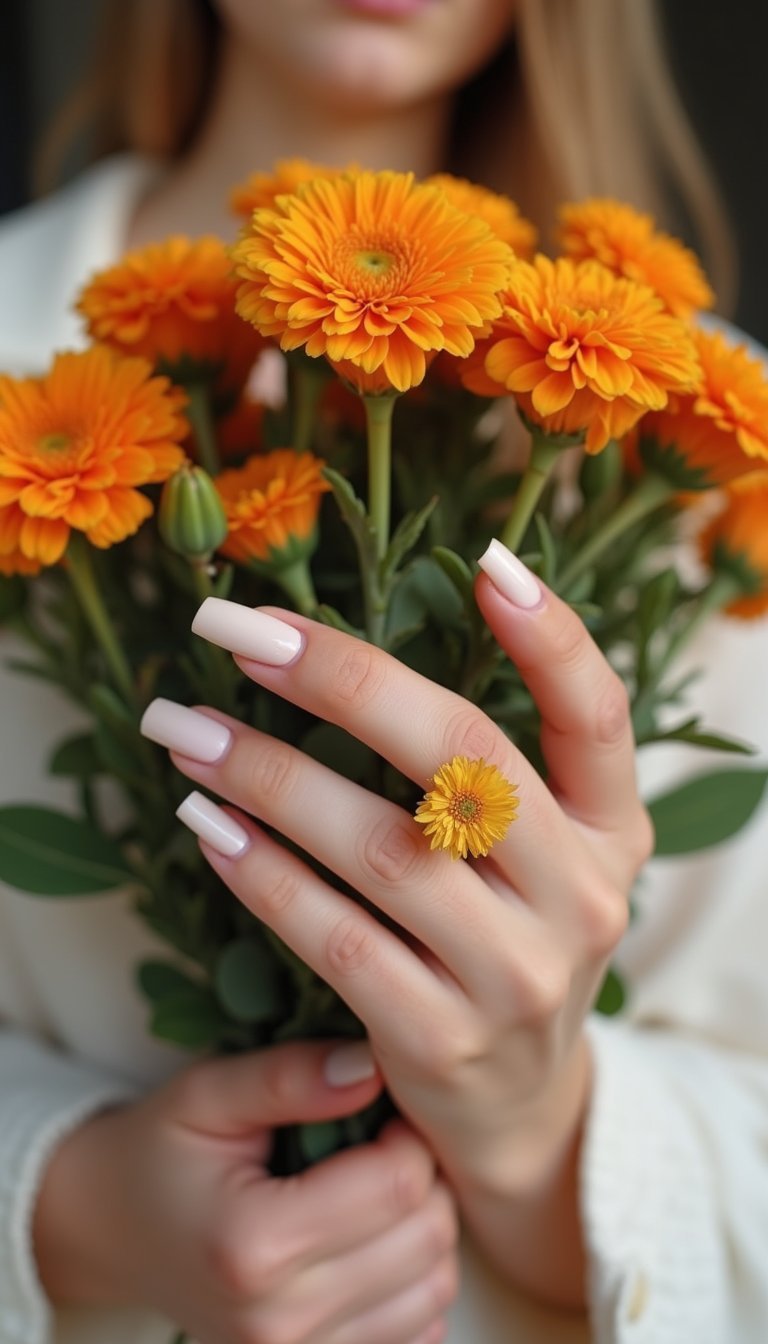
A bold marigold accent nail set against neutral companion nails makes the flower the star without overwhelming. Medium square or coffin shapes work well, and a glossy finish enhances the vibrancy of the marigold petals. Keep the remaining nails in soft beige or taupe to frame the accent. This approach offers a punchy pop of color while preserving overall versatility, great for anyone who loves a single statement nail in an otherwise classic kit.
Nail Tips
- File to square or coffin, buff lightly, and apply a base coat to all nails to prevent staining.
- Create neutral base nails with gel polish and paint the marigold accent using bright pigment, place pressed marigold petals and cure carefully.
- Seal with a glossy top coat over all nails, cure fully, and maintain cuticle health with daily oiling.
Vintage Blue Hydrangea Mosaic On Tips
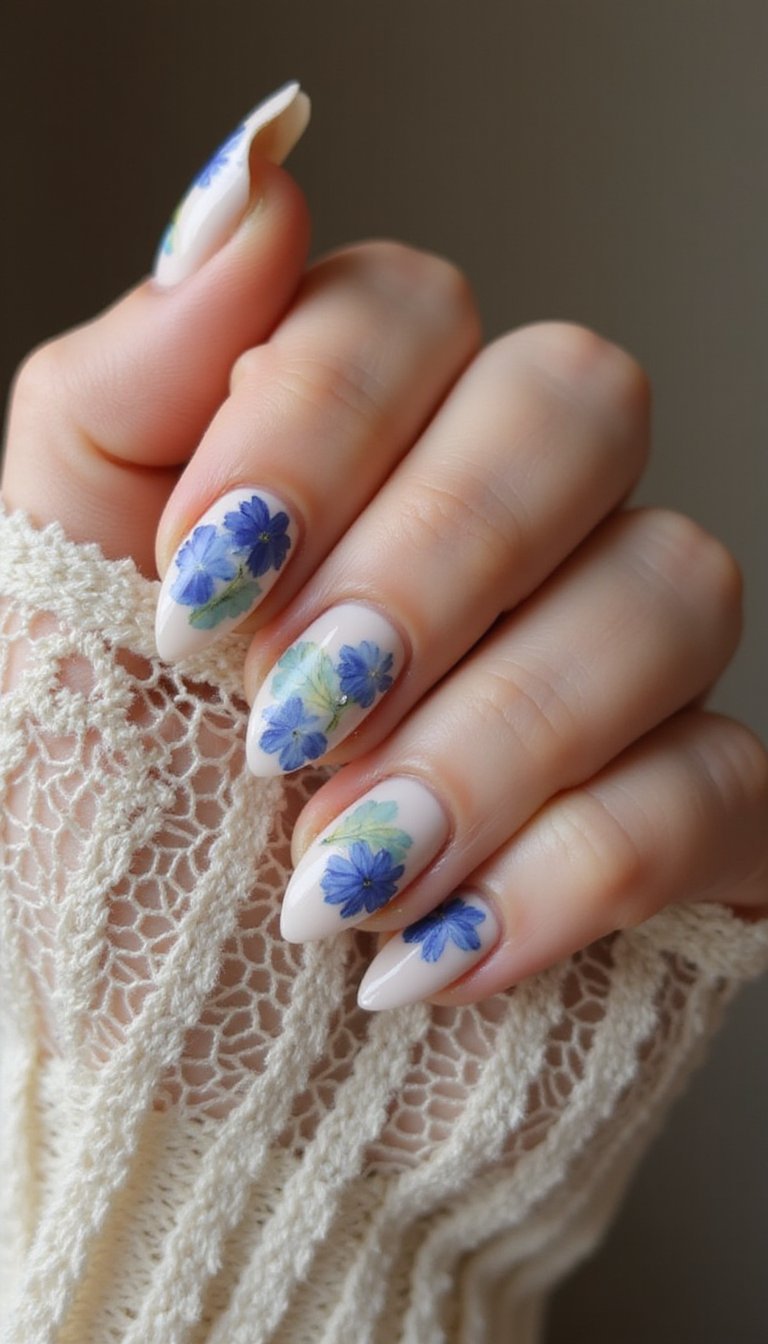
Pressed hydrangea petals in soft vintage blues arranged into mosaic tips feel nostalgic and artful on medium-long oval nails. Pair with a barely-there pink or cream base and a glossy finish to let the blues sing. Tiny clusters concentrated at the tips create a framed, wearable art effect that flatters romantic wardrobes and soft-hued outfits. The result is feminine with an antique sensibility, ideal for styled photo sessions or bridal showers.
Nail Tips
- Shape nails into oval, buff gently, and apply a thin base coat for smooth adhesion and color consistency.
- Paint a sheer base, cluster hydrangea petals at the tips on a tacky layer, and cure each layer to secure placement.
- Finish with a glossy top coat to protect the mosaic tips, cure fully, and reapply cuticle oil regularly to keep the manicure delicate-looking.
Cherry Blossom Branches On Soft Ivory Nails
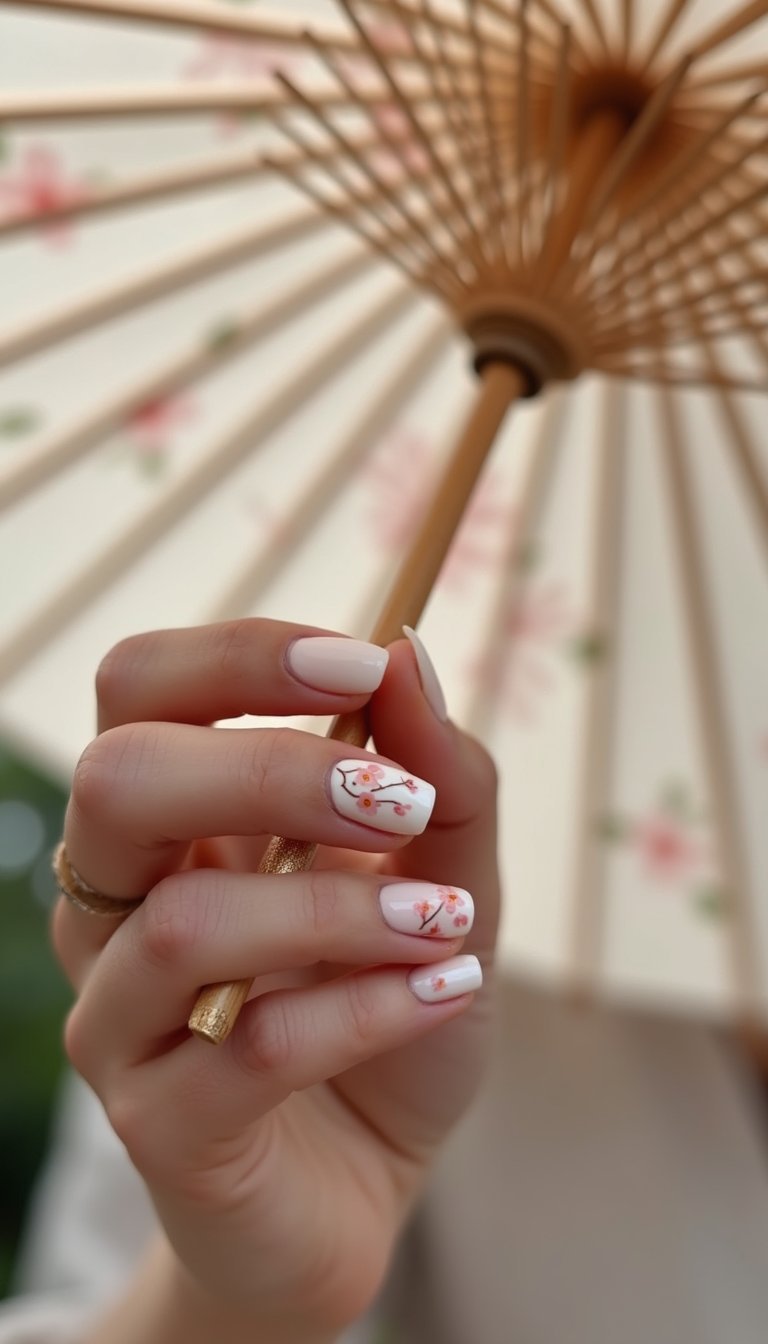
Delicate cherry blossom branches painted or placed as pressed petals across soft ivory almond nails feel poetic and refined. The composition can wrap the nail or sit on an accent finger for subtle drama. A glossy finish enhances the fragile nature of the petals and keeps the design feminine. This manicure pairs especially well with spring wardrobes and romantic outerwear, offering a quiet elegance that carries floral meaning without being loud.
Nail Tips
- File into almond shapes, buff lightly, and apply a base coat to even out the nail surface before decorating.
- Paint the ivory base with gel polish, place cherry blossom petals on the tacky layer in branch-like arrangements, and cure each layer thoroughly.
- Seal with a glossy top coat to protect delicate petals, cure fully, and use cuticle oil daily to keep the area soft.