I still remember the first time I tried a simple macrame wall hanging; knotting cotton cord on the living room floor felt oddly calming and immediate. Beginner Macrame Wall Hangings became a small ritual for me, an afternoon way to unwind while watching light shift across the fibers.
Over a few projects I learned how little was needed to transform a blank wall into something textured and warm.
These Beginner Macrame Wall Hangings ideas are the kinds of pieces that welcome a curious, hands-on approach and slow, satisfying progress.
Soft cotton fringe for a cozy corner texture
There was a tiny thrill when the fringe finally fell into place, the soft ends sighing against the wall like a curtain. The cotton cord felt pleasantly matte and slightly pillowy beneath my fingertips, and the fringe developed a subtle movement with the slightest air.
I liked how the natural fibers absorbed light, creating gentle shadows that changed through the day. It settled into a quiet presence that made a small corner feel intentionally cared for without speaking loudly.
Steps
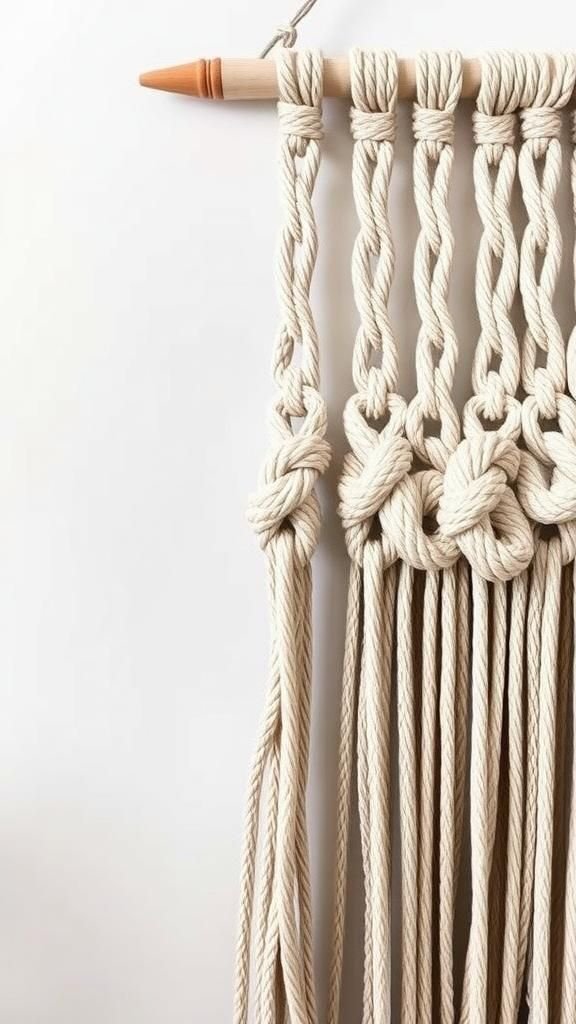
- Measure and cut several lengths of cotton cord to a uniform length.
- Fold cords in half and secure them to a wooden dowel with lark’s head knots.
- Arrange cords to form layered fringe and trim ends evenly for a tidy baseline.
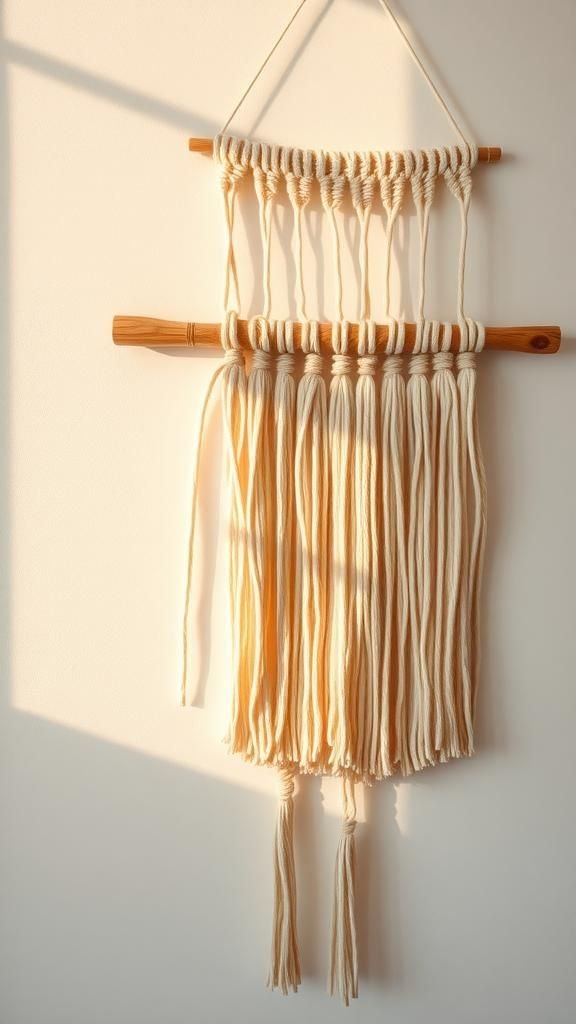
Beginner-friendly neutral macrame with wooden dowel

Working with a single wooden dowel felt grounding, the smooth warmth of the wood balancing the cool cotton cord. The neutral tones blended easily with the room, offering a subtle sculptural focus without demanding attention.
My hands enjoyed the predictable rhythm of the knots, and the tactile contrast between the firm dowel and yielding cords kept the process pleasant. When hung, the piece absorbed bits of sunlight and shadow, the knots throwing tiny geometric patterns that made the whole wall feel softer and more intentional.
Steps
- Choose a sturdy wooden dowel and cut cords to matching lengths.
- Fix cords to the dowel using a series of lark’s head knots across its length.
- Create repeating square knots in rows to build a textured, neutral panel.
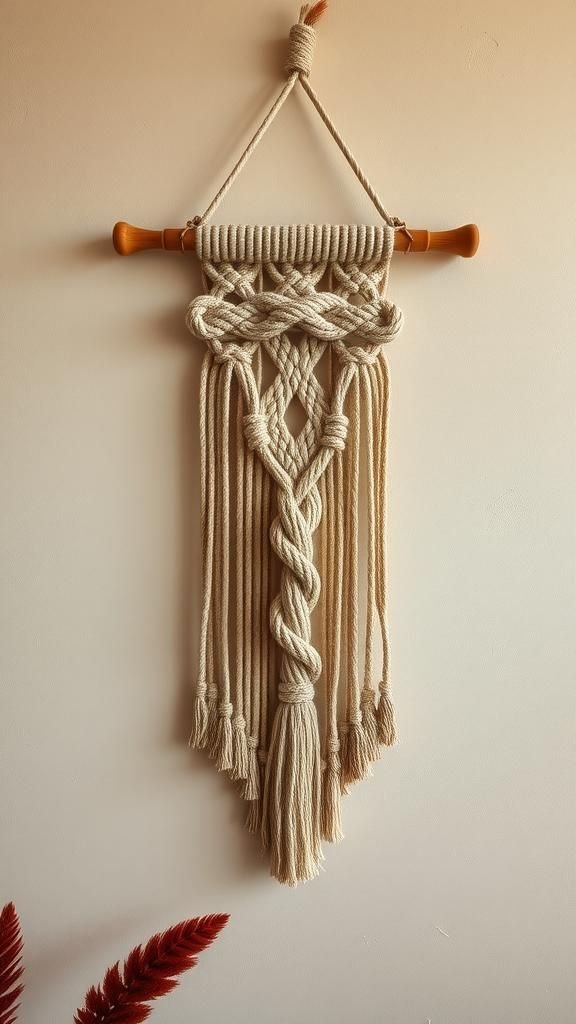
How to make a wrapped loop accent?

I always liked the little wrapped loop that crowns some hangings, a tidy touch that reads as both delicate and finished. The wrapping fiber had a slightly different sheen, creating a narrow highlight where it encircled the loop.
Watching hands wrap the cord around itself felt oddly satisfying, a small repetitive motion that made the piece feel anchored. When the loop was hung, it offered a refined starting point for the eye and a neat way for the whole hanging to sit flush against the wall.
Steps
- Form a loop with a short length of cord and position it above the main cords.
- Wind a thinner cord tightly around the base of the loop until an even wrapped section forms.
- Tuck the tail of the wrapping cord into the wrapped area to secure it discreetly.
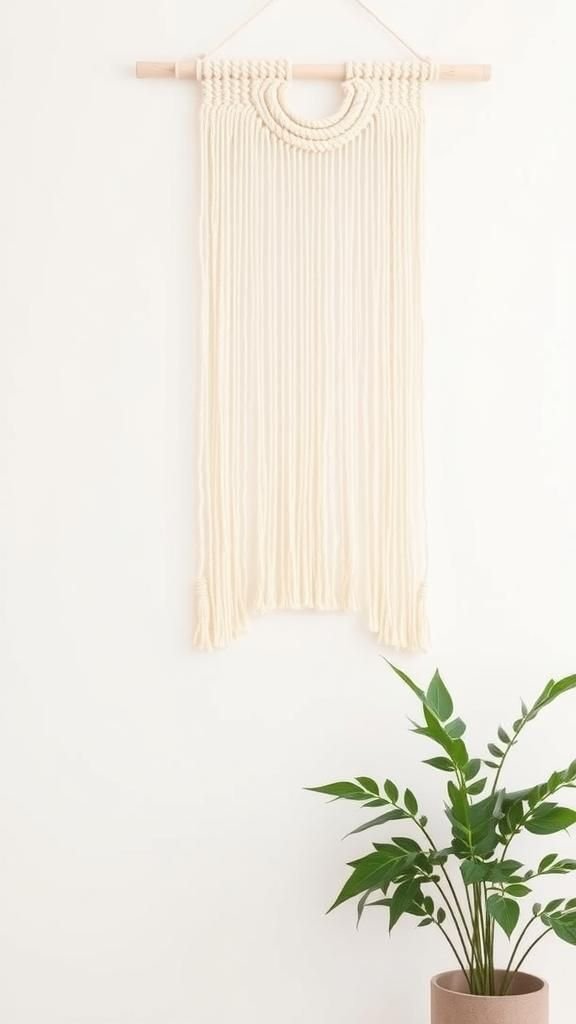
Boho semicircle wall hanging with soft tassels
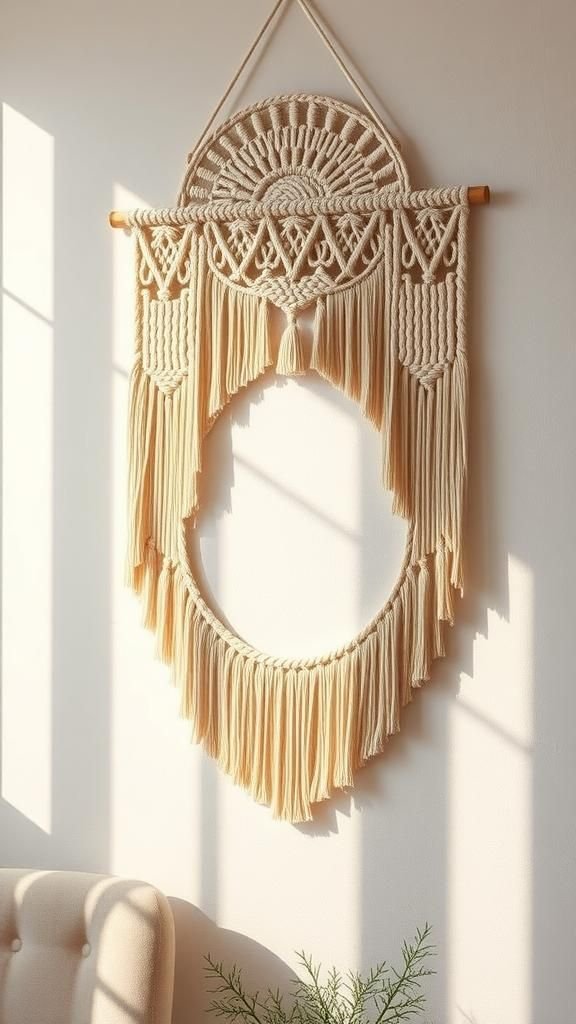
There was something playful about the semicircle shape, a soft moon that sat comfortably above head height and invited a gentle smile. The tassels at the edges added a fluttering finish, their tips brushing against the wall like quiet confetti.
The curve changed how shadows fell, creating a shallow gradient that felt organic and calm. I liked how the overall silhouette read from across the room, while the close-up revealed tiny variations in knot tension and fiber texture that felt intimately handmade.
Steps
- Create a semicircular framework by attaching cords to a curved dowel or bending a wooden rod.
- Tie alternating square knots to build the curved pattern and leave longer cords at the edges for tassels.
- Trim tassels to a gentle taper and comb them for a soft, finished look.
Chunky cord statement piece with neutral dyes

The chunky cord felt satisfying and a little dramatic, the heft of the fibers giving each knot a bold, sculptural presence. Neutral dye tones pulled from sand and stone made the piece feel earthy and rooted, while still staying gentle in a living room or entryway.
Handling the thick strands was almost like working with rope, each loop feeling weighty and substantial. When placed above a sofa, the wall hanging read as an architectural element, the thick cords casting pronounced shadows that changed with the light.
Steps
- Select thick macrame cord and prepare evenly measured lengths for the design.
- Create large, pronounced knots such as oversized square knots or half hitch rows to emphasize texture.
- Add a neutral-dyed accent strand woven through the piece for tonal variation and sculptural interest.
Mini gallery set: three coordinated small hangings
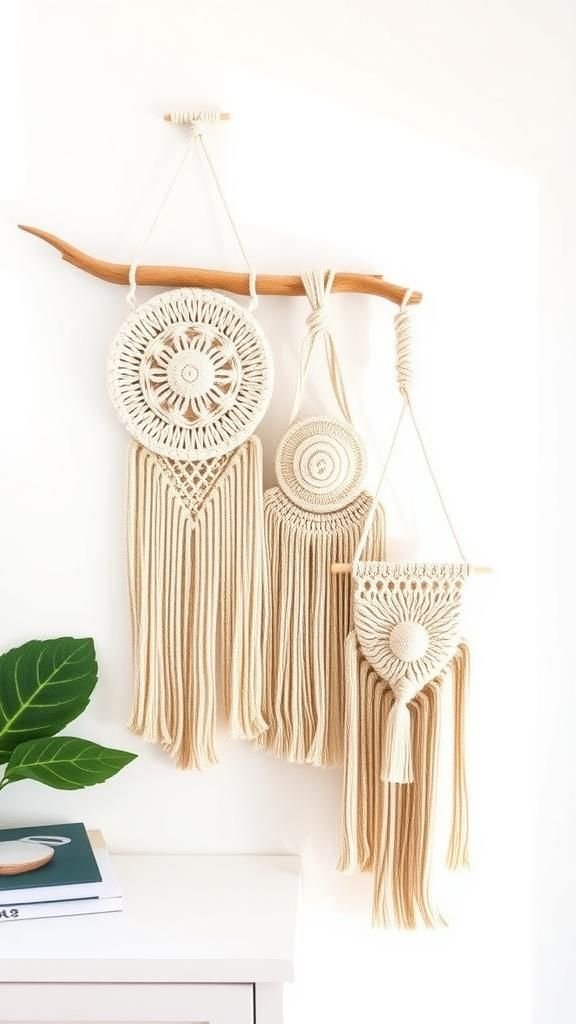
I liked arranging three petite hangings in a loose cluster, each similar but carrying a small personality of its own. One had a short fringe, another a compact geometric panel, and the third a tiny looped accent.
Together they created rhythm and scale without overwhelming the wall. The spaces between them felt deliberate, like breaths of air.
It was satisfying to step back and see how the trio balanced, each piece catching light differently while sharing the same palette and material warmth.
Steps
- Plan three small designs with shared materials and complementary silhouettes.
- Craft each hanging separately, varying fringe length and knot patterns for subtle differences.
- Arrange on the wall with even spacing to create a cohesive mini gallery.
Natural driftwood hanger for rustic charm
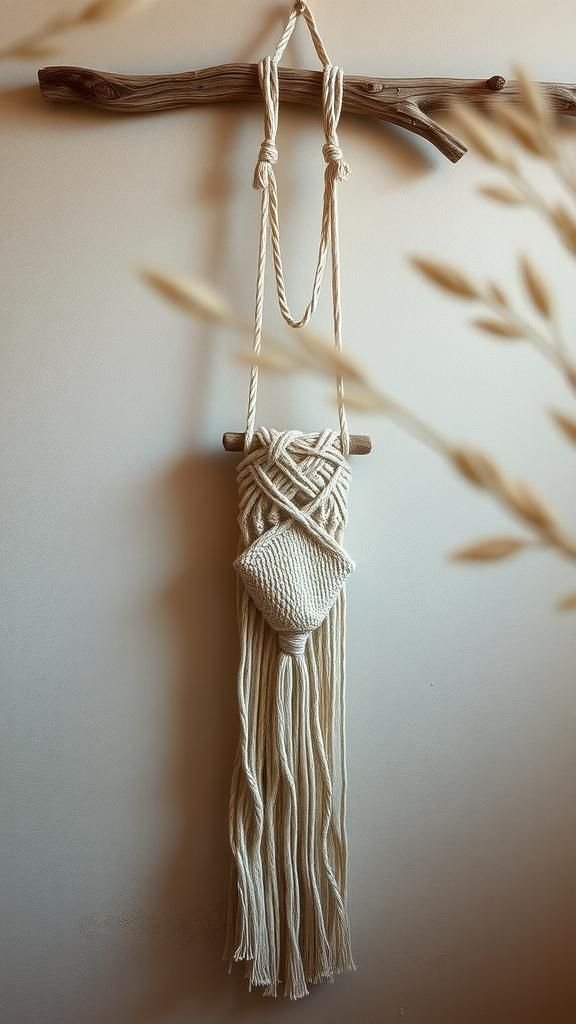
Finding a piece of driftwood changed the whole feeling of a simple hanging; the irregular shape and weathered grain lent a quiet story to the fibers. The wood’s pale, silvery tones and scars created a tactile contrast with the smooth cotton cords.
It felt as though the hanging had a history before it became art on the wall, which made the process feel more like a collaboration with found materials. Hung over a fireplace or a bookcase, the combination read as relaxed and thoughtfully worn-in.
Steps
- Select an attractive piece of driftwood and clean any loose debris.
- Attach cords to the driftwood with secure knots spaced to balance its irregular shape.
- Build the design below, allowing the driftwood’s natural curve to influence the overall silhouette.
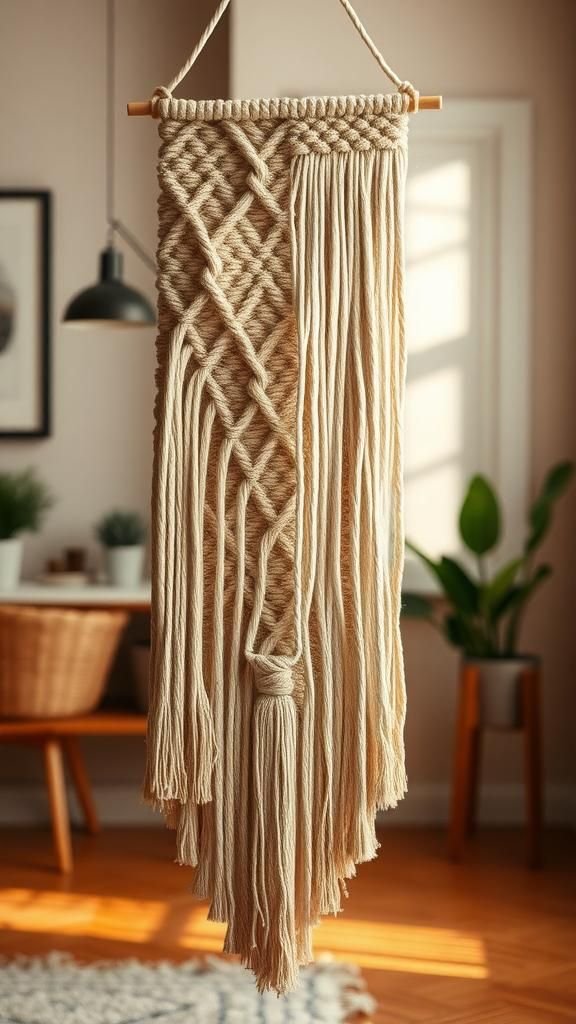
Textured diamond panel for geometric interest
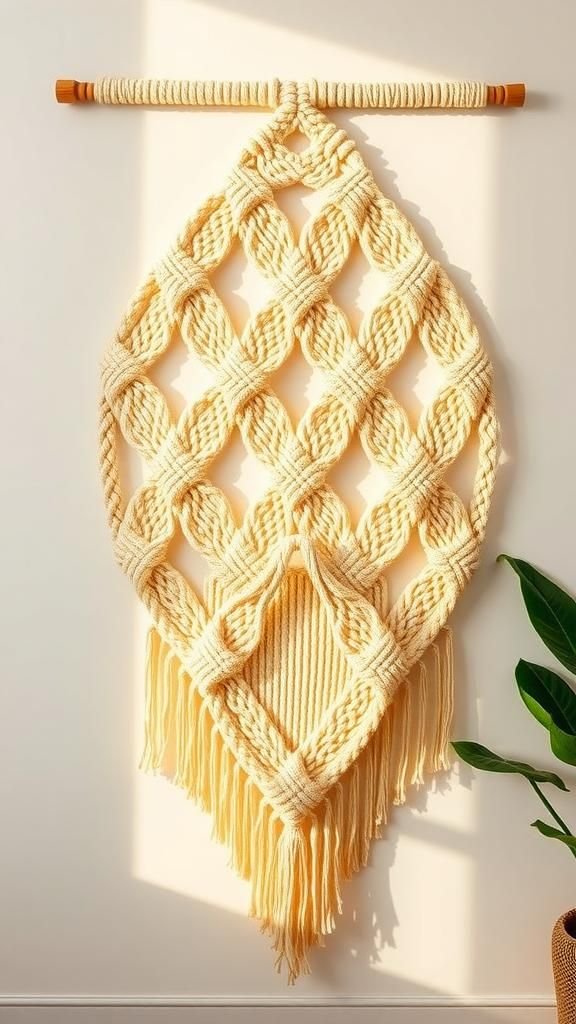
The diamond pattern introduced a quiet sense of order, little pockets of negative space framed by intentional knots. It felt satisfying to watch the geometry emerge, each intersection creating tiny shadows and a rhythm that the eye could follow.
The panel read like woven lace at a distance and like woven muscle up close. I enjoyed the way the geometry played with scale, feeling at home above a desk where it offered structure without strictness, softening the straight lines of furniture with its handmade pulse.
Steps
- Mount cords on a straight dowel and separate into sections for left and right knotting.
- Form alternating square knot sequences to create mirrored diagonal lines that meet as diamonds.
- Finish the bottom with a neat fringe or a trimmed V-shape to emphasize the diamond motif.
Half-moon fringe with layered textures and depth

The layered fringe in a half-moon silhouette felt unexpectedly sculptural, the staggered lengths giving depth and a gentle movement when the air shifted. Each layer caught light differently, creating a tiered glow that flirted with the wall’s tonal shifts.
The top looked neat and anchored while the lower layers softened into a feathery fall. Sitting beneath it, I noticed how shadows pooled near the wall and how the texture invited a hand to linger briefly, appreciating the softness and subtle irregularities.
Steps
- Create tiers by attaching cords at staggered lengths across a curved dowel.
- Knot short sections at the top tier and leave progressively longer cords for the lower tiers.
- Trim the bottom tier to a smooth curve to accentuate the half-moon silhouette.
Monochrome knotwork for subtle visual rhythm
Working in a single color brought attention to rhythm and texture rather than color contrasts. The knots formed a repeating language, a steady tempo that felt calm and meditative.
The monochrome palette allowed tiny variations in cord thickness and knot tightness to become focal points, turning craftsmanship into quiet ornament. The piece felt like a gentle pulse above a sofa, unifying other elements in the room through its restrained presence while still offering tactile intrigue on closer inspection.
Steps
- Select one color of macrame cord and cut uniform lengths for a harmonious look.
- Tie consistent knot patterns across the width to build a rhythmic, textured panel.
- Finish edges cleanly to maintain the monochrome emphasis and balanced silhouette.
Bohemian ladder-style arrangement with open spaces

The ladder-style layout introduced vertical movement, open rungs breathing space into the composition. Each open section allowed glimpses of wall color, turning negative space into an intentional element.
The rhythm of knotted rungs alternated with open gaps, creating a light, airy feeling rather than a dense textile. I appreciated how it lengthened a room visually, drawing the eye upward without closing off the wall, and how the gentle sway of the longer cords at the bottom added a playful, lived-in character.
Steps
- Attach pairs of cords to a straight dowel to form the vertical sides of the ladder.
- Create horizontal knot rungs at intervals, leaving open spaces between each rung for airiness.
- Finish the bottom with longer cords or a simple fringe to add gentle movement.
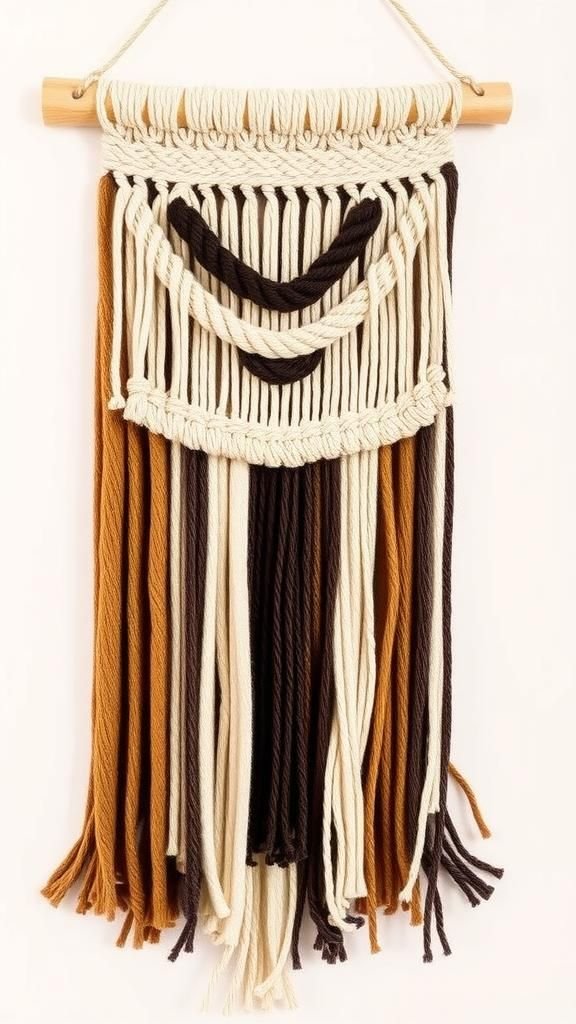
Tonal ombré yarn accents for soft color flow
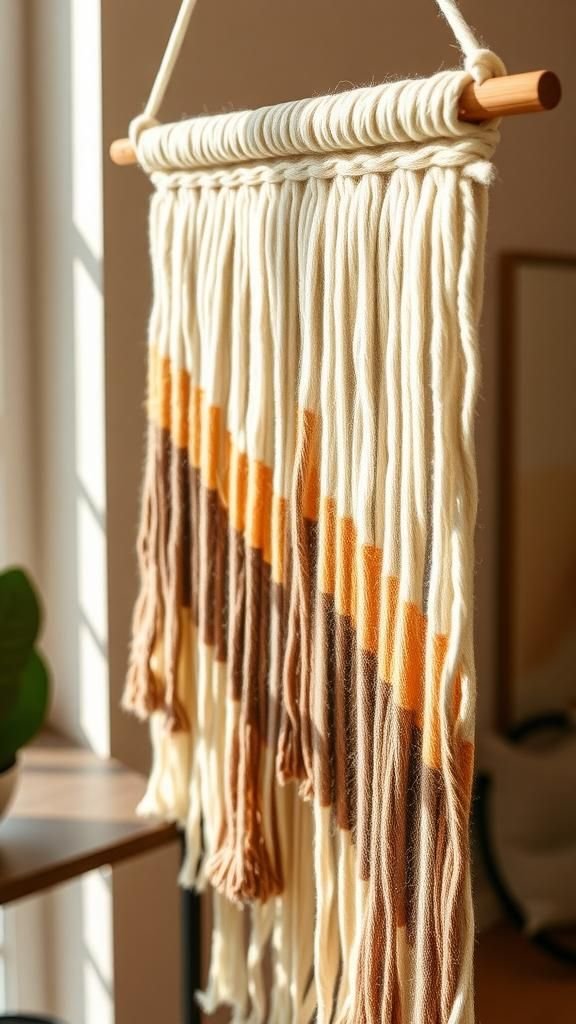
Introducing a tonal ombré yarn felt like a gentle sunrise threaded through the knots. The subtle color shift moved the eye along the piece, creating a calm gradient that felt natural rather than loud.
The yarn had a different hand than the cotton cord, lending tiny contrasts in sheen and thickness that made the texture richer. I liked how the ombré thread could be narrow and almost like a whisper or broader and more pronounced, depending on how much was woven into the design.
Steps
- Select an ombré yarn with a subtle gradient and combine it with natural cotton cords.
- Integrate the yarn through chosen knot patterns, allowing the gradient to flow vertically or diagonally.
- Secure ends neatly and blend with surrounding fringe to create a soft color transition.
Asymmetrical layout for an organic, relaxed look
An asymmetrical composition felt less formal and more personal, like a piece that had been curated over time. One side was dense with knots and fringe while the other breathed more openly, and that imbalance made the hanging feel alive.
It suggested a hand-led process rather than a ruler-led plan, which appealed to the way I decorate informally. The irregular outline cast charming, uneven shadows that changed with the light, giving the wall a sense of movement even when the room was still.
Steps
- Plan an offset layout by varying knot density and fringe length across the width.
- Build denser knot clusters on one side while leaving broader open areas on the other.
- Step back periodically to adjust balance until the composition feels naturally relaxed.
Wavy diagonal pattern that plays with movement
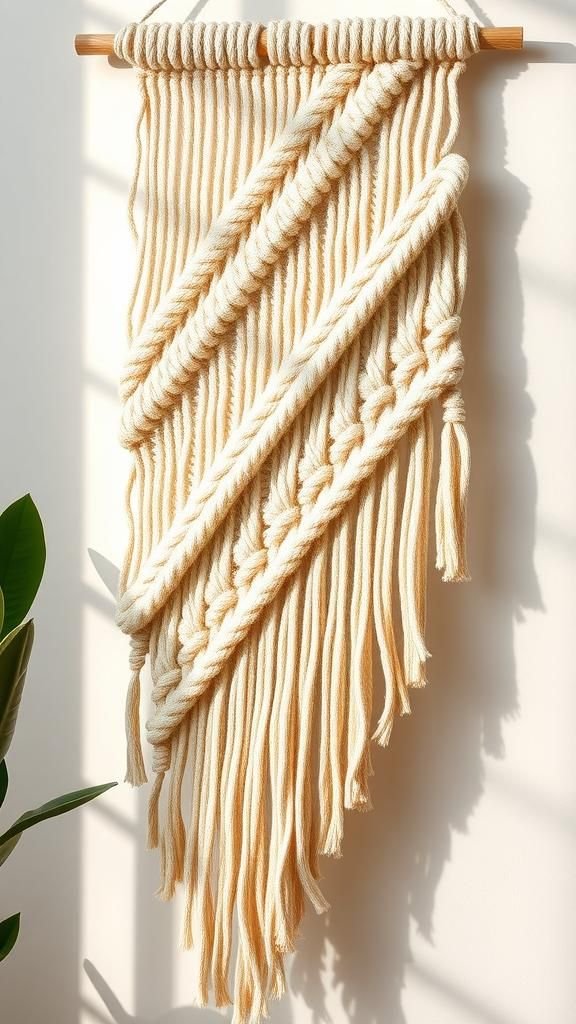
The diagonal waves introduced a lively sense of flow, lines that seemed to slide gently across the warp of cords. The pattern suggested movement without literal motion, a visual current that guided the gaze.
Touching the surface revealed slight ridges where knots changed direction, offering a pleasing tactile map. The waves were playful when viewed up close and elegantly graphic from a distance, making the piece suitable for a creative nook or an entryway where a touch of motion feels welcoming.
Steps
- Arrange cords on a dowel and separate into diagonal sections for alternating knot directions.
- Tie diagonal rows of square knots or half hitch knots to form undulating waves.
- Add a balanced fringe or angled trim to echo the diagonal motif.
Small plant pocket integrated into a hanging
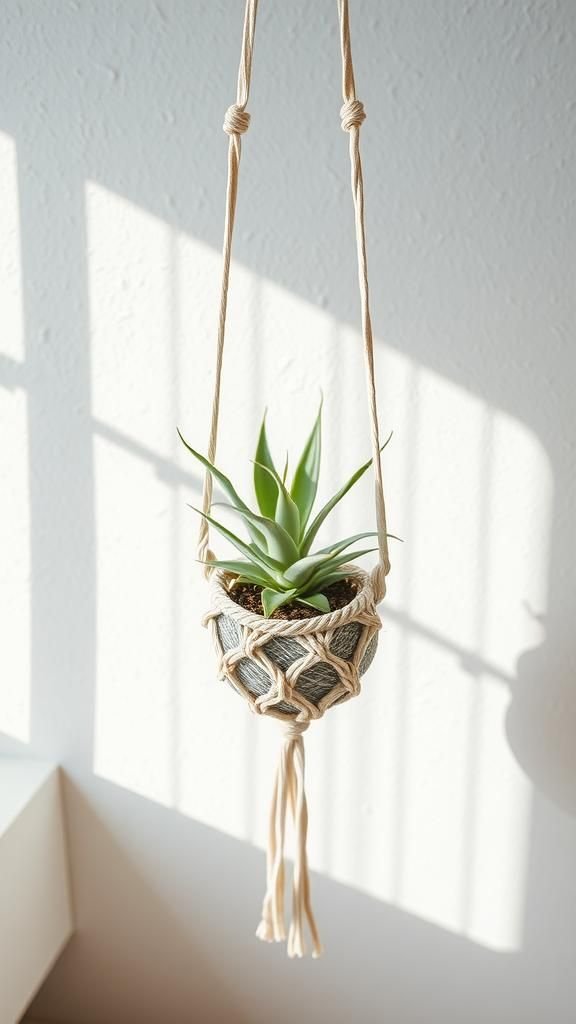
Adding a small pocket that could cradle a tiny plant brought an unexpected living element to the textile. The pocket sat like a soft nest, the cord creating a cozy cradle for a mossy pot or air plant.
The juxtaposition of living greenery against spun fibers felt refreshing, the plant’s life adding a slight unpredictability as leaves shifted and grew. I liked how the pocket encouraged interaction, a gentle tending ritual that made the wall hanging part of daily life rather than just decor.
Steps
- Construct a small pocket by weaving a dense knot section that creates an enclosed space near the base.
- Reinforce the pocket with tighter knots or an inner liner to support a lightweight pot.
- Place a small air plant or wrapped pot inside, ensuring it sits securely within the pocket.
Mixing thin and thick cords for layered interest
Combining thin and thick cords introduced a tactile dialogue, the fine strands teasing out delicate patterns while the thicker cords provided bold, structural lines. The contrast created visual layers that the eye enjoyed navigating, from airy lace-like sections to ropey, muscle-like knots.
Handling the combination felt playful, fingers alternating between the delicate and the substantial. Once hung, the piece read as richly textured but still approachable, the differences in scale making each knot type stand out without competing.
Steps
- Select a combination of thin and thick macrame cords and arrange them in alternating groups.
- Work knot patterns that highlight each cord type, allowing thin cords to form delicate decoration and thick cords to create structure.
- Balance the composition by spacing textures so the contrasts feel intentional and harmonious.
Rustic metal ring incorporated for modern contrast

A metal ring introduced a modern edge that contrasted with the soft cotton, an interplay between hard and soft that felt fresh. The cool, smooth circle framed a small area of knotwork and created a clear focal point within the hanging.
It added geometry and balance, the reflective surface catching scratchy highlights while the cord softened the metal’s presence. The combination read as contemporary yet warm, a small reminder that different materials can sit together comfortably and create visual interest without fuss.
Steps
- Choose a sturdy metal ring and position it as the central focal point on the dowel.
- Attach cords around the ring and knot patterns that integrate the ring into the overall design.
- Secure any loose ends neatly so the ring remains a clean, defined feature.
Feathered fringe with soft, brushed edges

The feathered fringe had a delicate, almost cloud-like quality, the brushed edges blurring the line between textile and fluff. Running a comb lightly through the ends produced a soft halo of fibers that caught the light in a flattering way.
The effect was gentle and intimate, inviting a closer look and a quiet moment of appreciation. Hung in a bedroom or a cozy reading nook, the feathered edges translated into a muted whisper against the wall, adding a hushed elegance to the space.
Steps
- Create a fringe by leaving longer cords at the bottom of the hanging.
- Carefully comb or tease the ends to separate fibers and create a feathered appearance.
- Trim sparingly to maintain a soft, airy silhouette while removing any uneven strands.
Vintage-inspired knot patterns with aged look
I was drawn to patterns that felt like they carried a past life, knots arranged in sequences that suggested hand-me-down craft and familiar rhythms. Fading the cord color slightly lent an aged character, as if the piece had been loved for years.
The knots themselves read like motifs from an older textile, comfortable and worn-in rather than slickly new. Displayed with a thrifted frame or aged wood, the hanging blended into a lived-in interior, offering a warm, slightly nostalgic presence.
Steps
- Select cords with a slightly faded or muted color for a vintage feel.
- Tie traditional knot patterns, focusing on repeated motifs that suggest age and history.
- Pair with an aged wooden dowel or reclaimed materials to enhance the vintage aesthetic.
Minimal linear piece for a Scandinavian touch
A streamlined linear hanging felt clean and deliberate, the simplicity echoing Scandinavian calm. Straight vertical lines and a restrained palette emphasized negative space, allowing the wall itself to become part of the composition.
The overall effect was quiet and modern, a subtle accent rather than a focal shout. I enjoyed the restraint, how small variations in tension and spacing became the piece’s personality, and how it complemented pale woods and soft linens without competing for attention.
Steps
- Choose a slim wooden dowel and cut long, even cords for a vertical linear look.
- Tie simple vertical knots or leave cords suspended for a minimalist silhouette.
- Trim ends evenly or leave raw to maintain the Scandinavian-inspired simplicity.
Mixed-media with wooden beads for earthy notes

Adding wooden beads introduced a playful punctuation to the textile, small warm beads threading through knots like little islands. The beads’ smooth surfaces contrasted with the matte cord, creating focal pops that invited the eye to hop along the design.
The sound of a bead shifting when the piece moved was faintly satisfying, a tiny percussive moment. The combination felt rustic and tactile, an approachable way to bring additional texture and personality to a hanging without overwhelming the softness of the fibers.
Steps
- Select wooden beads of varying sizes and thread them onto cords at planned intervals.
- Secure beads in place within knot patterns to prevent sliding.
- Balance bead placement across the piece so the visual weight feels even.