I still remember the afternoon I spent cutting paper tassels on the kitchen table, coffee cooling as friends talked about future plans. Those little bits of color and the way the string caught the light felt more meaningful than anything store-bought; making Graduation Party Decor Crafts turned a house into a memory-full place.
There is something quietly joyful about crafting decorations for a graduation.
Working on Graduation Party Decor Crafts offered chances to laugh over glue strands, arrange colors that matched a cap and gown, and watch a plain backyard turn warm and lively.
Mini diploma scroll party favors with ribbon

I love how small scroll favors feel like tiny promises. The texture of heavier paper, slightly rough at the edges, and the soft tug of a thin ribbon make each favor feel personal.
Guests often pick them up and smile, noticing the weight of the paper and the way the ribbon glints in the light. Placing a short, handwritten note inside adds warmth.
Setting a bunch out on a wooden tray turned a plain table into a little tableau of memories and quiet hope.
Steps
- Gather heavyweight paper, ribbon, small printed messages, and a bone folder or smooth edge for curling.
- Cut paper into rectangular strips and place a printed message near one end, then curl each strip gently into a scroll.
- Wrap a short length of ribbon around the center and tie a neat knot to hold the scroll closed.
- Arrange the scrolls in clusters on trays, nestled among floral sprigs or confetti for a soft display.
Tassel garland in school colors down the mantel
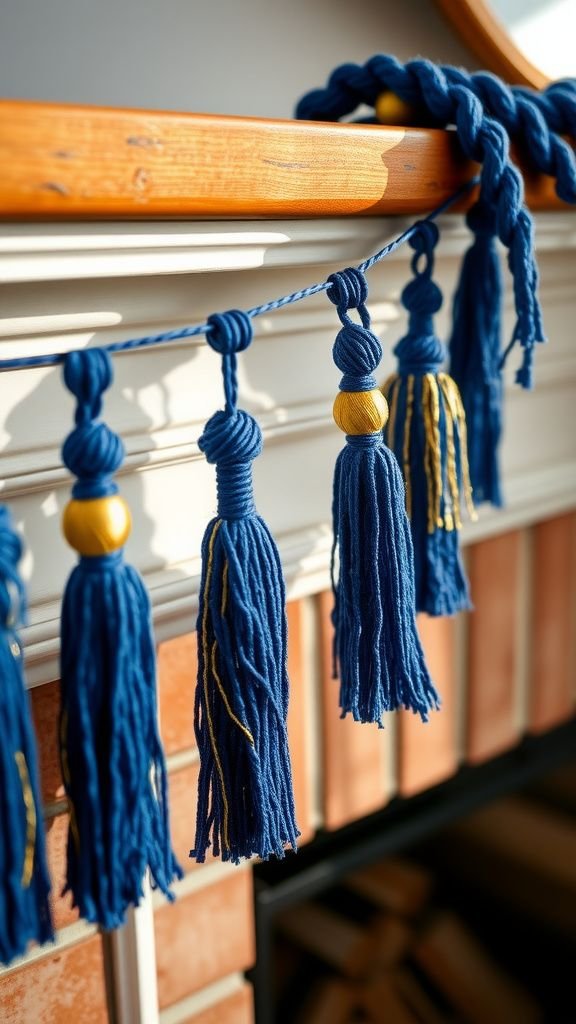
A tassel garland across a mantel brings a playful rhythm to a room. Yarn strands wobble gently with any air movement and catch light along their fringed edges.
I remember watching cousins reach up to brush them and laugh as fibers tickled fingers. The mix of matte yarn and occasional metallic thread gives a subtle contrast, and when draped at different heights the mantel takes on a layered, festive feel.
It made the fireplace look like a stage for small speeches and toasts.
Steps
- Select yarn in chosen colors and metallic thread for accents, then gather scissors and a ruler.
- Wrap yarn repeatedly around a template to create thick bundles, then tie near one end and remove from the template to form tassels.
- Thread a long cord through the tied ends of each tassel, spacing them evenly and adjusting for length.
- Drape the finished garland across the mantel and anchor each end with decorative weights or hooks.
Photo memory wall that tells a story

Creating a memory wall felt like arranging a timeline full of laughter and small triumphs. The photos varied from glossy to matte, and the mixture of candid shots and posed pictures gave the wall a lively pulse.
I noticed how guests lingered, pointing out a forgotten haircut or a shy smile. Little handwritten captions added personality, and layering some images slightly overlap produced a collage effect that seemed to invite conversation.
The wall became a magnet for shared recollections and soft smiles.
Steps
- Collect a selection of photos in mixed sizes and decide on a general layout on the floor or a large table.
- Mount photos on lightweight backing to create a cohesive look, then affix small adhesive tabs to the backs.
- Arrange the photos on the chosen wall, starting from a central focal point and expanding outward to balance the composition.
- Add handwritten captions or small decorative elements to highlight favorite moments.
Balloon tassel backdrop for fun photos
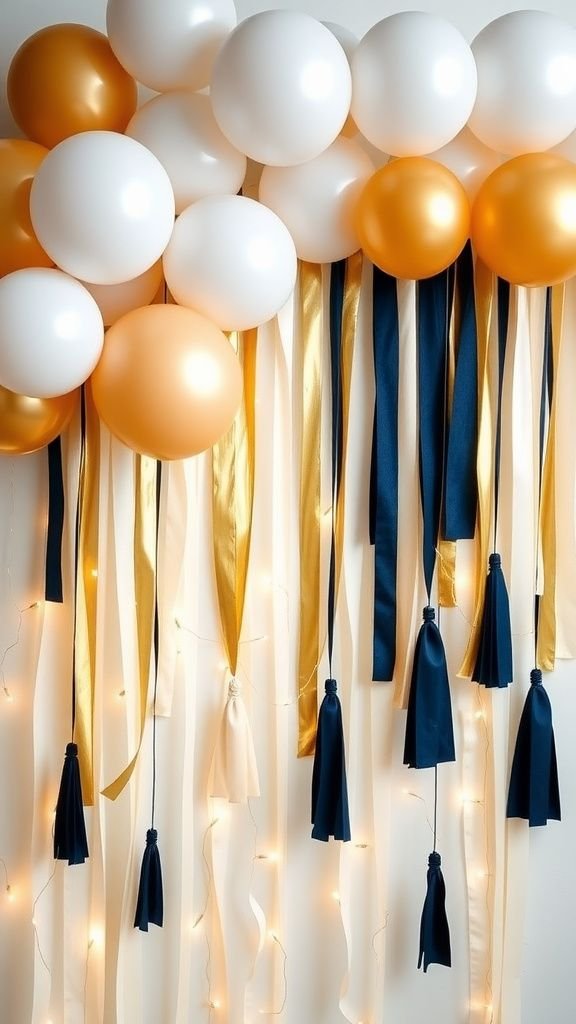
The balloon tassel backdrop made the photo corner feel celebratory without shouting. Shiny balloons reflected warm lights, while the tassels added texture and movement beneath them.
I enjoyed the way helium balloons bobbed gently, casting soft shadows against the tassels. People liked standing in front of the layered backdrop; it framed faces with color and playful fringe.
The combination of glossy surfaces and matte fibers created an appealing contrast that translated well in photos taken on phone cameras.
Steps
- Inflate balloons to a consistent size and arrange them into clusters to form the upper layer.
- Create long tassels from tissue or crepe paper and secure them to a horizontal support behind the balloons.
- Attach balloon clusters over the tassel layer, allowing tassels to hang freely for texture.
- Position the backdrop in the photo area and add soft string lights for a subtle glow.
Large class year marquee numbers for entryway
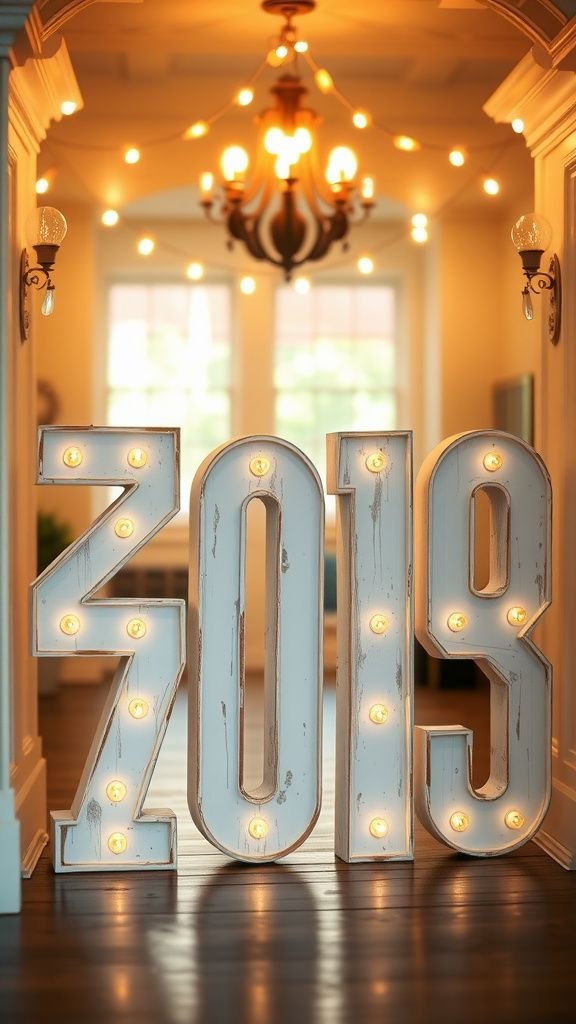
A set of large marquee numbers felt like a welcome sign for everyone arriving. The face of each number had a soft glow from warm bulbs, and the edges caught the light in a way that felt cinematic.
I recall standing back and admiring how the numbers anchored the entryway, making the space feel purposeful and festive. The texture of painted surfaces against the gleam of bulbs offered a pleasing mix, and guests tended to linger near the numbers for quick photos or to point out the graduating year.
Steps
- Trace large number templates onto sturdy board and cut out the shapes carefully.
- Paint or finish the front faces and allow drying time before arranging bulb placements.
- Drill or punch evenly spaced holes for bulbs and install warm LED bulbs into each hole.
- Mount the finished numbers on a freestanding frame or lean them against a decorated backdrop.
Clear balloons filled with confetti and sparkle inside
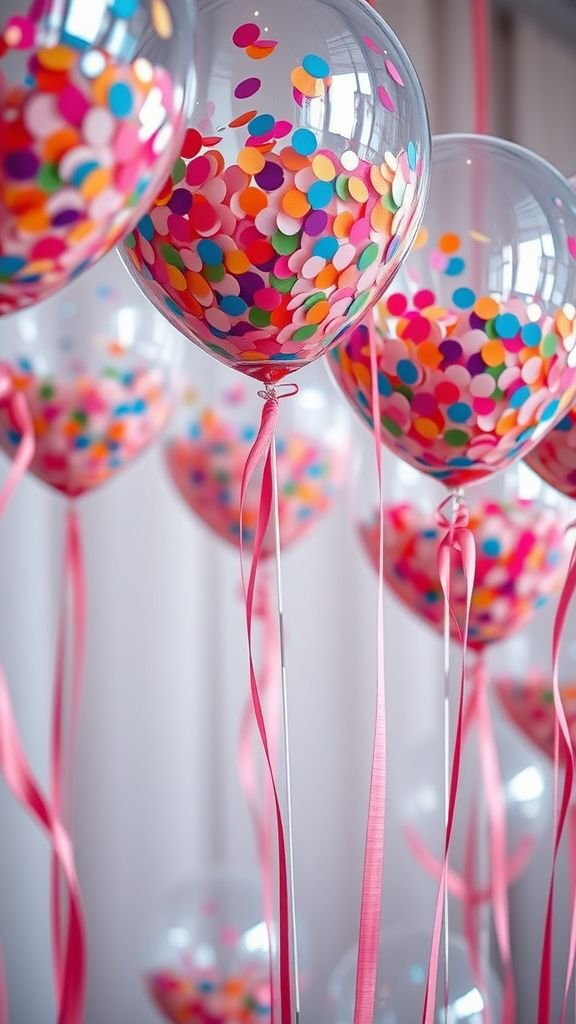
The clear confetti balloons had a playful, floating quality that made the ceiling feel alive. Confetti caught shards of light and fluttered gently with each tiny breeze, creating a soft glitter that shimmered without being loud.
I often found myself watching the confetti drift within the balloon, a small calming moment amid party bustle. Tying the balloon ribbons at varying lengths added visual depth, and the translucent shells reflected nearby colors, turning ordinary light into miniature bursts of color.
Steps
- Prepare clear round balloons and a collection of small confetti pieces in chosen colors.
- Insert confetti carefully into each balloon, then inflate slowly with helium for even distribution.
- Tie off balloons securely and add matching ribbon strands at varied lengths.
- Anchor balloons with small weights and scatter extra confetti on surrounding tables.
Mason jar centerpieces with twinkling fairy lights

Mason jar centerpieces with tiny lights felt both rustic and dreamy on dinner tables. The glass had a faint cool clarity and the lights inside sent a gentle, honeyed glow outward.
I liked the small contrasts: the cool glass, the warm LED glow, and the occasional sprig of eucalyptus or ribbon around the neck. Setting them in groups created pockets of light that invited conversation.
Guests often noticed how the glow softened faces, making long mealtime chats feel cozy and a bit magical.
Steps
- Place a short string of battery-powered fairy lights into each clean mason jar, positioning the battery pack toward the jar’s base.
- Add decorative filler such as dried florals, pebbles, or metallic confetti around the lights.
- Secure the jar lids loosely and wrap the necks with ribbon or twine for an added accent.
- Arrange jars in groupings down table centers and switch on lights shortly before guests arrive.
Napkin rings shaped like tiny graduation caps

Napkin rings shaped like miniature caps added a playful nod to the occasion and gave the table a cohesive identity. The matte black felt contrasted with little gold tassels, and the caps sat with a cozy gravity atop folded linens.
I enjoyed watching guests pick up a napkin and smile at the smallness of the detail. The texture of felt, the slight sheen of a metallic thread, and the careful balance when the cap rested on a linen fold made the place settings feel thoughtful without fuss.
Steps
- Cut small square pieces of stiffened felt and prepare matching small square bases for the cap tops.
- Affix the cap top to a short band that fits around folded napkins, securing edges neatly.
- Create tiny tassels and fasten them to the center of each cap top for an authentic look.
- Slide the bands around napkins and place at each setting for a cohesive table display.
Mini mortarboard cupcake toppers for dessert table

Tiny mortarboard toppers gave cupcakes an instant graduation personality. The contrast between dark square tops and bright frosting created a playful pop.
I remember guests picking a cupcake partly because of the topper, then pausing to admire the little cap perched like a hat. The toppers had a small, enjoyable weight when placed and the tassel added a delicate movement that looked charming in photos.
Lining them up on a simple cake stand turned the dessert table into a neat parade of tiny celebrations.
Steps
- Craft small square cap tops from sturdy cardstock and prepare short toothpick stems for insertion.
- Affix the cap top to each stem and add tiny tassels to the center point of the cap.
- Insert a topper into each frosted cupcake, spacing them evenly across the dessert stand.
- Arrange cupcakes with coordinating decorations for a unified look.
Personalized champagne bottle labels for toasts

Personalized bottle labels felt like a small, elegant detail that tied drinks to the celebration. The paper finish and custom lettering gave bottles a friendly, curated appearance.
I found the labels pleasant to handle; the slight texture of quality paper and the warm ink made each bottle feel like a keepsake. Guests tended to admire the typography and the way the label matched other table elements.
Lined up on an ice bucket, the labeled bottles looked like a coordinated collection, hinting at planned toasts and shared moments.
Steps
- Design a custom label layout with graduate’s name, year, and decorative elements, then print on adhesive-backed paper.
- Trim the labels to size and peel off backing carefully before aligning on chilled bottles.
- Smooth the labels onto each bottle to avoid bubbles and ensure straight placement.
- Chill bottles and display them in a decorative ice-filled container prior to serving.
Memory jar where guests place written notes
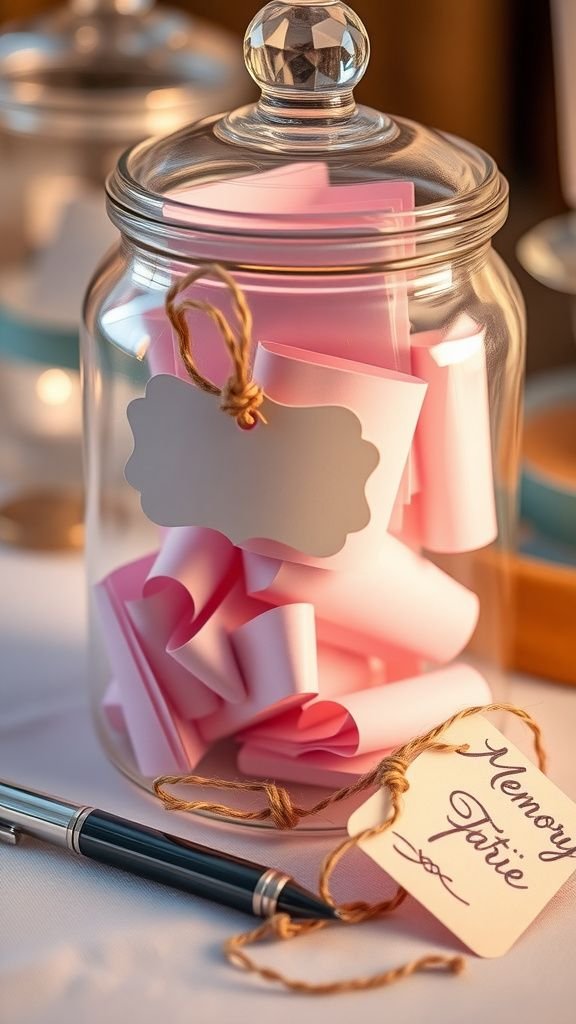
A memory jar invites quiet moments amid lively chatter. I watched fingers slide small folded notes into the jar and noticed how each slip bent gently when it met others, forming a layered interior like a paper garden.
The jar’s rim sometimes showed a fingerprint or two, and the collected notes gave a satisfying rustle when shaken. Reading a few aloud later felt intimate and warm.
The jar sat on a table with a pen and pretty cards nearby, which encouraged even shy visitors to contribute a short message.
Steps
- Provide a clean jar with a wide mouth, a stack of small cards, and pens on a nearby table.
- Encourage guests to write a short memory or message and fold their cards before dropping them into the jar.
- Seal the jar with a decorative lid or ribbon and label the jar with a simple tag.
- Open the jar after the event to read messages and share highlights with the graduate.
String photo lights for a cozy evening display

Stringing photos along tiny lights transformed the backyard into a lantern-lined story lane. The gentle glow from each bulb warmed faces in the photos and the wire threaded a soft path through the images.
I liked how ambient light softened the edges of photos and invited people to step closer and peer. The mixture of glossy and matte prints created a layered visual effect, and the line of lights gave a rhythmic beat to the walkway.
Guests paused beneath the photos, smiling at captured moments bathed in warm light.
Steps
- Prepare a string of battery-powered lights with clips or small clamps and select favorite photos in a mix of sizes.
- Clip photos onto the lit string at regular intervals, balancing heavier prints with lighter ones.
- Hang the lighted photo string along a fence, across a pergola, or indoors along a wall.
- Activate the lights at dusk for a soft, inviting atmosphere.
Chalkboard sign with hand-lettered schedule
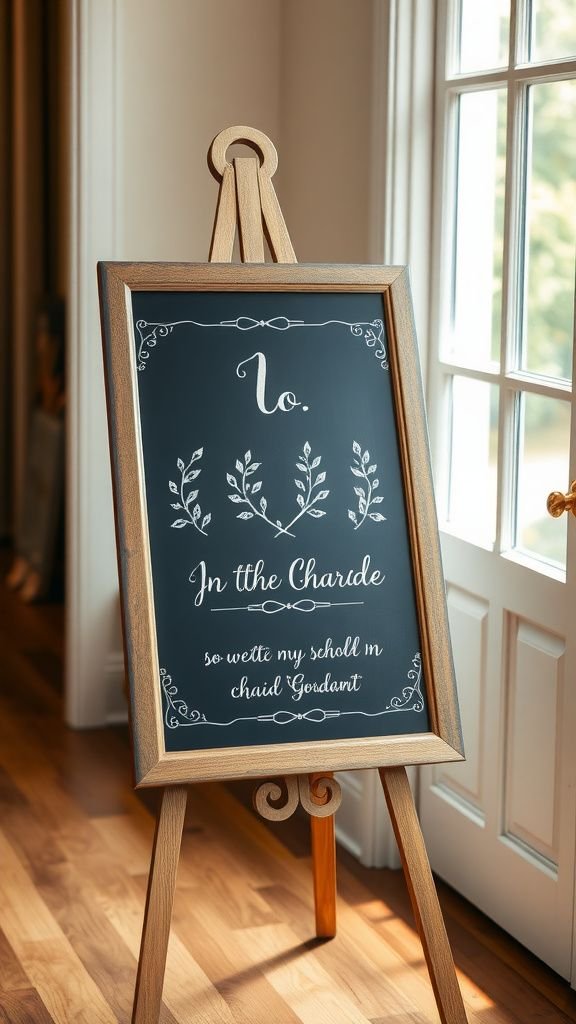
A hand-lettered chalkboard sign added personality and a focal point by the welcome table. The matte black surface showed chalk strokes and smudges in a way that felt handcrafted and friendly.
I always enjoyed the slight smell of chalk dust in the air and the look of varying line widths in the letters. Placed on an easel, the sign guided attention without feeling rigid.
The balance of playful lettering and neat organization made it approachable, and guests often paused to read the day’s flow or to laugh at small handwritten notes.
Steps
- Position a framed chalkboard on an easel and choose chalk markers or traditional chalk for lettering.
- Lightly sketch the layout with faint lines, then write headings and decorative flourishes with confident strokes.
- Add small icons or vines to fill empty spaces and erase any stray marks for a clean finish.
- Place the sign prominently so guests can reference the schedule or welcome message.
Tissue pom-pom ceiling clouds for overhead color
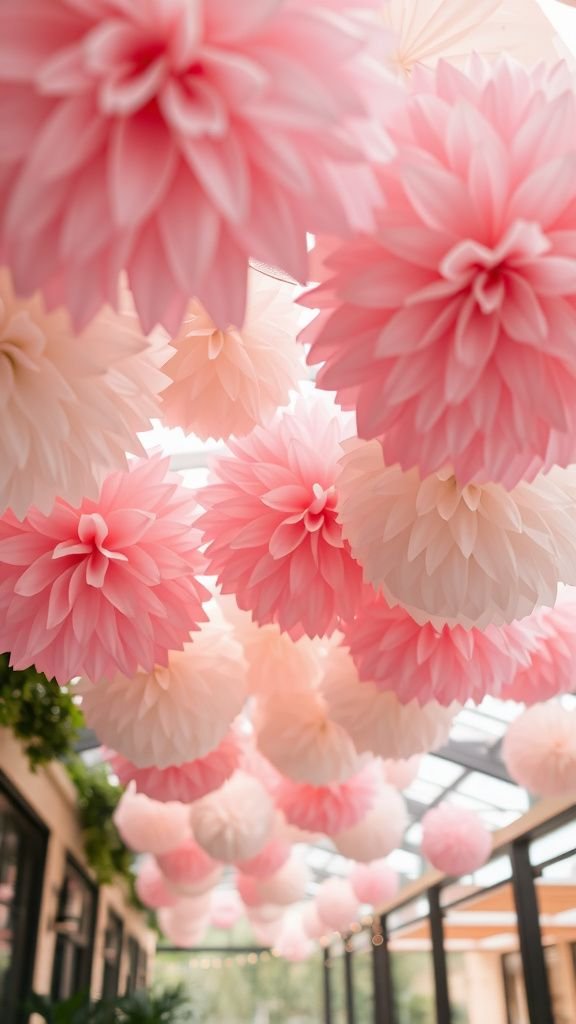
Hanging tissue pom-poms overhead turned the ceiling into a soft canopy. The puffy clusters had a featherlike lightness and the layered tissue created subtle shadows within each bloom.
I remember looking up and feeling like the space had slipped into something whimsical and calm. Guests often commented on how the colors softened the harshness of outdoor lights, and the gentle swish when a breeze passed through added a soothing rhythm.
Grouping pom-poms at different heights gave a sense of depth that felt cozy and intentional.
Steps
- Fluff tissue sheets into round pom-pom shapes and secure centers with wire or string before trimming edges for fullness.
- Attach thin threads at the pom-pom centers and vary the hanging lengths for depth.
- Suspend the pom-poms from overhead beams, pergolas, or a lightweight frame to create a canopy effect.
- Adjust spacing and heights to achieve a balanced and whimsical arrangement.
Cardstock cupcake toppers with graduate motifs

Cardstock toppers felt delightfully tangible held between fingers, offering crisp edges and bold silhouettes atop frosted cupcakes. The paper had a satisfying stiffness and the printed motifs—tiny caps, stars, and numbers—read clearly against creamy icing.
I noticed how kids loved pointing at their favorite designs while adults appreciated the simple graphic style. Arranged on a tiered stand, the cupcakes became a tidy display of color and shape.
The toppers added a playful identity to each dessert without being overly fussy.
Steps
- Design toppers on cardstock with motifs that match the party theme and cut out shapes carefully.
- Mount each cardstock shape onto a short toothpick or paper straw and secure the backing.
- Insert a topper into each cupcake, spacing stands evenly across the dessert display.
- Optionally add a dusting of edible glitter around the base for a subtle shimmer.
Chair sashes labeled for family and friends

Adding sashes to chairs brought a quiet air of organization and thoughtfulness. The fabric ribbon moved gently when a chair was scooted back, and names written in calligraphy added a personal touch.
I enjoyed seeing guests find their labeled spot and settling in, the fabric catching the light at different angles. The tactile smoothness of satin or the rustic weave of burlap changed the mood of the seating area.
Paired with small florals or a name card, the sashes made each place feel chosen and welcomed.
Steps
- Cut lengths of sash fabric to fit around chair backs, then press lightly to smooth creases.
- Hand-letter names or print labels on cardstock and affix to the center of each sash.
- Drape the sashes over chair backs and tie loose knots or bows for a polished look.
- Add a small floral sprig or ribbon accent to reinforce the seating designation.
Mini gift boxes shaped like mortarboards

Mortarboard gift boxes felt like tiny celebratory packages, neat and satisfying to open. The flat tops had a crisp edge and the little tassel hinted at ceremony.
I liked how placing a sweet treat inside made each box feel both ornamental and practical. The contrast between the dark top and lighter base created a pleasing silhouette when lined up on a tray.
Guests enjoyed taking one as they passed and the visual rhythm of identical shapes added structure to the gift table.
Steps
- Score and fold cardstock into small box bases with square lids sized to mimic mortarboard proportions.
- Attach lids to bases and affix a short tassel at the center point of each lid for authenticity.
- Fill boxes with small treats or keepsakes and close securely before arranging them on a tray.
- Add small name tags or stickers for a personalized touch at each guest’s place.
Table runner made from old programs and photos
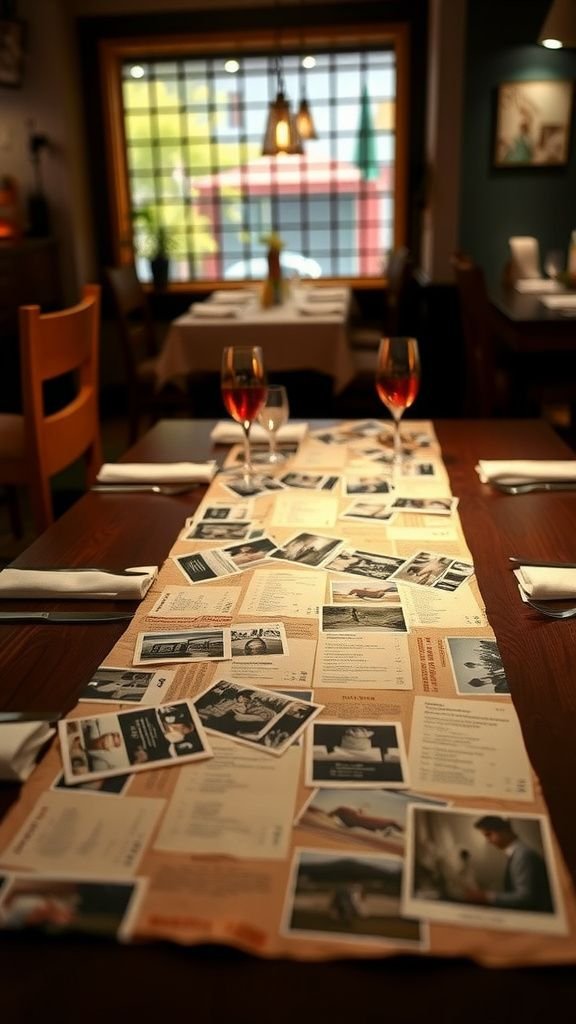
A runner created from old programs and photographs turned a table into a textured museum of memories. Layers of paper overlapped with corners peeking out, and the different finishes created a tactile collage.
I remember the soft rustle when someone brushed the table and how printed schedules and candid snapshots sat side by side, telling a layered story. The mix of typefaces, ink tones, and image edges made for an intriguing surface that invited hands to linger and eyes to trace familiar moments down the table’s length.
Steps
- Lay out programs and photos in a lengthwise arrangement on a long strip of kraft paper or fabric backing to preview the pattern.
- Adhere each piece to the backing with double-sided adhesive, overlapping edges to create a seamless runner.
- Trim the runner edges neatly and add decorative trim or tassels at the ends if desired.
- Place the finished runner along the center of the table and top with candles or small centerpieces.
Tassel wreath for the front door welcome

A tassel wreath made an inviting welcome that felt handcrafted and cheerful. The fringe moved softly in any breeze and the variety of textures—satin yarn, metallic threads, and cotton—created a lively halo effect.
I recall the subtle surprise on guests’ faces when they reached the door; the wreath set a friendly tone before anyone stepped inside. The circular shape framed the entry like a warm embrace, and the layered colors offered an immediate hint of the party inside.
Steps
- Prepare a foam or wire wreath base and create tassels from selected yarns or tissue paper.
- Secure tassels around the wreath base, arranging colors to create a balanced, circular pattern.
- Fill any visible gaps with smaller tassels or decorative sprigs for fullness.
- Hang the wreath on the front door with a sturdy ribbon or hook and adjust for symmetry.
Photo booth frame prop with playful accents
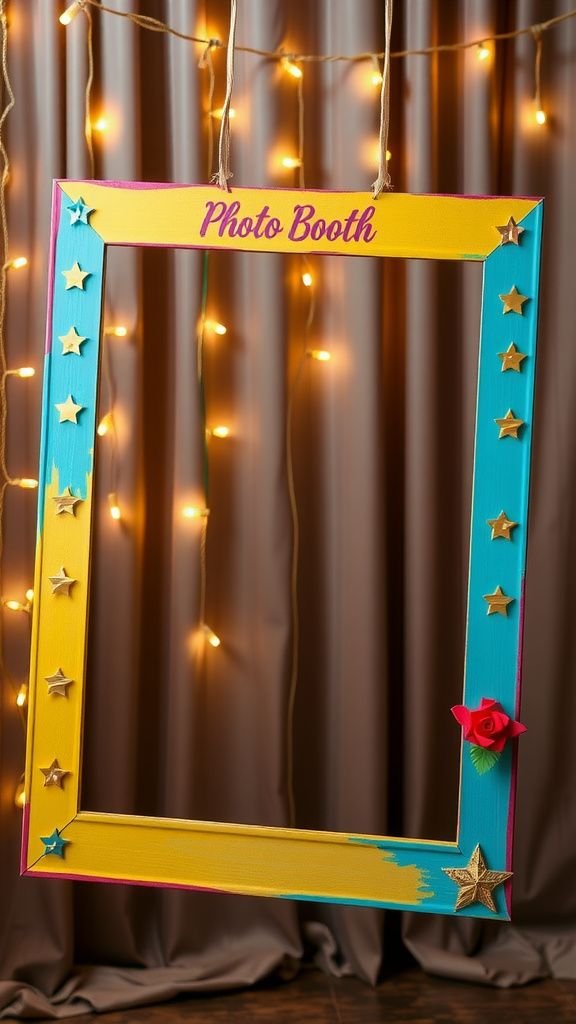
A large photo frame prop invited goofy poses and instant memories. The frame’s painted edges had a slightly worn look that felt approachable, and playful accents like stars or mini caps added whimsy.
I loved watching guests lean in and try different angles, the frame giving each photo a theatrical feel. Placing the prop near a well-lit corner and layering it with small props made for lively images.
The tactile surface and bold outline encouraged people to interact and laugh in front of the lens.
Steps
- Cut a large rectangular frame from sturdy foam board and finish the front with paint or decorative paper.
- Add playful accents such as die-cut shapes, mini caps, or stickers to the frame’s border.
- Mount the frame on a lightweight stand or have it lean against a decorated wall for support.
- Provide a small box of handheld props nearby for guests to accessorize their photos.
Layered paper banner with mixed textures and letters

A layered paper banner combined smooth cardstock, vellum, and metallic accents for a tactile headline across the party space. The letters had crisp edges and the background layers cast delicate shadows when lit.
I enjoyed how the banner moved slightly with air currents, creating a soft, living effect above the crowd. Guests tended to look up and smile, catching the banner’s message as they walked by.
The blend of matte and shiny surfaces felt thoughtfully balanced, offering a simple but classy focal point.
Steps
- Cut banner shapes from mixed papers and die-cut or hand-cut lettering for the message.
- Layer contrasting papers behind each letter to create depth and adhere them securely.
- Thread the banner shapes onto a strong cord or ribbon and space evenly.
- Hang the banner across a wall, entryway, or above the dessert table for visibility.