I love the hush of winter walks when pinecones appear along the path, dusted like little secrets. Those quiet finds have a way of turning into small home projects that feel personal and warm, which led me into Winter Pinecone Home Decor Crafts with a handful of simple afternoons and a mug of tea.
Over many short sessions I tried ideas that brightened a mantel and softened a hallway shelf.
Each Winter Pinecone Home Decor Crafts idea here grew from playing with texture, light, and scent, and from noticing how a tiny natural thing can change the mood of a room.
Frosted Pinecone Garland for the Mantel

I remember draping a string of frost-kissed cones across my mantel while a kettle steamed nearby. The cones carried a subtle crunch when handled, and the white dust settled into crevices so they seemed borrowed from a cold morning.
Warm fairy lights behind the garland threw soft amber points through the gaps, making the whole display feel like a quiet evening caught between hearth warmth and winter hush. Neighbors lingered when they came by, commenting on how the arrangement felt both organic and gentle, a simple pleasure during short daylight hours.
Steps
- Gather clean, dry pinecones and a length of thin twine long enough for the mantel span.
- Attach cones along the twine at even intervals by threading the twine through natural gaps or tying small loops around the base of each cone.
- Add a light dusting of faux snow or white craft powder on visible tips for a frosted look.
- Weave a strand of warm white fairy lights behind the garland and hang the piece across the mantel.
Tiny Pinecone Ornaments with Shimmering Touches

Stringing small cones onto slender hooks became a quiet afternoon ritual with holiday music low in the background. The cones felt brittle but comforting in the palm, each scale catching a hint of shimmer where light hit.
A touch of warmth from the tree lights made the shimmer glow like private little embers, and the contrast between natural brown and a faint metallic sheen was unexpectedly pleasing. Hanging a cluster of these ornaments near a window created tiny moving shadows on the curtains, a small show that made the evenings feel fuller.
Steps
- Select a batch of small, dry pinecones and attach miniature ornament hooks to the tops by slipping hooks into the cone eye or base.
- Apply a light coating of metallic paint or gilding on tips for a subtle sheen and allow them to dry fully.
- Tie thin ribbon or twine to each hook and hang the ornaments from branches at varying heights.
- Position a few near a window so gentle drafts cause faint movement and shadow play.
Gold-Leaf Pinecones for Subtle Holiday Glam

There was a quiet thrill the first time a cone caught a sliver of warm gold and reflected it back like a small treasure. The contrast of matte brown and thin metallic accents felt grown-up yet homey, like wearing a simple sweater with a single brooch.
When grouped in a shallow bowl, the light bounced around the gold tips and the whole bowl read like a little festival on the coffee table. Guests picked them up slowly, delighted by the unexpected brightness, and they brought a soft shimmer without shouting for attention.
Steps
- Choose firm pinecones and brush away loose debris so surfaces are clean and dry.
- Apply a thin adhesive to selected tips or edges, then press small pieces of gold leaf gently onto the tacky areas.
- Use a soft brush to remove excess gold leaf from crevices and seal with a light clear spray if desired.
- Arrange the finished cones in a shallow ceramic or glass bowl for a centerpiece.
Pinecone Wreath with Mixed Natural Texture

I found a sense of balance in a wreath that combined cones with sprigs of evergreen and dried seed pods. The roughness of cone scales sat next to the soft needles, and the circular form felt complete without fuss.
Hanging on the door, the wreath offered a tactile welcome that made me smile when coming home with cold cheeks. Tiny contrasts like glossy berries or a strip of linen ribbon added character, and the whole piece read as handcrafted and calm, a reminder of walks and the quiet shapes found along the way.
Steps
- Lay out a foam or grapevine wreath base and gather pinecones, evergreen sprigs, and dried seed pods.
- Secure each pinecone to the base by inserting a short wire through its bottom and anchoring into the wreath material.
- Tuck evergreen sprigs and seed pods between cones, wiring or tucking stems into the wreath structure.
- Add a small length of linen ribbon for hanging and adjust elements until the look feels balanced.
Mini Pinecone Trees on Wooden Bases

Tucking little cones into a tiny wooden stump felt like building a tiny forest for winter evenings. The cones stood upright like miniature conifers, and the grain of the wood base added earthy warmth.
Placing a trio of these minis on the side table created a small landscape that encouraged slow looks and soft conversation. The tactile contrast between smooth sanded wood and rugged cone scales invited fingers to trace the forms, and at night the group cast playful shadows that felt almost like company.
Steps
- Select small, narrow pinecones and sand a few wooden disks to create stable bases.
- Drill a shallow hole into each wooden base to accept the cone’s bottom for stable placement.
- Insert cone bottoms into the holes and secure with adhesive if a firmer hold is desired.
- Group multiple mini trees together on a tray or shelf to form a small vignette.
Pinecone Candle Rings for Cozy Evenings

A candle surrounded by a ring of small cones made the flame feel like the heart of a little forest clearing. The cones softened the glow and added organic rhythm around the vessel, and the scent of resin faintly rose on warm nights.
Placing the ring on a low tray brought the whole display closer to the table’s surface, and reflections from the candlelight picked out tiny highlights on the cone tips. It became a quiet centerpiece that invited long conversations over tea and a sense of shelter in the longer nights.
Steps
- Arrange small pinecones in a circular pattern around a low pillar candle on a heatproof tray.
- Use shorter cones or trim the bottoms so the candle sits slightly higher than the cone tips.
- Secure cones in place with small dots of adhesive if needed, leaving space for safe airflow.
- Light the candle while keeping the ring a safe distance from flammable materials and monitor the flame.
Pinecone Place Card Holders for Winter Tables

Placing a cone at each place setting felt like offering a small piece of the season to every guest. The cones sat low on plates and held cards with a gentle tilt, their rough scales contrasting with crisp napkins and polished cutlery.
The natural brown tones tied together linen runners and muted ceramics, and when soft candlelight touched the cones a comfortable hush settled over the table. People lingered at the start of the meal, commenting on how the touch of nature made the gathering feel quieter and more personal.
Steps
- Choose medium-sized pinecones and place each one near a dinner plate with its base resting stable on the table.
- Create a small slit in the top of each cone or tuck a tented place card between the scales so it stands upright.
- Arrange matching cards and adjust the angle for readability from the chair.
- Scatter a few tiny evergreen sprigs along the table for added texture and continuity.
Cinnamon-Scented Pinecone Potpourri Bowls for Entryway Table

A shallow bowl filled with cones warmed by cinnamon and clove felt like a welcome in olfactory form. The aroma rose when hands brushed past the bowl, and that spicy sweetness mixed with pine resin to make the hallway smell like a memory.
Texturally, the cones provided a pleasing contrast to smooth ceramic and polished wood surfaces. The bowl became a small ritual spot where keys and gloves rested while the scent lingered, a soft herald for anyone stepping inside from cold air and brisk streets.
Steps
- Place clean pinecones in a decorative bowl along with whole cinnamon sticks and a few dried orange slices.
- Add a few drops of cinnamon or clove essential oil onto some cone scales to reinforce the scent.
- Toss in a handful of dried star anise or allspice for visual interest and layered aroma.
- Position the bowl on the entryway table where passing breezes can gently release the fragrance.
Pinecone Luminaries with Soft Tea Lights

Watching small flames wink through gaps between cone scales created a gentle, moving pattern on nearby surfaces. The cones seemed to amplify the candlelight, turning it into a soft, flickering mosaic.
I liked how the glow felt private and measured, not overwhelming, and how the cones’ shadows stretched like tiny trees across a coffee table. Placing the luminaries on a tray with reflective surfaces increased the cozy feel, and the whole grouping became perfect for late-night reading or a quiet cup of something warm.
Steps
- Arrange medium pinecones around the edge of a shallow heatproof dish, leaving a central space for a tea light or small votive.
- Ensure cones are stable and not leaning too close to the flame; reposition as needed for safe clearance.
- Light the tea light and observe from a safe distance to confirm steady placement and safe airflow.
- Place the dish on a non-flammable surface and never leave candles unattended while lit.
Snow-Dusted Pinecone Centerpiece on Tray and Evergreens

I recall layering cones and sprigs of evergreen on a low tray, the whole grouping looking like a tiny winter knot when finished. A light dusting of faux snow caught in the scales and along needle tips, lending a chilly stillness amid indoor warmth.
The tray collected pine fragments and seed scales like little evidence of the walk from which the cones came. Placed on the coffee table, it invited soft attention and felt like a bridge between outside and inside, a small reminder of crisp air and quiet paths.
Steps
- Choose a shallow wooden or metal tray and arrange pinecones of differing sizes along with evergreen sprigs.
- Sprinkle a fine layer of faux snow or white craft dust over cones and greenery for a frosted appearance.
- Position the centerpiece on a central table and add a few pillar candles or glass votives around the tray for mood.
- Gently tap the tray outdoors or over a bowl to remove loose debris after the season ends.
Pinecone Napkin Rings for Intimate Dinners
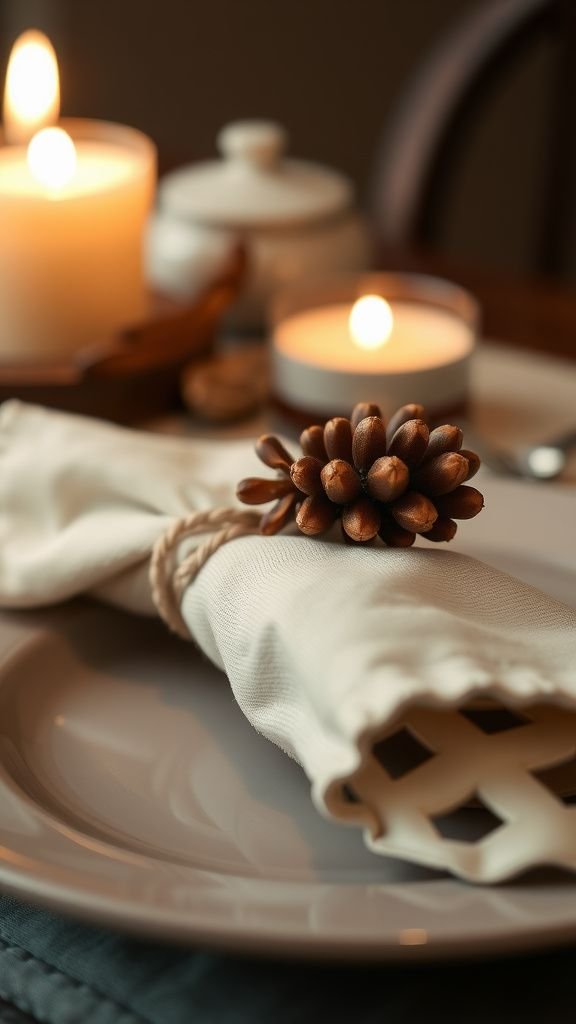
Tucking a cone into napkin folds felt like giving each guest a tiny keepsake. The texture of the cone against linen created a pleasing contrast that made place settings feel thought-out without fuss.
Candlelight coaxed out subtle shine on the scales, and the weight of the cone helped napkins sit in a relaxed, lived-in way. Conversations started slowly as forks touched plates, and the overall impression was one of warmth and ease, a table that invited people to linger without hurry.
Steps
- Select small, compact pinecones and short lengths of ribbon or twine for wrapping around napkins.
- Tie the ribbon around a neatly folded napkin and tuck the base of the cone beneath the knot so it sits securely.
- Trim ribbon ends and adjust the cone position so the guest can easily see the place setting name if present.
- Scatter a few extra cones down the table runner for cohesion.
Rustic Pinecone Mirror Frame Accent Piece Above The Mantle

Leaning a mirror framed with cones against a wall brought a touch of woodland charm to my living room. The reflection softened by cone clusters gave the space a layered feeling, where texture and light met.
Mirrors caught snippets of the room and the cones framed those glimpses with an earthy border. From different angles the grouping looked different, sometimes crisp, other times shadowed and mysterious.
It felt less like decoration and more like a found object that belonged in the room, carrying traces of outdoor walks into everyday view.
Steps
- Gather a plain mirror and a collection of medium to large pinecones for framing.
- Affix cones around the mirror edge with a strong adhesive, placing them in an overlapping pattern for depth.
- Allow adhesive to cure fully, then lean the mirror against the wall or hang securely using appropriate hardware.
- Position lighting to highlight cone textures without producing harsh glare on the mirror surface.
Mini Pinecone Terrariums with Mossy Bases
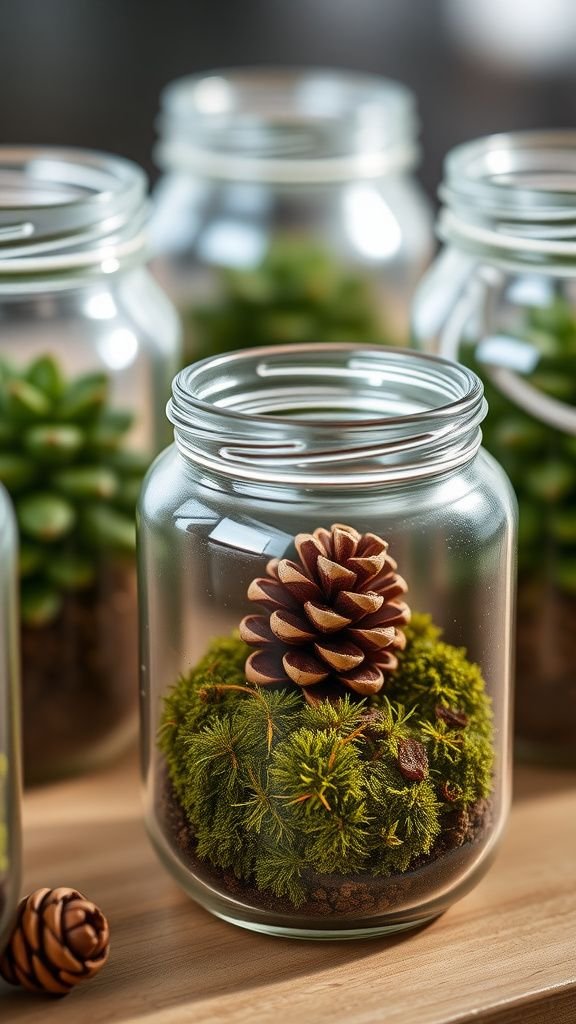
A small glass jar holding a cone and a bed of soft moss felt like a contained winter scene. The cone appeared as a small mountain against the green, and condensation sometimes created a misty effect that read like early morning.
These tiny terrariums gave quiet corners a living touch without needing much care, and they were fun to arrange in groups at different heights. The mix of glass coolness, soft moss texture, and rigid cone scales provided a pleasing trio of sensations whenever one walked by.
Steps
- Select clear glass jars and line the bottom with a thin layer of pebbles for drainage.
- Add a layer of activated charcoal if desired, then a layer of potting soil topped with preserved or live moss.
- Nestle a small pinecone into the moss and press gently so it sits upright and stable.
- Close the jar loosely to allow occasional air exchange, and place the terrarium in indirect light.
Driftwood and Pinecone Wall Hanging Display

Combining an aged piece of driftwood with hanging cones felt like carrying a shoreline memory indoors. The driftwood’s pale grain complemented the rich brown of cone scales, and gentle sway when a draft passed made the arrangement feel alive.
It hung by a simple cord, casting long, curious shadows on the wall as the day moved. The piece read as quiet and reflective, a little sculpture that brought a coastal hush to a hallway or bedroom, inviting slow looks and momentary daydreams.
Steps
- Find a length of weathered driftwood with a pleasing shape and secure a strong cord to each end for hanging.
- Attach pinecones to various lengths of twine and knot them so they hang at staggered heights from the driftwood.
- Balance the arrangement visually by adjusting hanging points before finalizing knots.
- Hang the driftwood display on a wall hook and allow slight movement for natural shadow play.
Pinecone Mobile that Sways in Breezes

A mobile made of cones and thin branches turned small drafts into a slow, gentle performance. The cones rotated and whispered against one another, producing faint clacks that felt like a weathered lullaby.
The overall silhouette changed as sunlight moved, throwing shifting shadows that animated the ceiling. Watching it became a tiny ritual on quiet afternoons, a reminder of outside motion even when the windows were closed.
The mobile read as handmade and slightly imperfect in the best way, which made it feel personal and unhurried.
Steps
- Select a lightweight branch as the mobile’s top and prepare varying lengths of twine with pinecones tied at the ends.
- Tie the twine pieces to the branch at staggered points so cones hang at different heights.
- Create a central suspension point and balance the branch so it hangs level from the ceiling hook.
- Hang the mobile where gentle air movement allows it to sway without striking walls.
Scented Pinecone Sachets for Closets and Drawers

Small cones tucked into fabric sachets released a slow, mellow scent each time a drawer opened. The cones kept their resinous character and paired nicely with dry lavender or cinnamon tucked alongside.
Opening a closet drawer felt like a tiny lift of winter air, and the sachets required almost no attention once placed. They sat quietly among wool sweaters and linens, preserving a soft aromatic presence that didn’t overwhelm.
I enjoyed swapping sachets between drawers, finding that the scent tied linen piles together with a faint seasonal thread.
Steps
- Place a few small pinecones into breathable fabric sachets along with dried lavender or a few drops of essential oil.
- Lightly knot or tie the sachets closed and label if desired for different drawers or closets.
- Nestle the sachets among folded clothing or linen stacks, refreshing the scent occasionally with a drop of oil.
- Replace sachets if the cones lose aroma after prolonged use.
Pinecone Bird Feeder Wreath for Quiet Gardens

Seeing birds land on a cone-laced wreath transformed the doorway into a small theater. The cones offered textured perches and the seeds stuck into crevices seemed to delight small beaks.
From indoors, the spectacle felt gentle and slow, with tiny flurries of movement that chased each other along the ring. The wreath itself hung like a living ornament on an exterior wall, collecting rain and sunlight and becoming part of the backyard rhythm.
Watching from the kitchen with a mug felt like being present without fuss.
Steps
- Spread a layer of peanut butter or seed paste over pinecone scales and roll the cones in birdseed until well coated.
- Attach the seeded cones to a sturdy wreath base at regular intervals, securing with wire or twine.
- Hang the wreath outdoors on a covered porch or sheltered spot where birds can feed safely.
- Replenish seeds as they are consumed and monitor for weather wear.
Glittered Pinecone Tree Favors for Guests

Handing out small glittered cones felt like giving guests a tiny memento that’s both playful and tactile. The glitter caught light at odd angles, turning the cones into miniature party sculptures, while their weight kept them feeling real and grounded.
Placed in little kraft boxes or on nameplates, they added a moment of delight before plates arrived. The combination of celebratory shine and natural form seemed to make people grin, and the favors lingered on mantel shelves after the gathering, keeping a bit of the evening’s warmth in view.
Steps
- Brush pinecone tips with adhesive and sprinkle fine glitter over the sticky areas, tapping off excess.
- Allow cones to dry fully on parchment to prevent sticking and shake gently to remove loose glitter.
- Place each finished cone in a small kraft box or tied pouch for guests.
- Arrange the favors at each place setting or on a welcome table for guests to take.
Pinecone Advent Calendar with Little Surprises

A ring of cones numbered and filled with small notes or tiny treats made countdowns feel slow and sweet. Each cone became a small curiosity that teased a small smile when opened, and the ritual of approaching the calendar felt unhurried.
The textured cone forms made the layout visually interesting, and children loved peeking into the little pockets. Hanging the calendar low on a wall allowed easy access and created morning moments that stretched the season into many small celebrations rather than a single event.
Steps
- Attach small cloth bags or folded notes to the bottoms or interior gaps of pinecones and number each for countdown days.
- Fill each bag or note with a tiny treat, message, or activity prompt suitable for the recipient.
- Arrange the cones on a board, string them along a garland, or hang them on a wall in an appealing pattern.
- Encourage daily opening of one cone until the countdown completes.
Painted White Pinecones for Minimal Winter Décor

A few cones brushed with soft white paint brought a quiet, almost Scandinavian calm to a shelf. The white softened edges and turned each cone into a sculptural object that read almost like carved wood.
Placed against pale backgrounds, they suggested snow without loud color, and their simple palette matched linen and stoneware nicely. The painted cones felt deliberate and restful, ideal for moments when the room called for restraint.
They gave corners a winter breath without overwhelming other objects, making the space feel curated and gentle.
Steps
- Select pinecones with open scales and lay them on protective paper for painting.
- Lightly paint the outer surfaces with a soft white paint, allowing natural brown to peek through for texture.
- Let paint dry fully and apply a second light coat if a more opaque look is desired.
- Arrange painted cones on shelves or in small bowls as minimalist accents.
Pinecone Shadow Box with Frosted Mini Scene

Creating a tiny tableau inside a shallow frame felt like capturing a little piece of winter to hang at eye level. A small cone sat among powdered ‘snow’ and a scrap of evergreen, and the shadows inside the box changed with the light across the day.
The framed scene read like a pocket memory, subtle enough to stop someone mid-walk and draw a soft smile. The box turned a single cone into an invitation to look closely, offering a slow, contemplative pause amid the usual rush of a room.
Steps
- Select a shallow shadow box and place a small pinecone on the backboard with a base of faux snow or cotton batting.
- Add a few miniature sprigs of evergreen or tiny ornaments around the cone for scale and interest.
- Close the box and secure the backing, then hang the shadow box at eye level.
- Position a soft directional light to cast gentle shadows inside the frame.