I started playing with air dry clay on a rainy weekend when I wanted something tactile and calming to hold between chores. The way the soft, slightly powdery material responds under fingertips and the quiet time it invites has kept me coming back for small home projects.
Across the living room and balcony, clay pieces have become quiet companions — a matte trinket dish by the lamp, a tiny planter with leaf impressions, a set of smooth drawer pulls.
Making air dry clay home decor has felt like a slow, pleasing conversation with the things around me.
Textured plant pots with organic leaf patterns
There is a comforting weight to a small clay pot, the cool matte surface catching morning light in soft highlights. On my balcony, a pot with imprinted leaf veins always draws attention; the pattern feels like a captured moment from a damp walk.
The clay surface has a faint chalky scent that blends with potting soil and jasmine in the air. When fingers trace the impression, the texture becomes a quiet focal point, grounding the plant and the shelf around it with an earthy, handcrafted presence.
Steps
- Prepare a smooth ball of air dry clay and flatten it into an even slab with a rolling tool.
- Place a real leaf gently onto the slab and press evenly with a flat, firm surface until veins are visible.
- Wrap the textured slab around a small pot form, blending seams with gentle pressure and smoothing edges.
- Let the piece dry upright in a sheltered spot until fully hardened, then sand lightly and apply a thin coat of sealant if desired.
Marbled trinket dishes that catch the light
Marbling clay produced a small set of trinket dishes that sit on my bedside table, each with swirls of warm cream and muted gray. The patterns curve like slow watercolors, and the thin rim catches a glint when late-afternoon sun slips through the curtains.
Fingers brushing the interior find a smooth, satiny feel where the clay was smoothed, while the underside keeps a rawer texture. Those dishes hold small things — a pair of studs, a stray hairpin — and the marbled surfaces add a soft visual rhythm to the nightstand.
Steps
- Combine two or more clay colors by rolling them together until swirls form, avoiding overmixing to keep distinct veins.
- Flatten the marbled slug into a round slab and lift it gently into a shallow mold or press over a rounded surface.
- Smooth the rim with a damp fingertip and refine the interior with a soft tool.
- Allow thorough drying on a flat surface, then sand any rough spots and finish with a light sealant for shine.
Hand-sculpted napkin rings with subtle twists
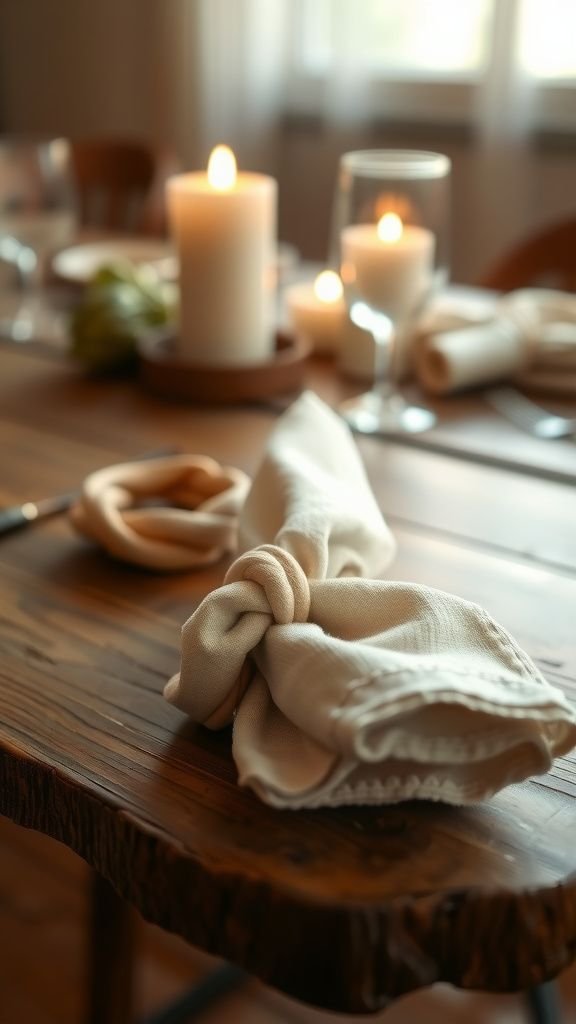
A set of mortar-colored napkin rings sits at the center of a rustic table, their gentle twists casting small shadows. The clay feels pleasantly cool against fingertips when arranging napkins, and the little ridges catch candlelight in a way that feels intimate.
Each ring has tiny imperfections that tell of hurried hands and laughter during gatherings, turning utility into character. On crowded dining nights, those rings quietly anchor place settings, the muted finish complementing linen and wood while offering a tactile pause between conversations.
Steps
- Roll air dry clay into uniform ropes and join the ends into circular rings, blending the seam smoothly.
- Create subtle twists by gently turning each ring, refining contours with a soft, rounded tool.
- Smooth surfaces with a slightly damp sponge to remove fingerprints and even out textures.
- Let the rings dry thoroughly on a flat surface, then sand lightly and apply a clear matte or satin sealer.
Leaf impression coasters for tea and quiet mornings
Coasters with pressed leaf impressions have become a small ritual for tea time at my kitchen nook. The impressions hold tiny ridges that trace veins and midribs, creating a tactile map under a warm mug.
Clay has a soft, velvety touch once dried, and those coasters feel sturdy without being heavy. When steam lifts from a cup, it mingles with the faint mineral scent of the clay, lending a homely atmosphere.
They stack neatly, each one slightly different, like a small archive of the plants by the window.
Steps
- Roll clay into even discs and press a fresh or dried leaf onto each one until details are visible.
- Remove the leaf gently, refine the edges of the coaster, and smooth any rough spots with a damp fingertip.
- Allow the coasters to air dry flat until hard, then sand the undersides for balance.
- Seal with a water-resistant finish on the top surface if intended for hot or wet items.
Minimalist wall tiles with geometric charm

A trio of small geometric wall tiles adds a quiet, modern rhythm above the hallway console. The clay keeps clean edges and a matte finish that reads like stone under indirect light.
When passing by, my hand sometimes brushes the tiles and feels a cool, reassuring solidity. The subtle channels and ridges catch shadow, shifting with the day and giving the wall a calm, sculptural quality.
Their unassuming presence makes the entryway feel curated without fuss, like a brief moment of stillness before leaving the house.
Steps
- Roll clay into a slab and cut geometric shapes using a sharp blade or cutter for clean edges.
- Add shallow grooves or raised details with sculpting tools to introduce texture.
- Smooth surfaces gently and let tiles dry flat on a level surface until fully hardened.
- Attach hanging hardware to the back once dry and optionally paint or seal the front surface.
Clay bead garland for shelves and mantels

A string of handmade clay beads drapes along my mantle, each bead slightly different in size and hue. Their surfaces range from finely sanded smooth to faintly thumbed, creating a rhythm of matte and textured beads.
The garland moves softly with small drafts, producing a muted, comforting weight that feels almost musical. The neutral palette blends with stacked books and dried stems, and handling the beads has become a calming, almost absentminded habit while waiting for coffee to brew.
They make a shelf feel curated without fuss.
Steps
- Roll small portions of clay into beads of varying sizes, creating intentional irregularities for character.
- Poke holes through the centers with a thin tool and let beads dry fully on a soft surface.
- Thread the dried beads onto natural twine or cord, spacing them to achieve an organic look.
- Knot the ends securely and arrange the garland across a mantel or shelf.
Sculpted candle holders with soft, uneven rims
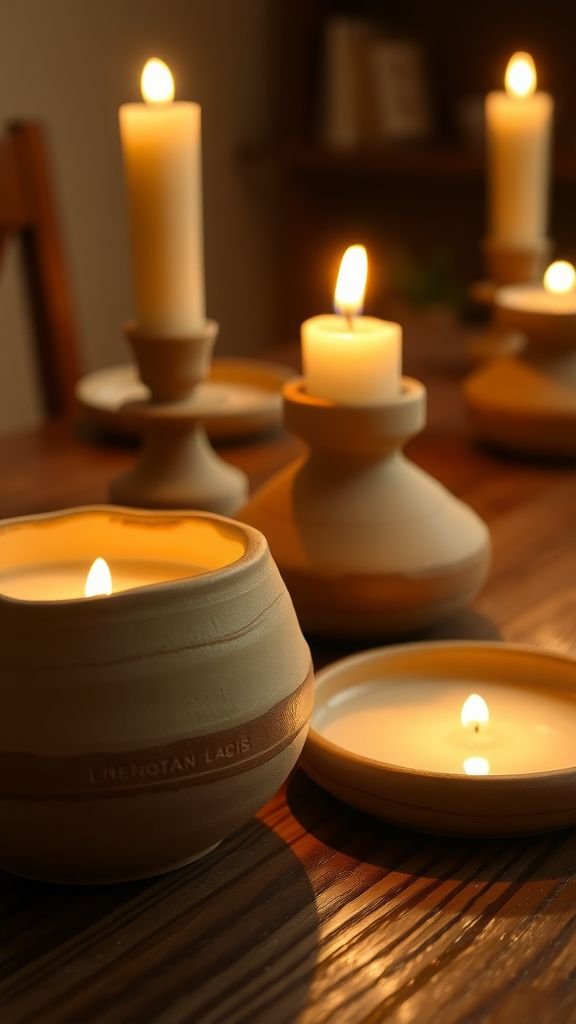
Candle holders with gentle, hand-formed rims give my dining table a slightly rustic mood. The clay’s matte finish contrasts with the flicker of a flame, while the uneven rim silhouette creates playful shadows on the surface beneath.
A faint scent of clay lingers when the holders are moved, reminding me of afternoons spent shaping each curve. The weight feels reassuring in the palm, and small tool marks that remain add personality rather than flaw.
When candles burn down, the holders collect little pools of wax that catch the light in quiet ways.
Steps
- Form a hollow base by pressing a clay slab into a shallow mold or around a rounded form.
- Refine the rim with fingertips or a soft tool to create intentional unevenness and texture.
- Smooth interior walls and let the holder dry upright to preserve its shape.
- Remove any residual dust, sand lightly, and optionally coat with heat-safe sealant before use with candles.
Boho wall hanging ornaments with fringe accents
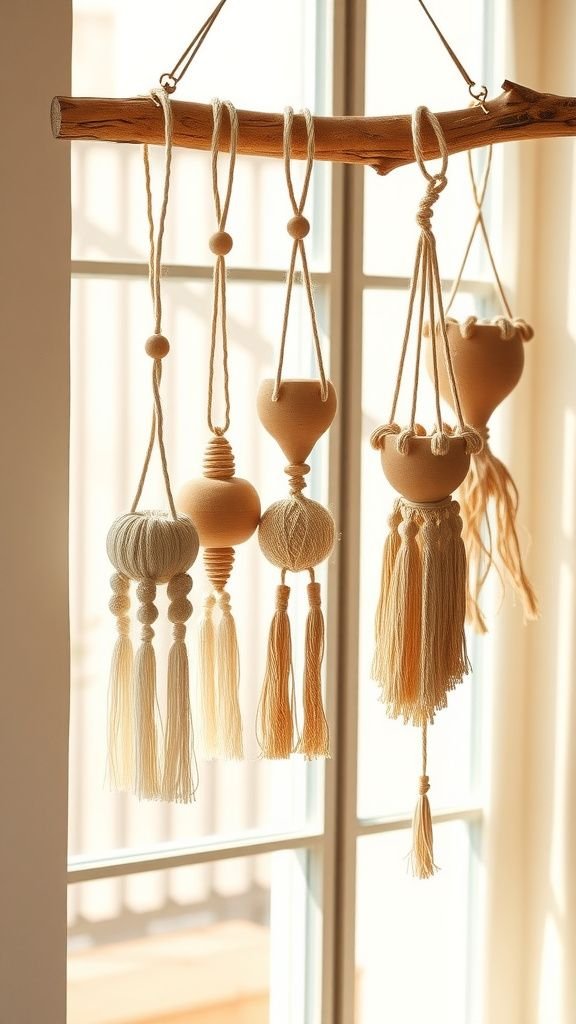
A small cluster of clay ornaments hangs near a window, mingling with linen tassels and cotton fringe. Each piece has a neutral, sunbaked color and a soft, tactile surface that pairs well with woven textures.
Light filters through the window and plays across subtle reliefs, creating gentle contrasts that feel pleasantly lived-in. When the breeze moves the fringe, the clay shapes swing slightly and catch the eye.
The hanging group adds a handcrafted, relaxed note to the room, like a memory of a market stall found on a leisurely afternoon.
Steps
- Roll slabs of clay and cut out varied organic shapes, adding small holes for hanging.
- Texture the surfaces with tools or fabric for interest, then let pieces dry until firm.
- Attach lengths of fringe, tassel, or cotton cord through the holes, securing with knots.
- Suspend the assembled ornaments from a driftwood branch or dowel for a boho display.
Tiny houses for shelves and tabletop nooks
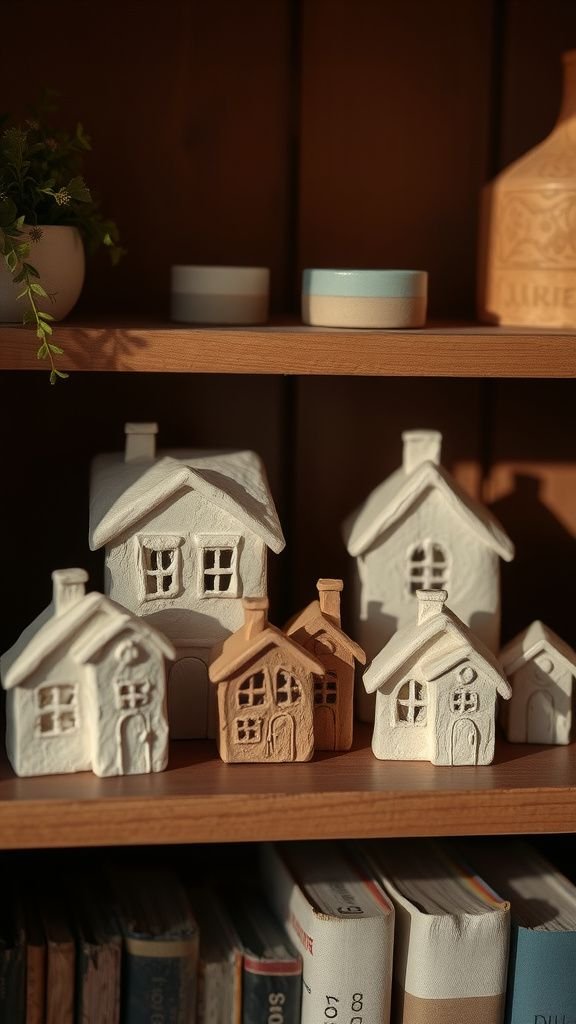
A row of diminutive clay houses sits along a bookcase, each one with a small window and slightly crooked roof. They feel like a tiny village that shifts with the afternoon light, casting miniature shadows across the shelf.
The surfaces retain faint tool marks and fingerprints that make the pieces feel familiar and approachable. At night, a nearby lamp creates a cozy silhouette, and the houses seem to gather warmth from the room.
They add a playful, storybook charm without demanding attention, like small talismans of domestic calm.
Steps
- Shape small boxy forms from clay slabs and attach simple roof pieces, smoothing joints carefully.
- Carve tiny windows and doorways with a sharp tool for character and light play.
- Allow pieces to dry thoroughly on a flat surface to retain geometric shape.
- Optionally apply soft washes of pigment or a matte finish to enhance the village look.
Keepsake handprints preserved in clay tiles
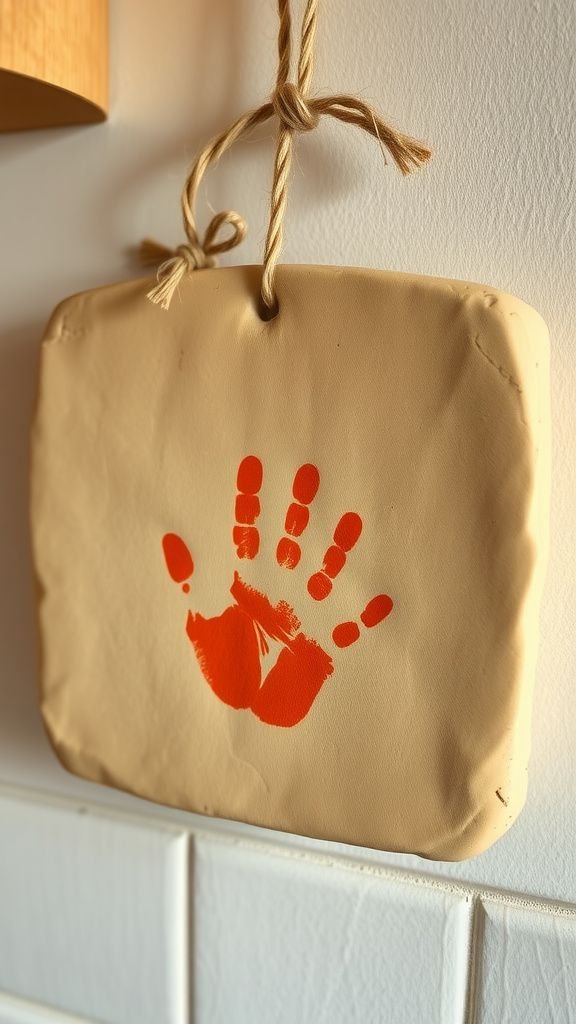
A clay tile with a child’s tiny handprint hangs on a kitchen wall knot. The impression holds the ridges of a small palm, frozen in soft relief with a quiet, almost tender presence.
The matte surface contrasts with the glossy memories of photographs, offering a tactile record that invites touch. Around the edges, faint smudges and slight unevenness give the tile a human warmth, a mark of a particular afternoon and a certain small laugh.
It reads like a gentle bookmark in the family story, simple and intimate.
Steps
- Roll out a slab of clay to an even thickness and smooth the surface gently.
- Press a clean hand firmly into the slab to create a clear impression, lifting off carefully.
- Refine the tile edges and add a hole for hanging if desired.
- Let the tile dry flat and completely, then seal or display as a keepsake.
Key dishes with a brushed metallic edge finish
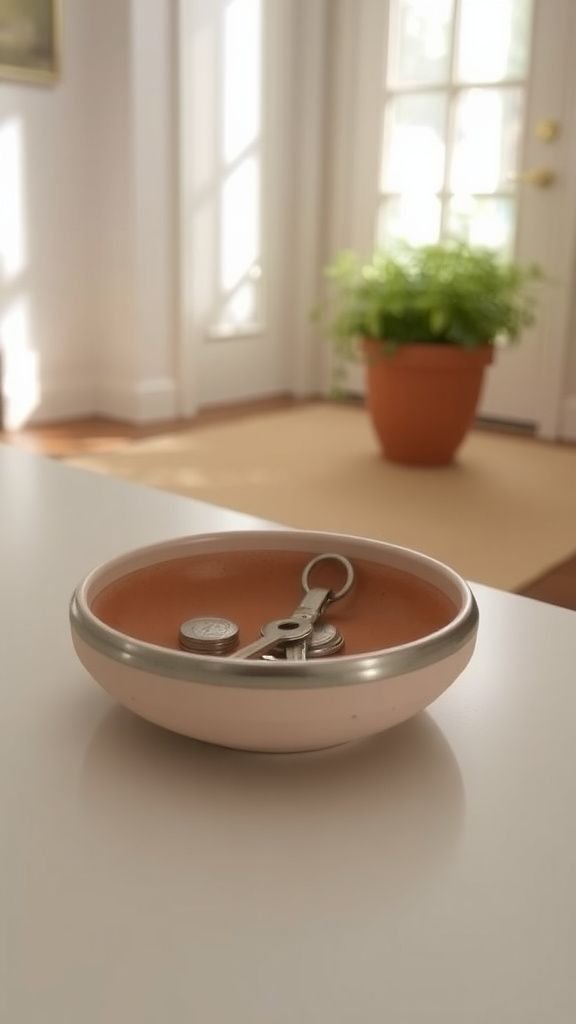
A small oval key dish sits near the door, its center soft and matte and its rim accented with a faint metallic sheen. When coins or rings settle there, the gentle contrast between the chalky clay and the metallic edge adds a touch of elegance without fuss.
The shallow bowl cradles small items and the underside keeps a natural, slightly rough texture that feels handmade. Handling it brings a moment of order to leaving or returning home, a quiet ritual of placing things down and taking a breath before moving on.
Steps
- Shape an oval shallow dish from a clay slab, smoothing the interior surface for small items.
- After drying, apply a thin metallic paint or gilding to the rim for a subtle highlight.
- Allow finishes to cure fully, then buff lightly if a softer sheen is desired.
- Place the dish by the entryway and refill with everyday small items as needed.
Geometric desk organizer with compartments

A compact clay organizer sits on my desk, its clean geometric forms creating pockets for pens, clips, and the odd sticky note. The matte finish feels muted against the gloss of laptop keys, and the angular shadows it casts change through the day.
The organizer’s compartments are just deep enough to hide a cluttered corner and the piece itself carries the faint warmth of hands that formed it. It lends the workspace a handcrafted pause, a functional sculpture that seems to ask for a slower rhythm at the end of a busy morning.
Steps
- Assemble a base from a flat clay slab and build compartment walls by joining thinner slabs at right angles.
- Score and blend seams for a secure bond, refining corners for a clean geometric look.
- Smooth surfaces with a damp sponge and add texture details if desired.
- Allow the organizer to dry fully before sanding edges and applying a protective finish.
Stackable bowls with intentionally rough edges
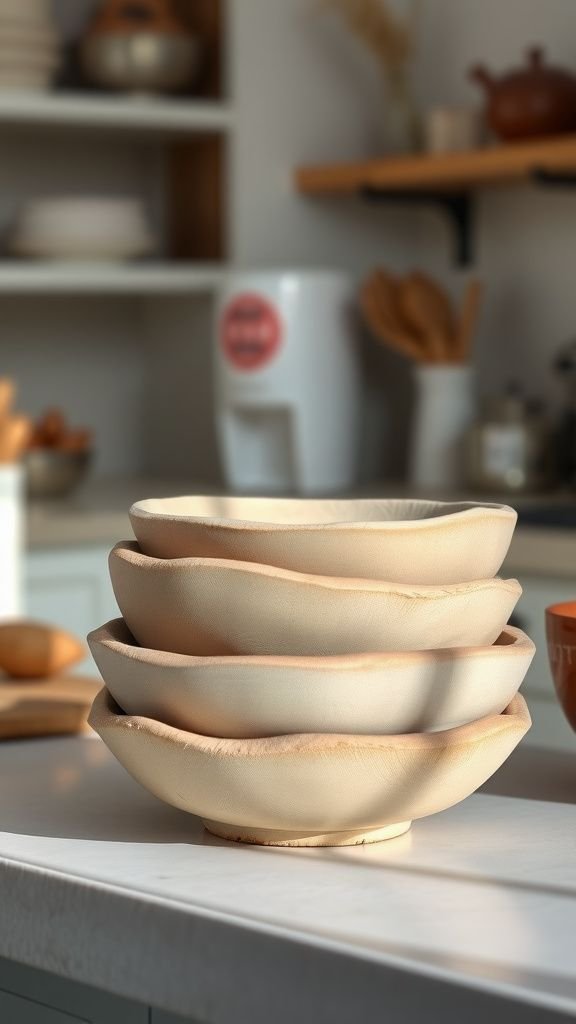
A stack of small bowls with slightly rough rims nests on the kitchen counter, each one bearing small variations that feel like fingerprints of the making. Their interiors are smoothly finished and cool to the touch, while the uneven rims create a tactile contrast when lifting a bowl.
Light catches the ridges and provides a small dramatic interplay between shadow and form. They are handy for prepped ingredients or little snacks, and watching them sit together feels like an ordinary, slow arrangement that rewards quiet observation in the daily routine.
Steps
- Form bowl shapes by draping clay slabs over rounded forms or shaping by hand into shallow molds.
- Refine the rims to retain slight irregularities for texture while ensuring bowls stack stably.
- Smooth interiors with a damp cloth and allow bowls to dry thoroughly on a level surface.
- Sand any rough bases and apply a protective coat if the bowls will contact food or liquids.
Lettered name tags for drawers and baskets

Small clay tags with embossed letters hang from woven baskets, bringing a handcrafted clarity to shelf corners. The raised letters catch dust and light differently than the smooth background, adding a subtle tactile contrast.
Each tag carries the faint warmth of fingers that pressed the characters in, and over time the edges soften with use. The muted color palette keeps the tags quietly elegant, and the presence of names turns storage into a moment of personal care, like a gentle label that holds both function and a modest decorative note.
Steps
- Roll thin clay slabs and cut into small rectangular or oval shapes for tags.
- Impress letters using stamps or a stylus to create clear, raised names.
- Add a small hole for threading twine before allowing tags to dry flat.
- Thread tags onto baskets or drawer pulls and adjust placement once dry.
Hanging planters with smooth rounded silhouettes
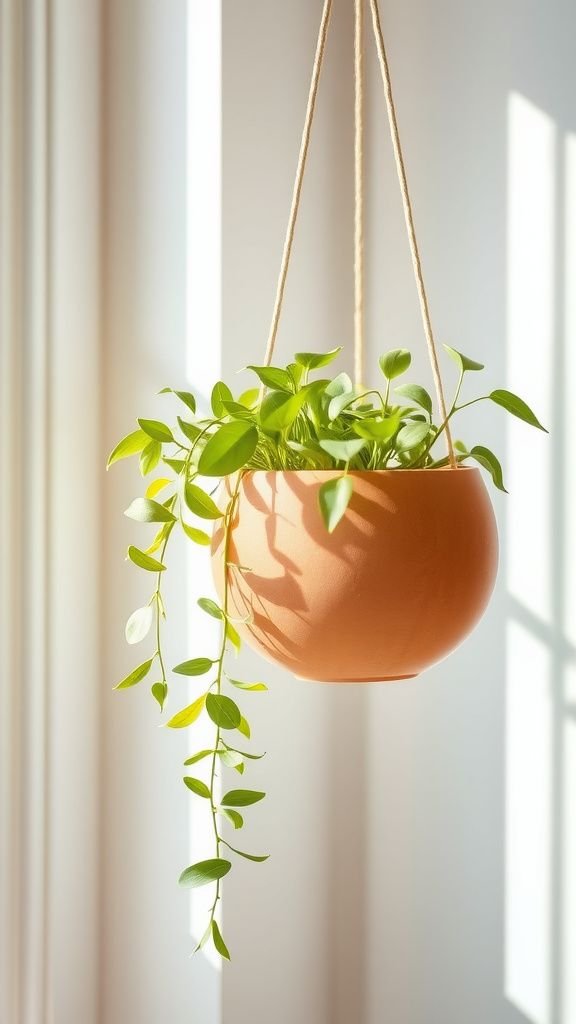
A hanging planter with a smooth, rounded belly sways gently in the breeze by the window. The clay’s cool surface meets warm sunlight and the contrast makes the planter glow softly.
The opening cradles a trailing plant whose leaves spill over the edge, while the planter’s muted tone complements bright greenery. When passing underneath, there is a slight earthy scent and the visual of suspended simplicity elevates the corner.
The planter feels both sculptural and lived-in, a suspended nook for a small, thriving piece of the home.
Steps
- Shape a rounded planter form by joining clay slabs or coiling and smoothing the surface.
- Create a reinforced hanging rim and add holes for cord attachment to ensure balance.
- Dry the planter slowly to avoid cracks, supporting the shape as needed.
- Thread natural fiber cords through the holes and hang the planter from a secure ceiling hook.
Drawer knobs and pulls with organic silhouettes
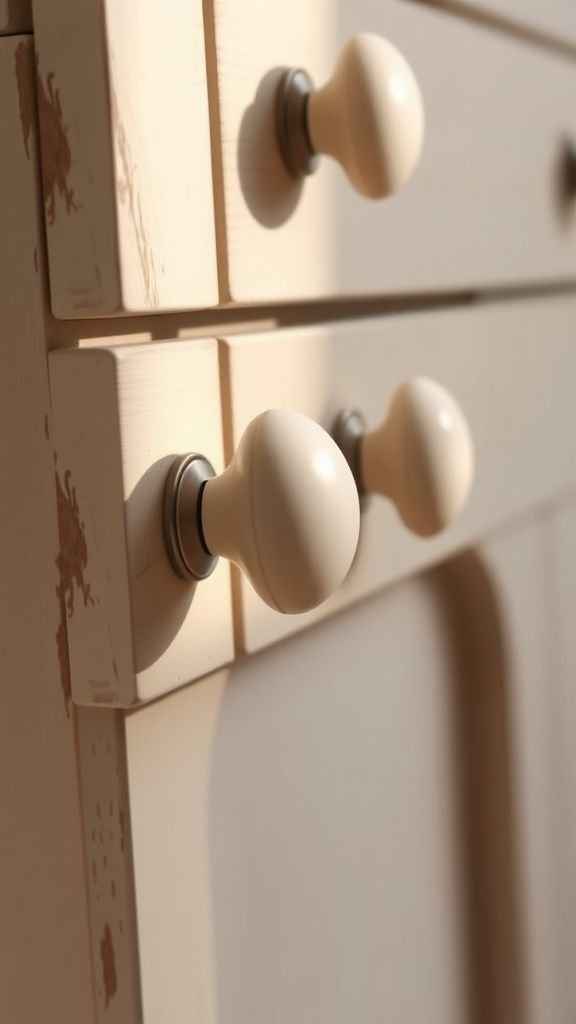
A set of clay knobs adds a tactile update to a dresser, their organic silhouettes standing out against painted wood. The knobs bear tiny tool marks that give them a handcrafted language and the finish is matte with a slight warmth under the fingers.
Turning a knob feels grounding in a way that mass-produced hardware rarely manages; the motion connects hand to object softly. Over time, the initial roughness smooths subtly where contact is frequent, tracing a small, personal history of daily routines and small adjustments in the room.
Steps
- Shape individual knobs or pulls from clay, creating ergonomic forms that fit comfortably in hand.
- Insert threaded hardware into the clay while still soft or attach after drying using appropriate adhesives.
- Let knobs cure fully and sand connection points for a secure fit.
- Install the knobs on drawers, ensuring tight and balanced mounting.
Holiday ornaments with pressed botanical motifs
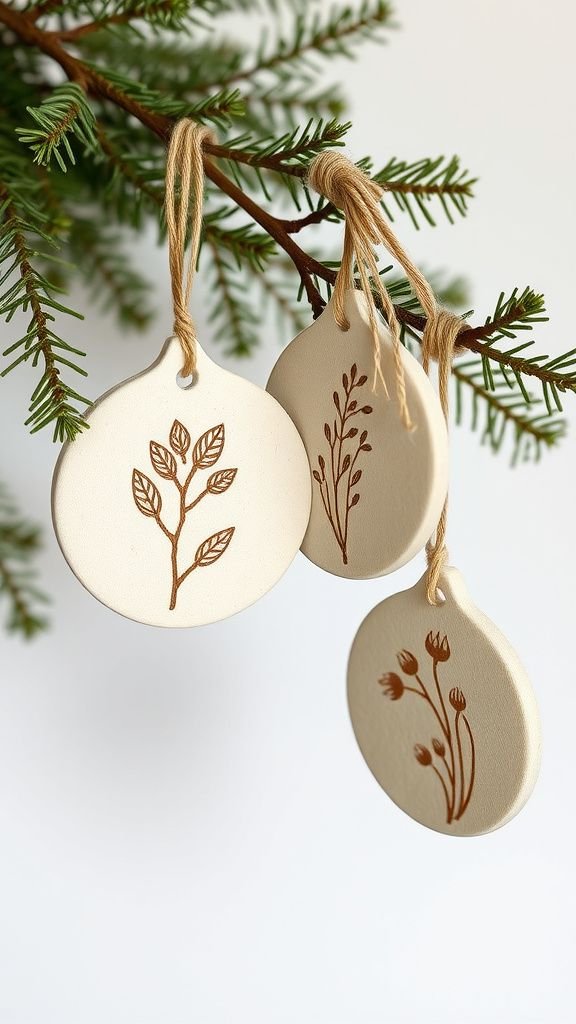
Flat clay ornaments with pressed botanicals hang from a small seasonal branch, their silhouettes catching cool winter light. The impressions hold delicate leaf veins and tiny floral outlines that feel almost like preserved moments from an autumn walk.
Each ornament’s matte surface keeps a quiet tone, and the twine hangers add a rustic touch. When the branch sits in the corner, the ornaments bring a gentle handcrafted presence that complements the seasonal shift, offering small, personal keepsakes that look deliberate without being ornate or overly fussy.
Steps
- Roll clay into thin, even shapes and press small botanicals gently into the surface for detailed impressions.
- Remove the plants, add a hanging hole, and smooth edges with a damp fingertip.
- Dry ornaments flat until firm, then thread twine or ribbon through the holes.
- Hang the ornaments on branches, garlands, or gift packages as desired.
Fridge magnets with painted abstract marks
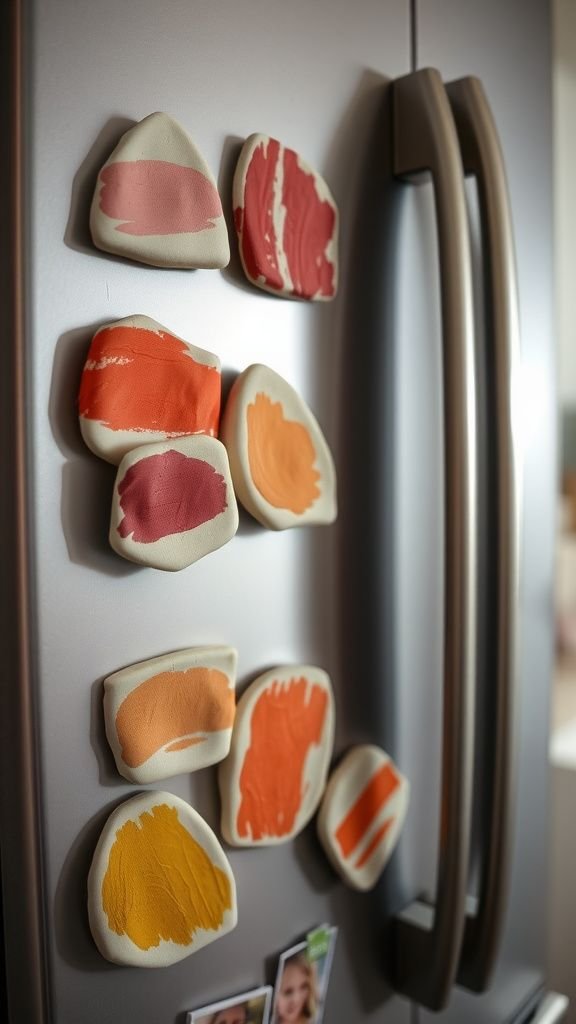
Small round clay magnets rest on the fridge, each bearing a splash of abstract color reminiscent of tiny studio experiments. The matte clay backgrounds ground the brushstrokes, and the painted marks vary from soft washes to bolder strokes, forming a playful cluster.
Touching them returns a faint residue of pigments and the magnets themselves add a casual liveliness to grocery lists and photos. They feel like pocket paintings, compact reminders of afternoons spent testing color blends, and their informal presence brightens the kitchen without drawing overwhelming attention.
Steps
- Create small, flat clay discs and let them dry fully to a firm state.
- Paint abstract marks or color washes on the dried surfaces and allow paint to cure.
- Adhere small strong magnets to the back with a durable adhesive.
- Arrange the magnets on the fridge to display notes or photos.
Wall-mounted key hooks with clay bases
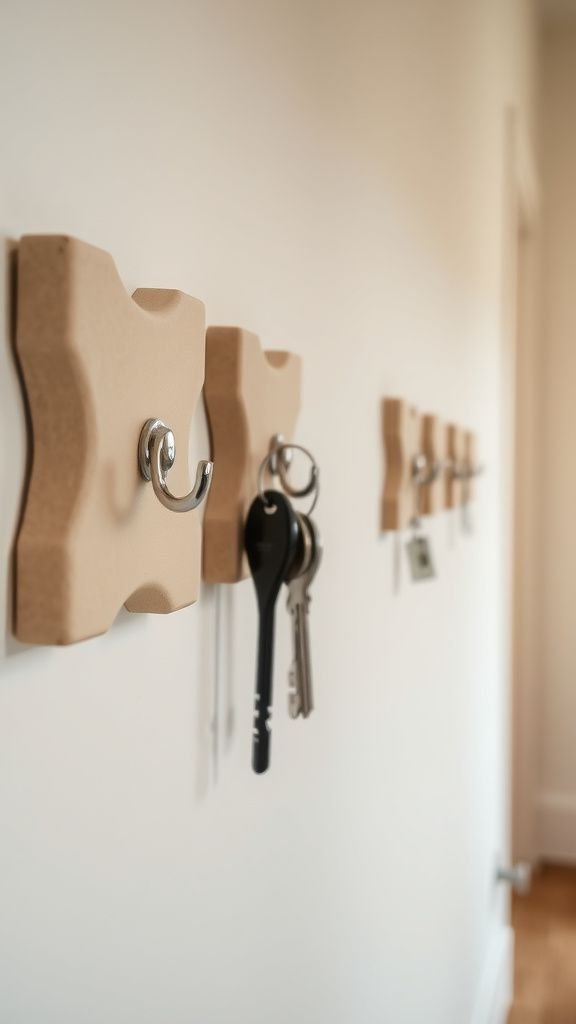
A row of clay-backed hooks keeps keys and small accessories corralled near the entry, each base bearing a soft texture that contrasts with the metal hook. Passing by, the matte clay provides a visual pause and a sense of order.
The bases have slight color variations and tiny finger marks that reveal their hand-formed origin. The hooks themselves catch light and reflect a bit more shine against the muted backdrop, creating a small interplay between utility and quiet design.
The installation feels steady and welcoming at the threshold of the home.
Steps
- Shape small flat clay plaques and create mounting holes or a recessed area for hook hardware.
- Allow the plaques to dry completely before attaching metal hooks or screw-in hardware.
- Secure plaques to a wall-mounted board or directly to the wall with appropriate fasteners.
- Hang keys and lightweight accessories, checking stability periodically.
Decorative curtain tiebacks shaped like moons
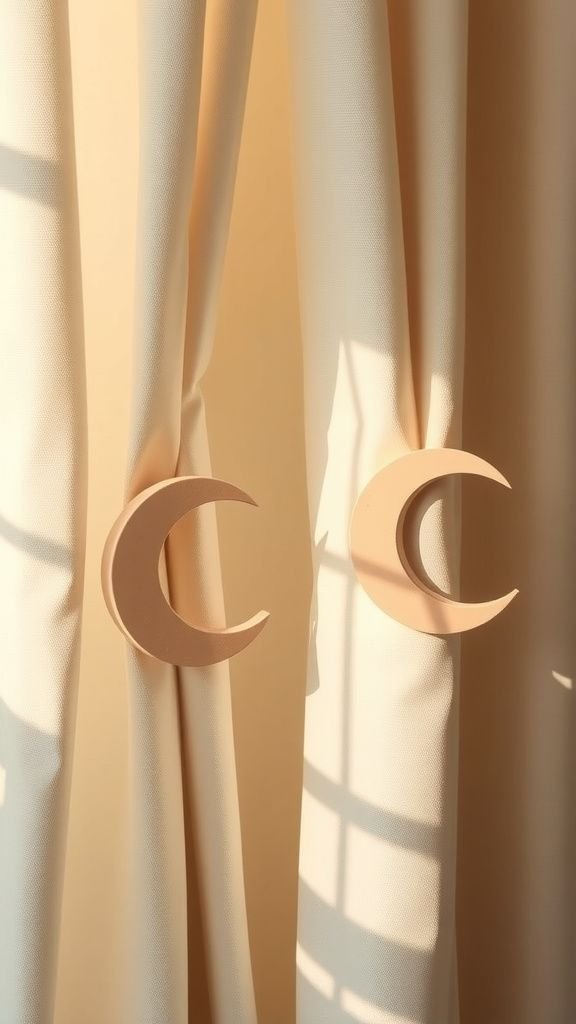
Moon-shaped clay tiebacks cradle curtain folds and add a small celestial note to the living room. Their curved profiles feel smooth and thumb-sized, the clay surface cool in contrast to warm linen.
When light from the window slants through, the tiebacks cast soft crescent shadows on the fabric below. Each moon has fine textural marks that make it feel timeless and wearable in a soft, domestic way.
The piece seems to quiet the bustle of an open window, bringing a brief sense of composition and calm to the curtain panel.
Steps
- Sculpt crescent shapes from clay, smoothing curves and ensuring a hole or loop for attachment.
- Dry the shapes thoroughly and sand any rough edges for comfort.
- Attach loops of cord or small metal rings through the holes to secure around curtain folds.
- Position the tiebacks at desired heights and adjust curtain gathers for a balanced look.
Scented diffusers with porous clay bases
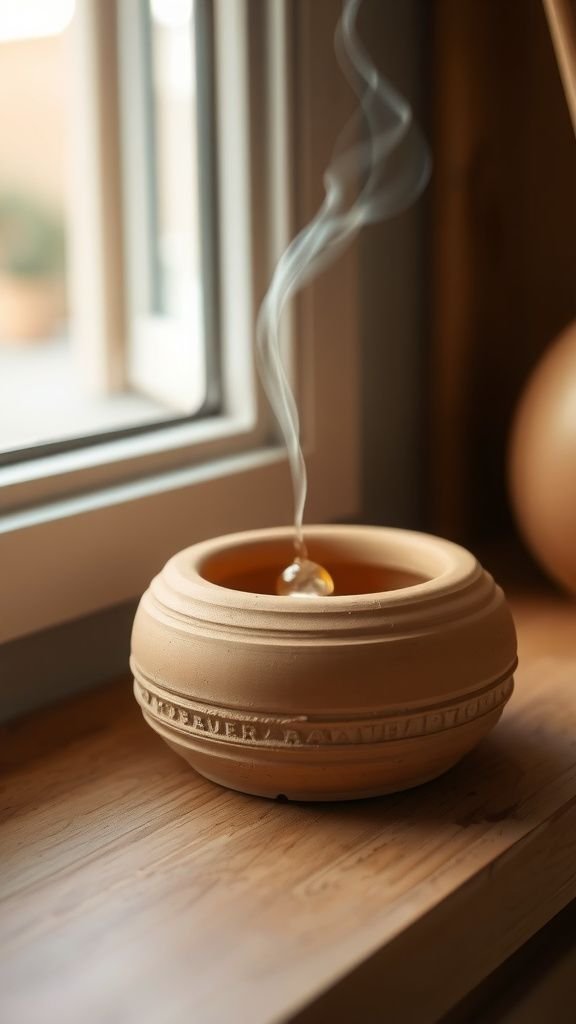
A small porous clay disk holds fragrant oil droplets near the entry, releasing subtle scent into the air. The surface drinks in the oil and softens the aroma over hours, creating a steady, mellow presence.
Clay’s natural breathability plays well with botanical notes like cedar or citrus, and the disk’s muted tone blends into the shelf arrangement. Observing the faint darkening where oil meets clay is oddly satisfying, an intimate record of moments when the room felt particularly welcoming.
The scent lingers without demanding attention, like a quiet signature.
Steps
- Shape a porous clay base with small surface texture to increase absorption potential.
- Allow the base to dry slowly to maintain porosity, avoiding overly dense compaction.
- Place a few drops of essential oil on the surface and refresh as scent fades.
- Keep the diffuser on a small saucer to catch any excess oil and protect surfaces.