I’ve always loved how simple sheets of paper can turn into small, intimate gestures that feel personal and warm. On a rainy February afternoon I spread colored paper across the kitchen table and began making little Valentine tokens; the quiet scratch of scissors and the soft rustle of folded paper felt comforting and unexpectedly romantic.
Romantic Valentine Paper Crafts became a way to string together tiny moments of thoughtfulness, each piece carrying a memory of color, scent, and a laugh shared over a glue-smeared fingertip.
Making paper creations for Valentine’s Day often brings out playful nostalgia. A stack of patterned paper, a favorite pen, and a mug of tea transforms the living room into a cozy workshop where hearts, notes, and tiny bouquets slowly appear.
Those small rituals of crafting Valentine paper projects turned quiet afternoons into treasured keepsakes, and that gentle, hands-on pleasure is what drew me back every year.
Layered heart garland with tactile paper textures

The garland felt like a slow, rhythmic heartbeat strung across the mantel. Each heart layered with textured paper has a different personality: one is linen-slight and cool to the touch, another is shiny with a faint metallic whisper, and a vellum piece glows warmly when backlit.
I remember draping it across an old mirror while the late afternoon light skittered through the window, watching shadows dance between the scalloped edges. The gentle weight of the hearts created a soft sway, and the whole display smelled faintly of the paper mill and that hot cup of tea beside me.
Steps
- Gather a selection of textured and patterned paper, a length of thin twine, scissors, and a hole punch.
- Trace and cut hearts of matching and varying sizes, layering two or three papers for each heart before punching a small hole near the top.
- Thread the hearts onto the twine in an alternating pattern, spacing them evenly and tying tiny knots to keep each heart from sliding.
- Hang the garland across a mantel or window frame, adjusting spacing until the gentle sway looks balanced.
Pop-up heart card that surprises with depth

The moment a pop-up heart unfurled, the card felt like a small stage for an intimate confession. Layers of paper rose up with a delicate sound, revealing a bold red heart that seemed to hover over a field of pale pink.
The fold lines held a quiet geometry, and the contrast between the flat front and the three-dimensional interior always felt satisfying. I pictured someone opening this on a kitchen table, fingers pausing over the pop-up as if trying to catch the gentle little shadow it cast.
It read as playful and slightly theatrical, the kind of keepsake that earned a place on a bookshelf.
Steps
- Select a sturdy cardstock for the base and a contrasting color for the pop-up element, then fold the base cardstock in half firmly.
- Mark and cut two parallel slits inside the folded base to create a tab, then crease the tab inward so it forms a platform for the heart.
- Prepare a layered heart assembly and attach its base to the tab so the heart stands when the card opens.
- Decorate the card interior and exterior with patterned paper, hand lettering, or small embellishments as desired.
Paper rose bouquet with whisper-thin petals

These paper roses have a quiet, museum-like fragility that made them feel like heirlooms. Each petal curled with a soft edge and caught light in a way real flowers sometimes miss.
When I cupped one in my palm it warmed slightly from body heat, and the creased centers gave a sense of time captured. Grouped in a small jar they created a permanent bouquet that smelled faintly of the studio — a mixture of paper dust and citrus adhesive.
The arrangement seemed to hold-up better than any supermarket bloom, and it kept inviting me to rearrange a petal or two.
Steps
- Choose thin, flexible paper in a few complementary shades and prepare circular petal templates in graduated sizes.
- Shape each petal by gently curling edges around a pencil, then layer petals around a small rolled center to form a rose.
- Secure the base of the bloom and add a paper-wrapped stem, repeating until the bouquet reaches the desired fullness.
- Arrange the roses in a small jar or vase, fluffing petals and adjusting heights for a natural silhouette.
Tiny love notes tucked into handmade envelopes

Handmade envelopes hold a small promise when slid under a pillow or slipped into a coat pocket. The paper sometimes whispers as it peels open, revealing a note written in an uneven, affectionate hand.
I liked the little ritual of choosing patterned paper, watching the envelope seam catch the light, and imagining the recipient’s smile when they found the tucked message. A faint scent of the ink lingered on the paper, and the envelope flap had a satisfying weight as it closed.
These tiny notes felt private and gentle, small relics of ordinary affection that lingered long after the words were read.
Steps
- Trace an envelope template onto patterned or handmade paper and cut along the outer edges for a neat shape.
- Score the folding lines lightly for crisp creases, then fold the side flaps inward and fold the bottom flap up to form the envelope pocket.
- Tuck a handwritten note inside and secure the top flap with a decorative sticker or a small dab of adhesive.
- Address or embellish the exterior with a stamped heart or hand-drawn motif for a personalized touch.
Accordion heart booklets for tiny poems

Accordion booklets felt like miniature theatrical programs, each fold revealing a new beat of a poem or a memory. The rhythm of opening each panel invited quiet attention and small smiles.
I enjoyed the tactile quality of the ridged spine and the way different papers offered little surprises; some pages were translucent and softened the ink, others were thick and held a crisp stroke. Nestling a tiny folded booklet into a pocket or a purse felt like gifting a private performance.
The whole thing read as both playful and tender, a pocket-sized keepsake that begged to be unfolded slowly.
Steps
- Cut a long strip of paper and score even intervals along its length for clean accordion folds.
- Fold the strip back and forth to form the accordion spine, ensuring crisp creases for each panel.
- Trim the ends and decorate individual panels with short poems, illustrations, or pressed paper accents.
- Optionally create a simple cover from sturdier cardstock and attach it to the front and back of the accordion.
Layered paper doilies for a vintage touch

Paper doilies bring a whisper of old-fashioned charm that felt unexpectedly modern when layered and slightly offset. Their fine cut patterns created lace-like shadows on tabletop surfaces, turning a simple glass jar into a nostalgic centerpiece.
I loved how the delicate edges felt against fingertips, and how the stack created a gentle palette of white and cream with hints of blush when paired with colored paper beneath. On rainy afternoons the soft rustle of doilies reminded me of a bakery napkin and tenderly held memories of handwritten letters and kitchen tables where great conversations lingered long after dessert.
Steps
- Select different sizes and patterns of paper doilies and a couple of colored cardstock pieces for contrast.
- Layer doilies over the cardstock, offsetting each slightly to reveal the colored edges beneath.
- Secure the layers at the center with a tiny adhesive dot or a decorative brad to keep them aligned.
- Place the layered doilies under a vase or frame them as a delicate wall cluster for a soft vintage display.
Vellum envelope liners for soft translucent glow

Vellum liners gave envelopes a tender, soft-lit reveal that felt like a secret. The translucent paper blurred the edges of the inner note, creating a gentle peek-a-boo effect.
When light passed through, the liner created a warm halo around written words, and the texture made the envelope interior feel like a small stage set. I remember sliding one into an envelope and watching the recipient hold it up to the lamp, smiling at the softened colors.
The vellum’s cool, smooth touch contrasted with the coarse grain of a kraft envelope in a satisfying way.
Steps
- Measure the interior dimensions of the envelope and trace a liner shape onto vellum paper, trimming for a snug fit.
- Fold the vellum to match the envelope flaps, creating a gentle crease for a neat insertion.
- Apply a thin line of adhesive along the side flaps and press the vellum liner in place inside the envelope.
- Slide the note inside and close the envelope, enjoying the mellow translucence when light filters through.
Paper lace candle wraps for gentle mood lighting

Paper lace wraps turned simple candles into softly patterned beacons, casting delicate silhouettes on table surfaces. The cut edges threw tiny shadows that danced with the flame, creating a slow-moving lace show that felt intimate.
I liked the way the paper’s thinness made the light blush through, warming the tabletop and brightening faces across the room. A faint toasted-paper scent rose from the warmth nearby, and the whole scene took on a hush of quiet ceremony.
The effect was romantic without being fussy, an accidental theater of shadows and glow that made a meal feel hand-prepared.
Steps
- Choose a paper lace pattern and measure the circumference of the candle or glass votive to determine wrap length.
- Trim the paper to size and test fit around the candle or votive before finalizing the edges.
- Adhere the ends of the paper with a single tiny adhesive dot, ensuring the wrap rests gently around the candle base.
- Place the wrapped candle inside a glass holder for added safety and light diffusion before lighting.
Origami kissing hearts that seem to float

Origami kissing hearts felt like a small magic trick; a flat square of paper transformed into a tiny, compact heart that hinted at depth and hidden corners. When scattered across a tabletop they looked like confetti with an intention, each one a petite sculpture.
The crisp folds made a satisfying line that caught afternoon light, and the little pockets at the top held tiny pressed scents or a pinch of dried lavender. I remember lining a row of them along a windowsill where they peered out, like a playful congregation of miniature lovers nodding into the breeze.
Steps
- Start with small squares of colored paper and fold them along diagonal and edge creases to begin forming the heart base.
- Create precise corner tucks and flatten each fold for clean lines that define the heart silhouette.
- Refine the top lobes by folding small sections inward until the heart shape is balanced and compact.
- Arrange the finished hearts in clusters or scatter them across a gift surface for a delicate display.
Heart-shaped confetti with hand-torn edges

Hand-torn confetti carried an informal, breezy charm that felt less polished and more personal. The irregular, feathered edges made each heart unique, as if the paper had taken its own breath.
I remember the satisfying sound as handfuls of bits skittered across a tablecloth and the soft papery rustle they made when gathered into small piles. The colors mingled like a scattered bouquet, and the confetti left a trail of tiny whispers wherever it landed.
It had the casual joy of childhood celebrations and the quiet thoughtfulness of a note tucked into a pocket for later discovery.
Steps
- Choose a variety of colored papers and prepare a heart-shaped punch or template for consistent forms.
- Tear the paper around the template to create imperfect, feathered edges that give each heart character.
- Collect the torn hearts in a shallow dish or envelope for scattering or slipping into cards.
- Sprinkle the confetti across gift wrap or a table setting to add a playful, tactile accent.
Mini shadow boxes for layered paper memories

Mini shadow boxes felt like curated little theaters for paper ephemera; each layer created whispering depth. A heart cutout in the foreground, a tiny ticket stub behind it, and a sliver of pressed flower created a scene that seemed to breathe when tilted toward the light.
I enjoyed arranging elements so that some pieces peeked and others receded, like a small personal landscape. The box lids caught reflections, and the interior shadows introduced a sense of time passing.
It became a way to hold a single moment in a compact frame that could be handled and revisited.
Steps
- Choose a shallow shadow box and plan the placement of small paper elements, photos, and pressed mementos.
- Mount background layers to the box interior, building foreground pieces on tiny foam pads for depth.
- Balance color and texture across the composition, adding delicate cutouts and small metallic accents if desired.
- Close the box and check for unwanted reflections, adjusting elements until the scene feels harmonious.
Secret message scrolls tucked into tiny bottles

Tiny bottles carrying secret message scrolls had a playful, almost nautical romance to them. The scrolls themselves smelled faintly of the ink and paper, and their snug rolls made the glass rattle softly when handled.
I liked how the bottles caught candlelight, illuminating the fragile script and throwing speckled reflections onto the tabletop. Sliding one across a plate at dinner felt like arranging a small ritual, and the tiny cork popped with a delicate sound that announced a private exchange.
Together, the bottle and note suggested a story waiting to be read aloud under low light.
Steps
- Write short messages on narrow strips of paper and roll them snugly to form tiny scrolls.
- Insert each scroll gently into a small glass bottle and seal it with a cork, optionally adding a wax seal.
- Tie a miniature tag around the bottle neck with a name or a short hint of the message inside.
- Arrange the bottles on a tray or scatter them as whimsical placeholders for a dinner table.
Hand-lettered love coupons in a little booklet

Love coupons folded into a small booklet felt like an invitation wrapped in paper. Each stub offered an affectionate promise with handwriting that varied between bold and whisper-thin lines.
I enjoyed the tactile experience of flipping through the little stack, the faint indentation of the pen remaining as evidence of the thought put into each line. The booklet smelled faintly of the ink and the tabletop where it was made, and the colors of the covers created a small, personal palette.
These coupons felt informal and warm, a playful exchange of small pleasures saved for quiet afternoons.
Steps
- Design a template for coupon stubs on cardstock, leaving space for a short promise and a decorative border.
- Hand-letter each coupon with playful promises, varying lettering styles for personality.
- Stack the coupons and bind one edge with a decorative staple or thin ribbon to create a booklet.
- Place the booklet in a small envelope or tie it with twine for a charming presentation.
Heart-shaped bookmarks with tassel accents

Heart-shaped bookmarks felt like little promises to return to a page and a person. The cardstock had a comforting thickness, and the rounded lobes fit easily between fingers.
Adding a soft tassel introduced a playful tactile contrast: the silky threads brushing against paper edges and making a tiny sound when the book closed. I placed one in my current novel and enjoyed the way it peeked out of the spine, a quiet reminder to revisit a story and a memory.
The color pairings surprised me sometimes, pairing bold coral with muted sage for a subtle modern twist.
Steps
- Trace and cut heart shapes from sturdy cardstock, reinforcing the top edge for durability.
- Punch a small hole at the top center and thread a pre-made tassel or a bundle of embroidery floss through it.
- Secure the tassel with a knot and trim the ends for a neat finish.
- Optionally laminate the bookmark for extra longevity and tuck it into a favorite book.
Vintage map love notes folded into hearts

Folding vintage map scraps into little hearts felt like gifting a place and a memory all at once. The printed lines and tiny type became an unexpected pattern across the heart, suggesting journeys and familiar streets.
I loved the contrast between the map’s cool, faded ink and the warm gesture of a heart shape. Each piece carried a hint of travel — a coastline, a station name, a river bend — and placed on a mantel they nodded toward stories told over long dinners.
The paper held a faint mustiness that seemed oddly comforting, like an old passport stamped with laughter.
Steps
- Source vintage maps or print map fragments on thin paper and cut them into squares for folding.
- Fold each square following a heart template to form tidy, map-printed heart shapes.
- Press the folded hearts gently to maintain their shape and display them in a shallow dish or scatter across a table.
- Pair hearts with a small caption noting the map location and a related memory for added sentiment.
Paper tassel garland with soft color transitions

A tassel garland introduced movement and a slow ebb of color across a room. Each tassel brushed the air lightly when the door opened, creating a faint rustle that sounded like pages turning.
I enjoyed the ombre progression from pale blush to deep cranberry; the fibers caught and reflected bits of light, giving the garland a playful shimmer. Draped over a bookshelf it provided a casual frame for photographs and small keepsakes.
The tactile element made the garland feel like a string of tiny banners, each one a little note of celebration suspended in midair.
Steps
- Cut strips of paper or thin crepe in graduated colors and layer them to form individual tassels.
- Roll and secure the top of each tassel, leaving a loop for threading onto twine.
- Thread the tassels along the twine in a pleasing color progression, spacing them evenly.
- Hang the garland across a shelf or doorway and adjust tassel spacing for a balanced look.
Lace-cut hearts with delicate negative space patterns
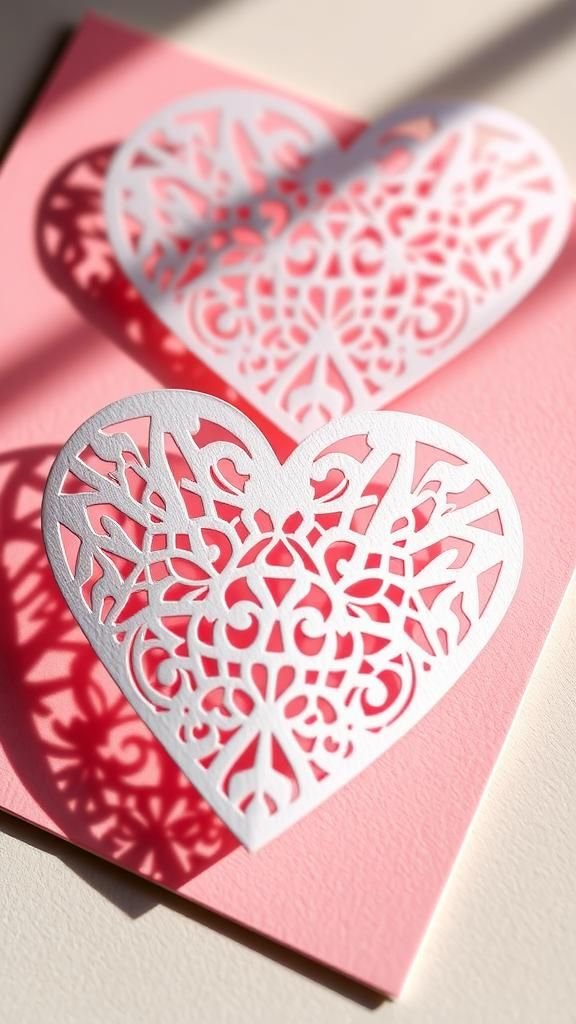
Lace-cut hearts looked like tiny windows into a softer world; the negative spaces created filigree that invited closer inspection. The precision of the cutouts cast intricate shadows that moved as the light shifted, and when layered over a colored sheet they created a stained-glass effect.
I remember leaning in close, counting the little holes and appreciating the quiet patience in the tiny pattern work. The paper edges felt crisp under fingertips, and the overall silhouette read like a keepsake borrowed from an old letter.
The effect was quietly elegant, lending any tabletop a whisper of ceremony.
Steps
- Choose a sturdy paper and sketch or print a lace-heart pattern for cutting accuracy.
- Secure the paper on a cutting mat and carefully cut the negative spaces with a sharp blade or precision tool.
- Clean up any loose fibers and press the finished hearts flat for neat presentation.
- Layer the lace-cut hearts over colored card or frame them for display.
Envelope seals with paper-cut floral monograms

Paper-cut monogram seals felt like a personal crest, a tiny emblem sewn into the corner of a letter. Each floral flourish around the initial gave the seal its own mood, sometimes coy and looping, other times precise and compact.
The raised paper edges caught light, creating a subtle relief that begged to be touched. I enjoyed placing one on the back flap of an envelope and imagining the recipient pausing to admire the miniature artwork before breaking the seal.
The overall effect transformed an ordinary envelope into a small, formal offering that read as earnest and thoughtful.
Steps
- Design a small floral monogram and transfer the pattern onto sturdy paper for cutting.
- Carefully cut out the monogram and floral elements and mount them onto small circular backing pieces.
- Adhere the finished seal to envelope flaps with a minimal adhesive to keep the relief visible.
- Optionally press the edge gently for a cleaner bond and allow to dry before mailing.
Paper flower corsage for a pocket or lapel

A paper flower corsage felt like a wearable note, unexpected and charming on a jacket lapel. The petals held a crispness that contrasted with the softness of fabric, and when I brushed it with my fingers the edges made a faint rustle.
The center gathered light differently than surrounding petals, creating a bright focal point that caught eyes across a room. Wearing one at a small gathering felt lighthearted and a little theatrical, like carrying a personal emblem of affection.
The corsage seemed to spark conversations, each compliment becoming part of the memory of the evening.
Steps
- Construct a layered paper bloom with graduated petals and secure a small backing disc for stability.
- Attach a pin or small alligator clip to the backing for lapel or pocket placement.
- Add a short paper-wrapped stem or ribbon loop for extra security if needed.
- Position the corsage on fabric and check the fit, adjusting petals for an attractive silhouette.
Keepsake envelope garland with short love notes
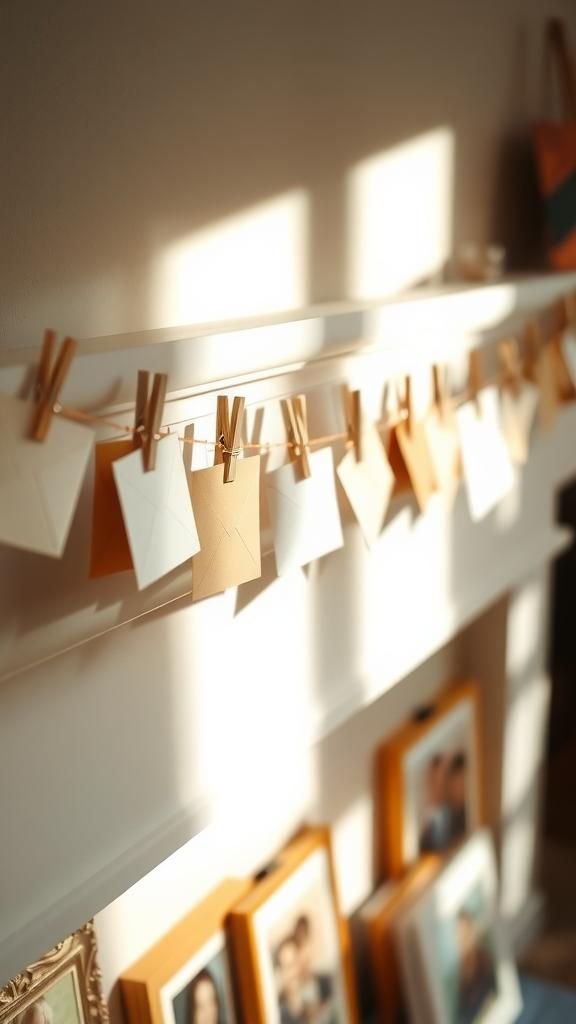
An envelope garland strung across a mantel became a timeline of small sentiments, each tiny envelope holding a single line or a faded photograph. The little flaps cast slanted shadows against the wall, and every now and then one would ruffle as someone passed beneath.
I liked the variety of papers and the way a cluster of envelopes hinted at an unfolding story. The garland invited casual interaction: a hand reaching up to peek, a quiet laugh, a folded note pinned between two envelopes.
It felt like a living scrapbook that gathered small acts of affection over time.
Steps
- Prepare several small envelopes and tuck brief notes, photos, or mementos into each.
- Attach each envelope to a length of twine using tiny clothespins or thin adhesive tabs.
- Space the envelopes evenly along the twine and create small groupings for visual interest.
- Hang the garland across a mantel or wall and occasionally rotate contents to refresh the display.
Paper heart mobiles that sway with the air

A heart mobile hanging near a window turned every air current into movement and story. The suspended hearts twisted and turned, catching speckles of sun and throwing patterned shadows across the ceiling.
I found myself watching it the way one watches a small animal, noticing rhythm and pause. The balances between pieces felt delicate but steady, and the slow rotation offered moments of quiet contemplation.
Each heart hung at a slightly different height and color, creating an airy, layered silhouette that read like a soft constellation above the coffee table.
Steps
- Create multiple heart shapes in varying sizes and colors, reinforcing hanging points with small adhesive patches.
- Cut lengths of fishing line or thin thread and attach each heart to a lightweight ring or branch.
- Balance the suspended elements so the mobile hangs level while allowing free movement.
- Hang the mobile near a gentle draft or window to encourage slow, graceful swaying.