I grew up cutting paper snowflakes at the kitchen table while winter rain tapped the windows, and those simple shapes still feel cozy to me. Playing with textures and light turned a rainy afternoon into something playful and quiet.
Snowflake Paper Craft Ideas brings that same warmth, mixing quick projects with pieces that beg for a hot drink and slow attention.
These paper snowflake ideas are the kind of things I hand to friends when I want to share a small, homemade moment. Each idea carries its own rhythm, from crisp folds to soft tissue layers, and I love how a scrap of paper can brighten a room.
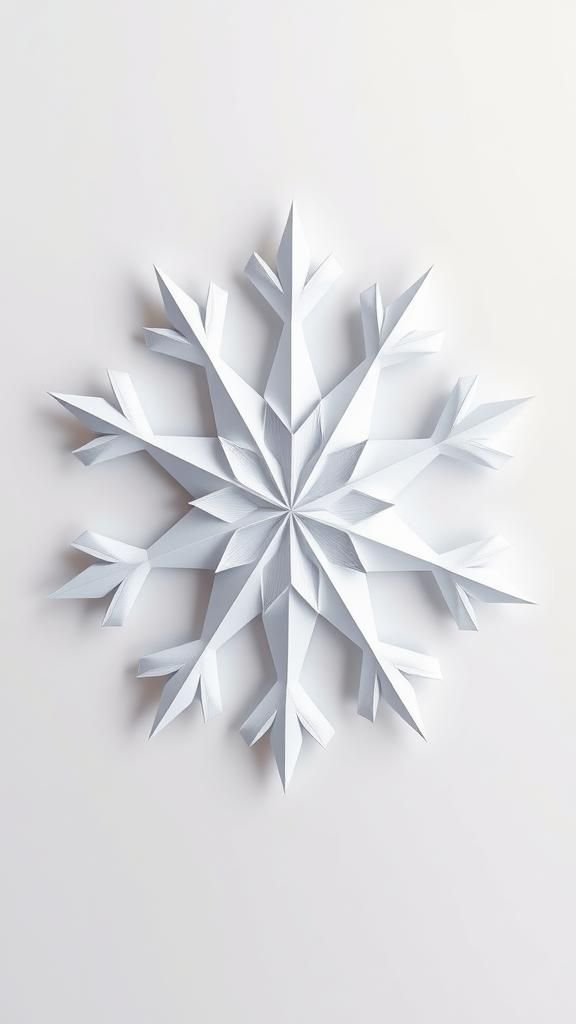
Classic folded snowflakes with imperfect edges
I remember the soft snap of thin paper as it folded into a tiny triangle, a ritual that always felt comforting. The finished snowflake often had uneven arms and slightly jagged points that made it feel handcrafted rather than factory-made.
Light coming through the cutouts casts delicate shadows on the table, and the paper’s faint scent of ink mixes with the memory of winter air. Holding one up to the window reveals a miniature winter scene, with each arm showing the small quirks of the maker’s hand.
Steps
- Fold a square sheet of paper into a triangle by bringing one corner to the opposite corner, then fold that triangle into smaller overlapping triangles until compact.
- Draw a few simple cut shapes along the triangle’s edges, avoiding the folded spine area, and then carefully cut through the layers with scissors.
- Unfold the paper slowly to reveal the snowflake, smoothing creases gently to help it lie flat before displaying on a windowsill or hanging by thread.
Layered paper snowflake ornament with texture
I like stacking different papers to create a snowflake with depth, where each sheet adds a whisper of texture. Thin vellum gives a soft glow, while cardstock adds a satisfying weight.
The center often becomes a tiny focal point, sometimes with a pearl or a small scrap of glittering paper that catches light. When the mobile drifts with a draft, the layered edges graze each other with a muffled whisper.
There’s a quiet pleasure in watching shadow and form shift as the layers overlap and part.
Steps
- Cut several snowflake shapes of slightly different sizes from contrasting papers, making each one progressively smaller.
- Stack the cut shapes with the heaviest paper at the back and the most translucent at the front, aligning centers carefully.
- Fasten the layers at the center with a small brad or glue dot, then thread a loop through the center to hang the ornament on a tree or branch.
Three-dimensional snowflake ball that floats
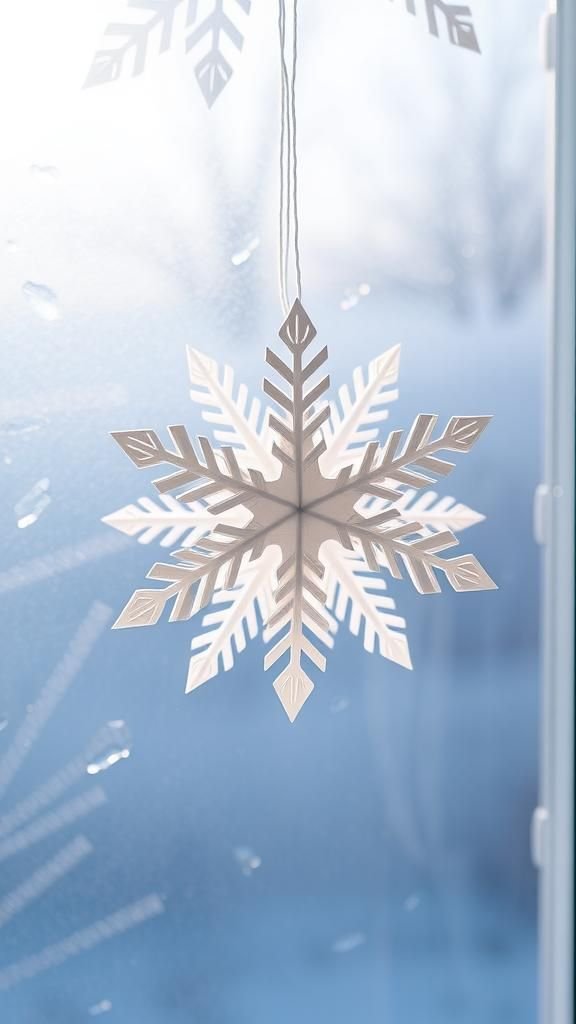
The first time I made a 3D snowflake ball I was struck by how it changed from flat cutouts to a spherical form that seemed to float. Each arm protruded in a delicate arc, catching light differently as the piece turned.
The tactile contrast between crisp edges and the hollow interior invites closer inspection. The whole ball feels lighter than it looks, responding to the faintest air currents with a slow, graceful spin.
It adds a playful geometry to a window or doorway, like a tiny paper planet.
Steps
- Cut multiple identical snowflake pieces from sturdy paper and score fold lines where each arm will bend outward.
- Gently fold the arms of each piece to create slight curves, then align the edges of pieces to form a sphere.
- Glue or tape the adjoining edges together, leaving a small opening to insert a hanging loop before sealing the seam completely.
Stained-glass tissue snowflake for windows
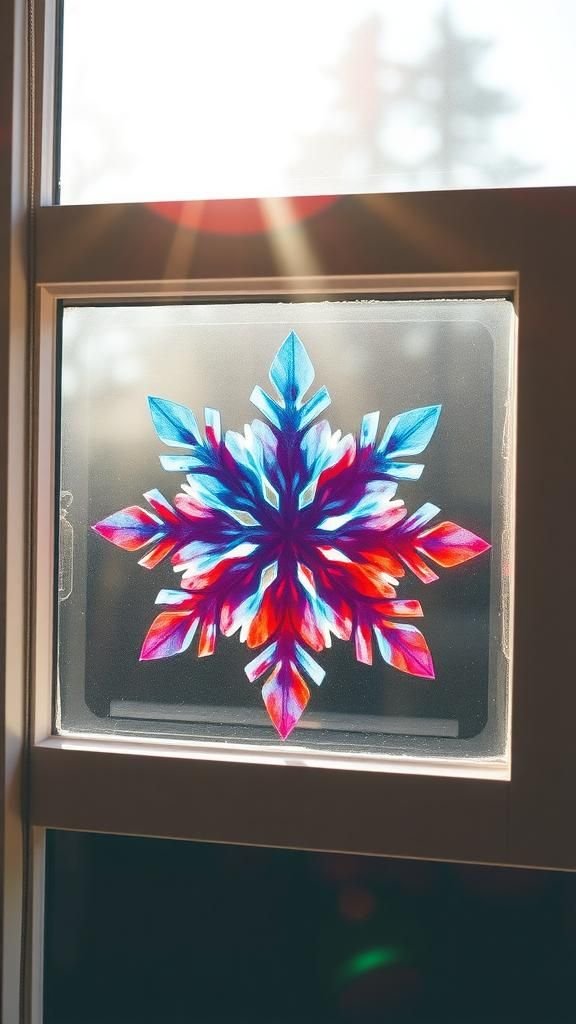
I enjoy the way colored tissue softens light, turning sunlight into a mellow watercolor wash. Thin tissue layered between a paper frame creates tiny panes that glow like stained glass.
The edges have a faint crinkled sound when handled, and the juxtaposition of bold color against white paper feels hopeful and bright on a gray afternoon. When multiple pieces hang together, the window becomes a small gallery of translucent color, each snowflake acting like a miniature painting that changes with the sun’s angle.
Steps
- Cut a snowflake frame from cardstock with open interior shapes that will become window panes.
- Stretch small pieces of colored tissue over the openings, securing them on the back with adhesive so the tissue remains taut.
- Trim excess tissue and attach a hanging loop at the top, then display in a sunny window where light can shine through the colors.
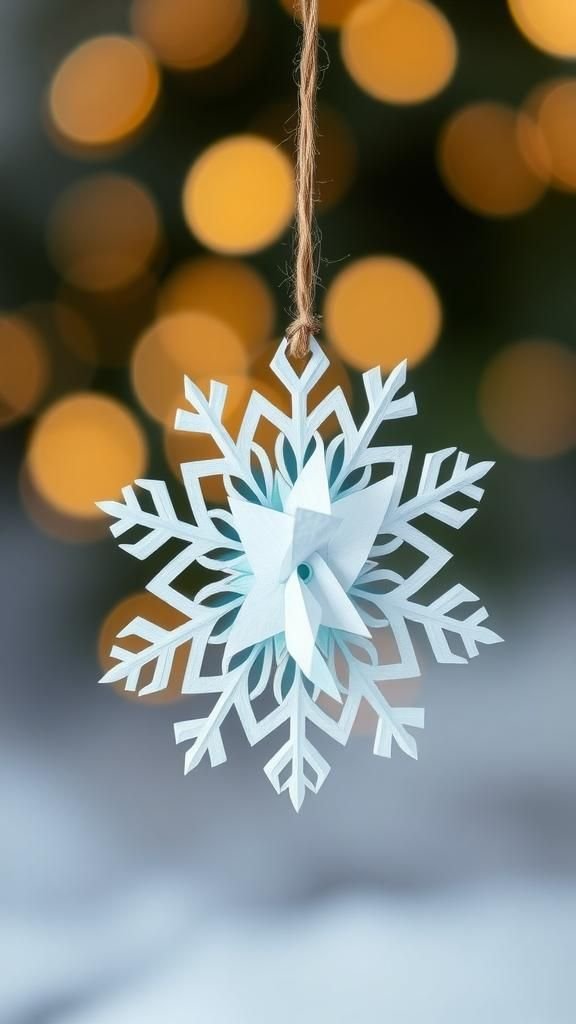
Quilled snowflake pendant with curled paper

Quilling feels meditative, a way to coax shape from thin strips until they bloom into tiny coils and teardrops. A quilled snowflake pendant has a lace-like personality, each rolled coil offering a different catch of light.
I often trace the tiny spirals with a fingertip, noticing how the paper’s sheen plays off the curves. Hung from a string, the pendant swings with a soft whisper and shows off the gentle shadows of filament-like paper.
The finished piece feels fragile yet unexpectedly sturdy when held.
Steps
- Prepare narrow strips of paper and roll them into coils using a quilling tool, shaping some into teardrops and marquise shapes.
- Arrange the coils into a radial snowflake pattern on a backing disc, adhering each piece where the design requires.
- Once dry, add a small bail or loop to the top so the pendant can hang from a ribbon or chain.
Doily-inspired lace snowflake garland for mantel

Turning round paper doilies into snowflakes feels like turning old postcards into new stories. The lace pattern of a doily gives a snowflake an airy filigree that looks enchanting when strung along a mantel.
I like how the garland drapes with a gentle sag, each lace disc catching a different edge of light. When the fireplace glows, the paper glows back, and there’s a comforting contrast between warm hearth and cool paper white.
The overall effect is quiet and domestic, like a small ceremony of winter.
Steps
- Trim doilies into snowflake-like shapes by clipping small wedges from the edges or adding additional cutouts for more detail.
- Space the modified doilies along a length of thin twine or ribbon, securing each with small clothespins or glue dots.
- Hang the garland along a mantel or doorway so the delicate lace elements cast patterned shadows in warm light.
Pop-up snowflake greeting card that surprises

There’s a small thrill when a flat card blooms into a three-dimensional snowflake as it opens. The pop-up element appears like a paper bloom, filling the inside with a delicate structure that invites a touch.
I often pair the pop-up with a handwritten note, and the combination feels personal in a way an instant message never does. The interplay between the flat exterior and sculpted interior creates a secret for the recipient to find, and handling the card always brings back the tactile joy of papercraft.
Steps
- Fold a card in half and design a pop-up mechanism by cutting matching tabs and flaps that will lift when the card opens.
- Attach a pre-cut paper snowflake to the pop-up tabs so it stands upright when the card is opened.
- Test the opening and closing gently, making small adjustments so the snowflake folds flat without catching when the card closes.
Paper lantern snowflake that glows softly

A paper lantern with snowflake cutouts brings a hush to a room when lit. The light filters through the hand-cut shapes and casts delicate starbursts on nearby walls.
The paper’s warmth feels surprisingly cozy, and I often sit beside one while reading, appreciating the gentle flicker. There’s a quietness to the glow, like a small nightlight for winter evenings.
The sound of a faint breeze and the soft pattern projections create a calming backdrop that invites slow conversation or solitary thought.
Steps
- Cut a cylinder of sturdy paper tall enough to form the lantern, then arrange snowflake cutouts around its surface.
- Secure the cylinder’s seam and add a flat base so it can stand, making sure the cutouts remain unobstructed.
- Place a battery tea light inside the lantern and enjoy the soft patterned glow while keeping it on a heat-safe surface.
Intricate paper-cut lace snowflake silhouette

Fine paper-cutting slows time in the best way, where delicate snips reveal a detailed lace silhouette. Working on one of these always involves close focus, and I notice small breath sounds and the tactile drag of scissors.
The finished silhouette looks fragile yet crisp, a tiny window into patience. When held against light, the negative space becomes the star, and the tiny bridges of paper that hold the design amaze me.
These pieces feel like quiet poems, where every cut counts and the silence of the work lingers.
Steps
- Trace an intricate snowflake pattern onto a folded sheet of paper and ensure the design connects to the central area to maintain structure.
- Carefully cut along the traced lines with a precision craft knife, working slowly to preserve tiny bridges and fine details.
- Unfold the paper to reveal the lace silhouette and press it flat under a book if needed before framing or displaying.
Modular origami snowflake with repeating units
Putting together an origami snowflake feels like assembling a small constellation. Each folded unit snaps into place with a faint click, and the symmetry that emerges is quietly satisfying.
The repetitive action turns into a rhythm, and when the final unit locks in, the piece feels complete in a precise way. The paper’s crisp fold lines and the slight friction between units give a tactile richness.
It looks geometric from a distance and intricate up close, with each module contributing to an overall pattern that balances logic and whimsy.
Steps
- Fold multiple identical origami units from square sheets, creating interlocking tabs or pockets as the pattern requires.
- Join the units by tucking tabs into pockets, aligning edges so the entire circle forms evenly.
- Secure the final connection and gently shape the points so the snowflake lays flat or holds a slight cup shape.
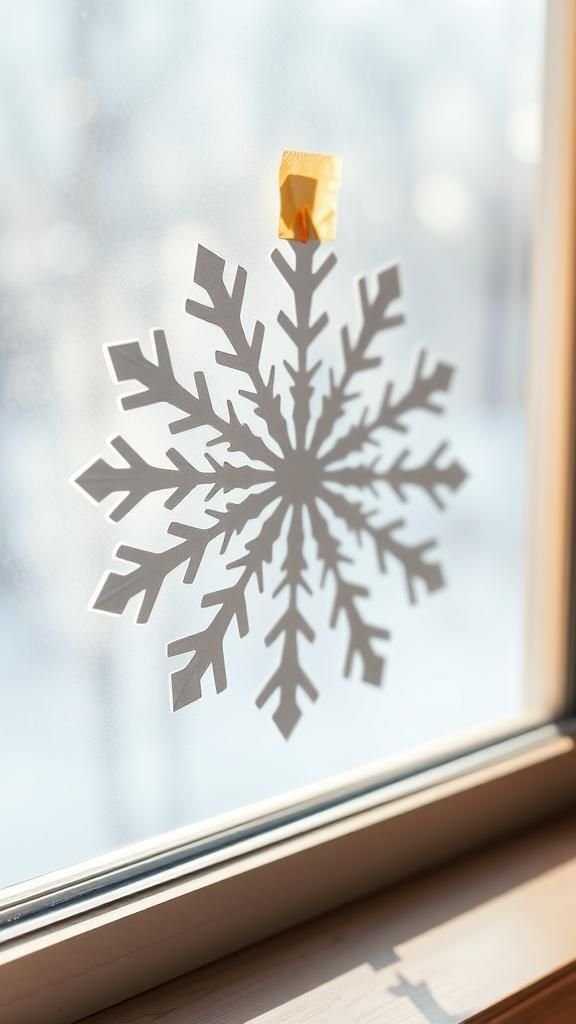
Window cling snowflake using translucent contact paper
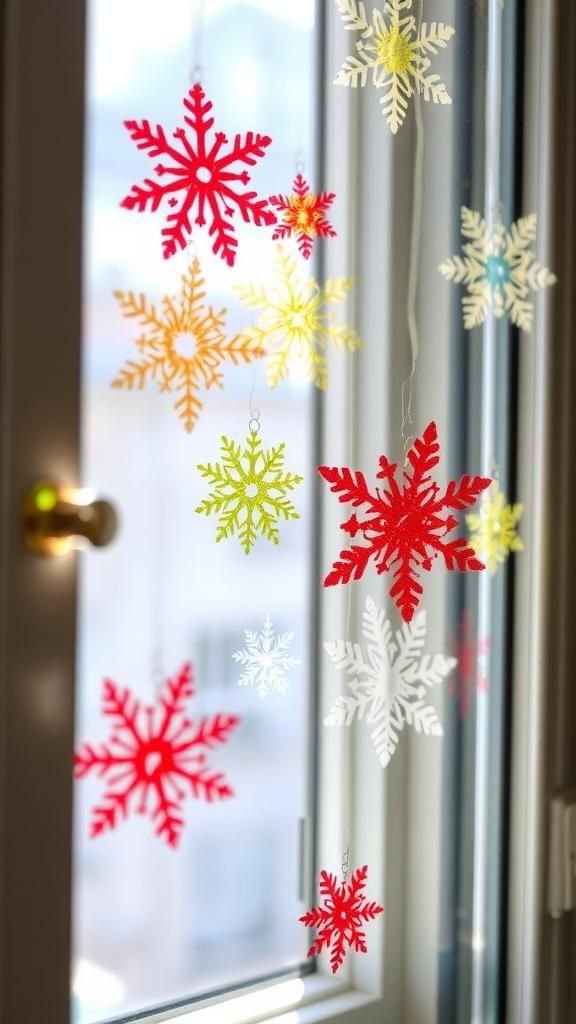
Making a snowflake cling for a window brings a playful burst of color to a cold view. The translucent contact paper feels smooth and cool under fingertips, and when pressed to glass it creates a glossy little tableau.
The edges pick up light and create tiny highlights, while overlapping colors blend into new hues. I enjoy rearranging these clings as the mood changes, moving them higher for afternoon sun or clustering them at eye level for small hands.
They are cheerful companions on drizzly days, bringing a handcrafted shine to the pane.
Steps
- Cut snowflake shapes from colored translucent contact paper or transfer tissue, leaving a small border for handling.
- Peel the backing and press the cling firmly onto a clean window surface, smoothing out air bubbles.
- Repeat with differently colored clings for layered effects, rearranging as desired to catch different light angles.
Snowflake wreath made from tiny paper cutouts

A wreath composed of many small paper snowflakes feels abundant without being heavy. I once arranged dozens on a foam ring and found the collective white shapes looked like a frozen bloom.
The edges create soft shadow lace against the wall, and there’s a satisfying contrast between the wreath’s roundness and the angular snowflake points. Walking past, I’d hear the faint rustle when a draft moved the lighter pieces.
It reads like a winter halo at the entryway, welcoming with a handmade quietness rather than loud holiday cheer.
Steps
- Cut a collection of small snowflake shapes from paper in matching or coordinating tones.
- Layer and slightly overlap the pieces around a sturdy ring base, securing each with glue or pins so they flare outward.
- Finish with a loop for hanging and position the wreath where the layered shadows can show.
Holiday gift tags shaped like tiny snowflakes

Gift tags shaped as snowflakes add a small, personal note to packages that feels handcrafted. The paper edges sometimes bear a hint of ink or metallic pen, which catches the eye when light hits.
Holding a wrapped present with a paper snowflake tag feels like a tiny ceremony, and I often imagine the recipient feeling that moment of tactile attention before the ribbon is untied. The tags can be crisp and simple or dressed with a tiny thread of sparkle, each one carrying the warmth of its maker’s thought.
Steps
- Cut small snowflake shapes from sturdy paper or cardstock sized to fit on a gift corner or ribbon.
- Punch a hole near the edge, thread through twine or ribbon, and optionally add a small embellishment like a foil accent.
- Tie the tag to a wrapped package so it sits visibly on top of the bow.
Snowflake confetti for a tabletop sprinkle
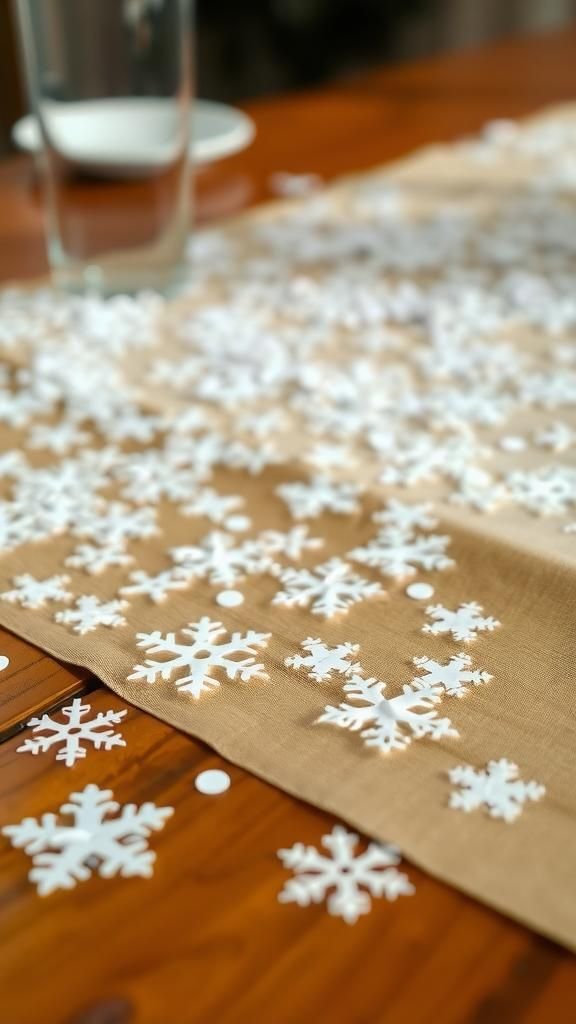
Scattering tiny snowflake shapes across a table feels playful and celebratory in a quiet way. The confetti pieces catch light and create a dusting that looks like a fresh snowfall in miniature.
I like how they shift under a glass when someone moves it, leaving a small trail of paper behind. The texture against linen is subtle, the edges sometimes lifting slightly to catch a shadow.
It’s an economical flourish that transforms a simple setting into something that invites lingering and small compliments.
Steps
- Punch or cut small snowflake shapes from lightweight paper, keeping a mix of sizes for visual interest.
- Clean the tabletop surface, then scatter the confetti evenly across the center area or along a runner.
- If desired, capture the confetti inside clear votives or under place settings for a contained effect.
Shadow box with layered paper snowflake scene

A shadow box lets paper snowflakes live in a small, protected world. Layering snowflakes at different depths creates a sense of distance, like a paper forest glimpsed on a winter walk.
I enjoy the hush inside the box, where light enters and the layers cast soft, tiered shadows. The enclosed frame invites quiet inspection, and the piece feels like a tiny stage set of winter memory.
When placed on a shelf, it offers a pause—a contained scene that rewards slow looking from different angles.
Steps
- Arrange paper snowflakes on thin strips or foam pads to create multiple depth layers inside a shallow box frame.
- Secure each element so it remains suspended at the chosen depth, maintaining balance across the composition.
- Close the frame and position the shadow box where side light can create layered shadow effects on the backboard.
Bookmark with a delicate snowflake corner

A snowflake bookmark adds a little winter flourish to reading time. I once tucked a corner snowflake into a novel and enjoyed the way its silhouette peeked above the page.
The paper’s thin edge sometimes ticked the fingertip when turning a page, a tiny tactile reminder that someone had thought about the moment between chapters. Simple ribbon or a tassel can add a small weight, and the bookmark makes the act of returning to a book feel slightly ceremonial, as if the story waits with a paper friend.
Steps
- Cut a rectangular strip of sturdy paper or cardstock to bookmark size and design a snowflake shape that will sit at one corner.
- Cut out the snowflake corner carefully so it peeks above the page when inserted, reinforcing delicate sections if needed.
- Add a ribbon or tassel through a punched hole for easier retrieval and a small decorative touch.
Table place cards shaped like mini snowflakes

Using snowflakes as place cards turns seating into a small ceremonial act. I enjoy writing names alongside tiny paper cutouts that sit like little crowns on napkins.
The paper surface accepts ink in a friendly way, and the quiet formality of a personal card feels intimate for guests. When sunlight hits the table, the paper shadows mingle with the centerpiece glow, and the overall setting feels thoughtfully arranged.
Passing a name card across a table becomes a gentle social exchange, softened by the paper’s fragile charm.
Steps
- Cut small snowflake shapes from cardstock and write guest names on or beside each piece with a fine pen.
- Fold a small base or attach a tuck so the card can stand upright on the table near each place setting.
- Arrange the cards on napkins or plates so they are visible as guests are seated.
Long paper runner made from linked snowflakes

A table runner made of linked paper snowflakes feels like a slow ribbon of winter draped across the surface. Each connected piece contributes to movement, and the slight overlaps create layered shadow bands.
I once laid one down for a small dinner and enjoyed how it drew the eye along the table’s length without overpowering the place settings. The paper’s crisp edges contrasted with soft linens, and the runner folded easily for storage between gatherings.
It’s an economical way to add continuous texture across a tabletop.
Steps
- Cut multiple medium-sized snowflake shapes and prepare small tabs or loops to link them together along their edges.
- Join the snowflakes by fastening the tabs so they lie flat yet slightly overlapping, forming a continuous strip.
- Lay the runner down the table’s center and adjust spacing so the pattern flows naturally between place settings.
Mini snowflake sculptures on thin wooden sticks

Mounting small paper snowflakes on slender sticks turns them into little sculptural blooms. Arranged in a jar, they read like a winter bouquet that never wilts.
The thin stems offer a contrast between the organic suggestion of branches and the geometric paper forms above. I enjoy the quiet animation when someone breathes near the jar and the snowflakes wobble and settle again.
The combination looks charming on a side table or windowsill, and the tactile mix of wood grain and crisp paper invites a soft inspection.
Steps
- Attach small paper snowflakes to the tops of thin wooden sticks or skewers using glue or tape at the back.
- Arrange the sticks at varying heights in a jar or foam base to create a layered bouquet effect.
- Optionally add small filler like dried moss or beads in the container to stabilize the arrangement.
Metallic paper snowflake mobile with shimmer
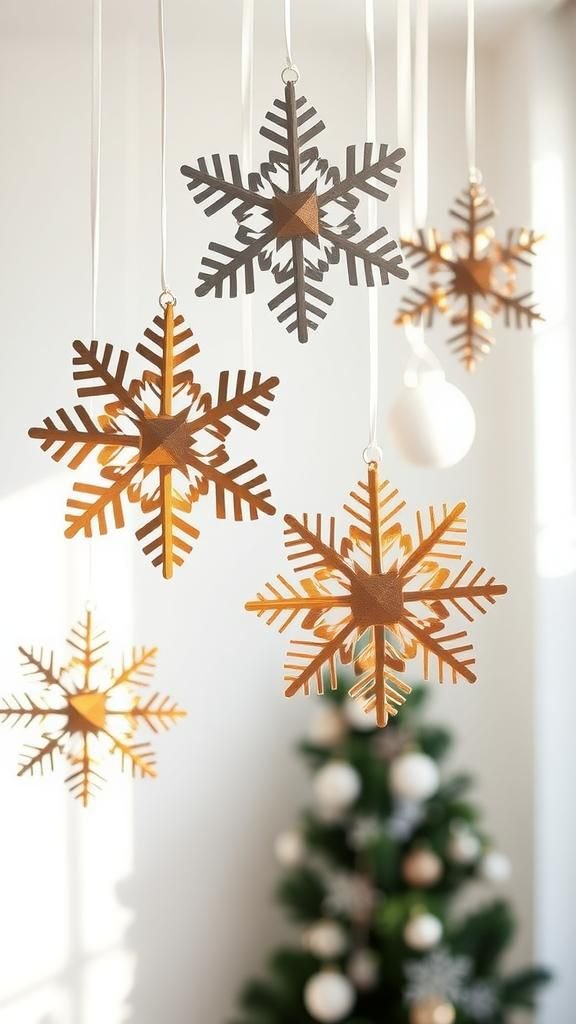
Shiny metallic paper lends a small drama to snowflakes, catching light in a way that plain paper does not. Hanging several on a mobile creates twinkles that move with the slightest air.
The sound is a faint clink if pieces touch, and the reflections scatter tiny highlights on nearby surfaces. I like how the metallic finishes feel modern yet playful, a contrast to the traditional white snowflake.
Suspended over a corner table or in an entry, the mobile feels like a tiny constellation of winter lights.
Steps
- Cut snowflake shapes from metallic or foil-backed paper, ensuring edges are smooth to avoid tearing.
- Attach the snowflakes to lengths of clear thread or thin wire and balance them from a central ring or hoop.
- Adjust hanging lengths so the pieces move freely without tangling, then secure the top loop for installation.
Stitched paper snowflake with simple embroidery lines

Adding a few running stitches to a paper snowflake introduces a crafted warmth that bridges paper and thread. The gentle resistance of paper under the needle is satisfying, and the small embroidery lines create subtle textural ridges.
I often choose soft contrasting thread that peeks through cutouts and gives the piece a humble stitch-mark signature. The finished snowflake sits between drawing and textile work, offering both visual rhythm and a hand-marked intimacy.
It’s a quiet embellishment that rewards close looking and the pleasure of small, repetitive marks.
Steps
- Puncture a pre-cut paper snowflake with small holes along desired stitch lines using a pin or awl.
- Thread a needle with embroidery floss and follow the punched path, securing the thread on the back with small knots.
- Trim excess thread and press the snowflake flat under a book if needed before display.