I remember wandering down the aisles of a dollar store on a rainy afternoon and coming away with a handful of mismatched items that somehow felt full of possibility. There is something quietly satisfying about turning inexpensive finds into warming touches for the home, and Dollar Store Home Decor Crafts have become a way to experiment without worrying about waste.
Over time I collected small wins: a glass jar that caught light like a lantern, a ribbon bundle that became a cheerful garland, a tray transformed into a focal point.
These simple projects often feel like tiny celebrations of thrift and creativity.
Mason jar lantern with soft fairy lights

I like how a clear jar can become a tiny world when it holds little lights. The glass feels cool under my fingers and catches the glow in a way that makes the whole room hush for a moment.
Salt or sand at the bottom adds weight and a beachy look, while the veil of warm light creates a cozy nook on cloudy evenings. It sits on a bedside table or windowsill and changes the mood without shouting, offering a gentle, amber presence that feels both nostalgic and quietly modern.
Steps
- Place a small layer of sand or decorative filler into the bottom of a clean jar.
- Nest a string of battery-operated fairy lights into the jar, arranging the lights so they spread evenly.
- Tuck the battery pack behind the lights or hide it beneath the filler if space allows.
- Close the lid loosely if the battery pack needs ventilation, or leave the lid off for a softer glow.
- Position the jar on a shelf or table where its warm light can be enjoyed.
Gallery wall from painted thrift frames
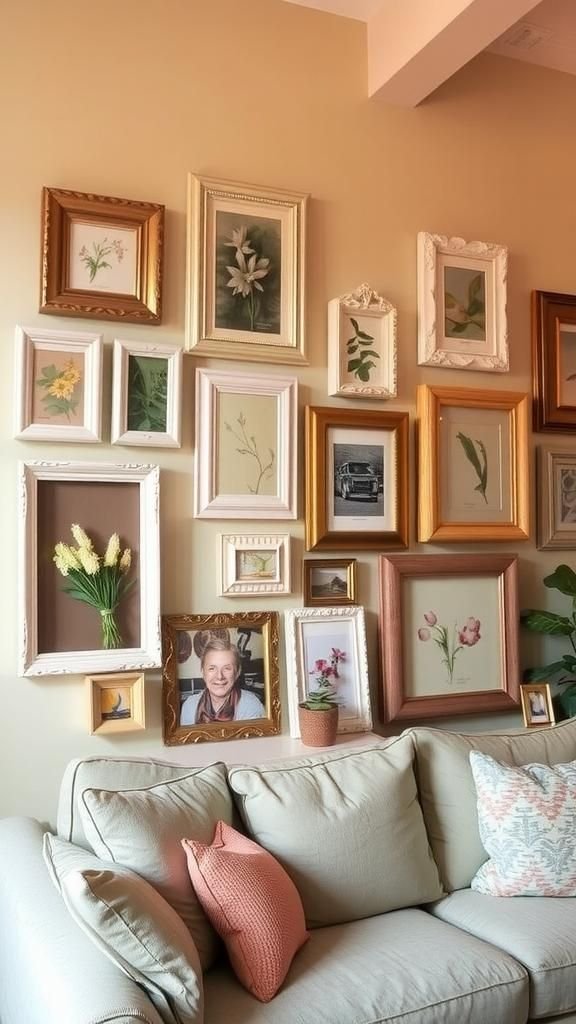
Old frames left on a shelf suddenly feel purposeful when they are painted in a cohesive palette. The brush strokes leave faint ridges and the smell of fresh paint brings a tiny thrill.
Grouping frames of different sizes creates a lively rhythm on the wall and the contrast between glossy and matte finishes keeps the eye moving. Framed pages from magazines or vintage postcards peek through, adding texture and memory.
Hanging them together feels like telling a story, a casual collection that invites a closer look without needing to be precious.
Steps
- Gather mismatched frames and clean any dust or grime from the surfaces.
- Apply a few light coats of paint to each frame, allowing time to dry between coats.
- Replace the glass or backing if needed, insert chosen artwork or photos.
- Arrange the frames on the floor to find a pleasing composition before hanging.
- Hang the frames at eye level, adjusting spacing for balance.
Tiny faux succulent planter from soap dish

A small soap dish that used to sit in the bathroom now hosts a miniature garden that never needs attention. The smooth ceramic base contrasts with the fuzzy plastic leaves of a faux succulent and the little pebbles add a dry, gravelly texture.
It gives off a quiet, green energy and feels unexpectedly fresh on a kitchen windowsill. Passing by, I find myself smiling at how lifelike the arrangement looks under morning light, and how it brings a touch of outdoors inside without any watering guilt.
Steps
- Clean the soap dish and dry it thoroughly before assembling materials.
- Arrange a small foam or soil substitute into the dish as a base for the faux succulent.
- Insert the faux succulent into the base, surrounding it with tiny pebbles for stability.
- Tuck a few decorative stones or moss around the plant to complete the look.
- Place the finished planter on a windowsill or shelf for a pop of green.
Rope-wrapped vase for coastal cottage vibes

I enjoy the contrast between slick glass and rough, fibrous rope when they come together around a vase. The tactile friction of the rope makes the piece feel more grounded, and the muted beige of natural twine brings a seaside calm.
Dried stems or a single bloom looks at home against the neutral wrap, and the scent of a salt breeze seems summoned by association. It rests on a reclaimed wood table and the combination of textures makes the vignette feel collected and quietly lived-in, like a souvenir from a gentle afternoon.
Steps
- Select a glass vase and a length of natural rope appropriate for its height.
- Begin wrapping the rope tightly around the vase, ensuring each coil sits neatly beside the last.
- Secure the rope end discreetly at the base or under a decorative trim.
- Add dried stems or a single long-stem bloom to complement the coastal look.
- Place the wrapped vase on a table where textures and light can play together.
Glitter-dipped pinecones for warm seasonal charm

There is a small thrill when natural roughness meets sparkle. Pinecones gathered from walks take on a new personality when edges catch a dusting of shimmer, and the crunch of dry scales contrasts with the unlikely gloss.
They feel festive without being flashy, sitting in a bowl with cinnamon sticks that give off a faint, comforting perfume. The light picks up the glitter in unexpected ways, sending tiny pinpricks of brightness across a mantel.
They bring a woodland mood into the living room with a playful, low-key shimmer.
Steps
- Select clean, dry pinecones and remove any loose debris.
- Apply a light layer of adhesive to the tips or along the scales where sparkle is desired.
- Sprinkle fine glitter over the adhesive, tapping off excess for an even look.
- Allow the pinecones to dry fully on a protected surface.
- Arrange the finished pinecones in a bowl or on a mantel with seasonal accents.
Fabric scrap tassel garland for cozy mantel decor

I keep a small bag of leftover fabric strips that somehow always beckons when a mantel feels bare. The soft rustle of frayed edges and the mix of patterns bring a homespun rhythm to a room.
The garland hangs with a friendly, casual sway and the weight of each tassel creates a relaxed drape that feels welcoming. Colors caught in afternoon light throw dappled reflections across the wall, and the tactile mix of cotton and linen invites fingers to linger.
It ends up as a cheerful backdrop to evening tea.
Steps
- Prepare an assortment of fabric strips in coordinating colors and textures.
- Tie the strips along a length of twine or thin rope, spacing them to create a balanced look.
- Adjust the tassels so they face the same direction and achieve a pleasing drape.
- Trim any uneven edges for a tidy finish if desired.
- Hang the garland across a mantel or along a wall for a cozy accent.
Chalkboard labeled storage jars for pantry charm
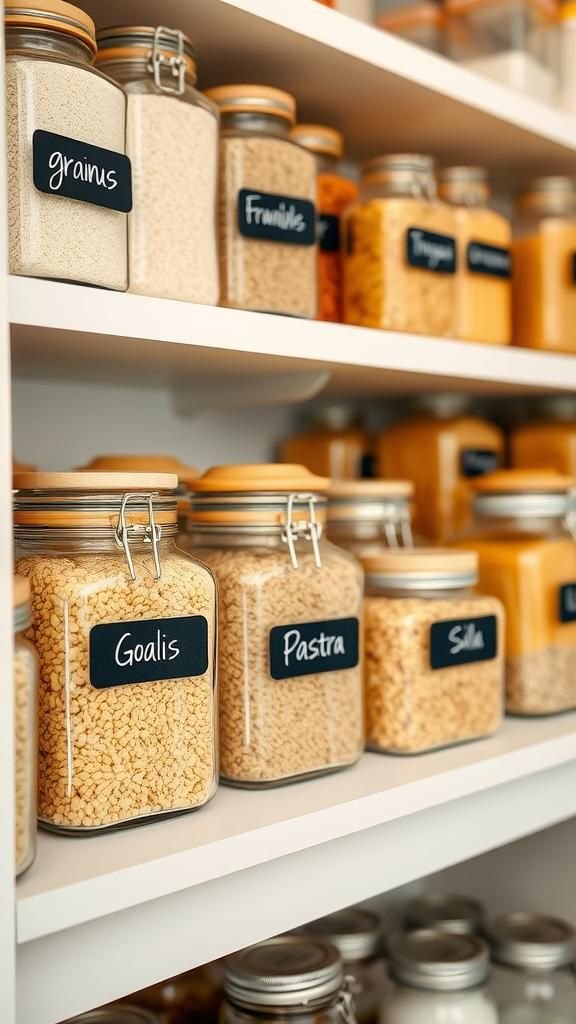
Clear jars lined up on a shelf feel orderly and inviting when each wears a small chalkboard label. The cool glass shows the grainy textures of dry goods and the matte chalkboard adds a friendly, writable surface.
I like the slight ghost of chalk from earlier lists and the quiet satisfaction of a tidy shelf when the morning light hits it. The labels make the whole pantry feel curated without fuss, and the contrast of dark matte against glossy glass has a pleasing, slightly vintage rhythm that calms the cluttered eye.
Steps
- Clean clear jars thoroughly and let them dry before labeling.
- Affix small adhesive chalkboard labels to the fronts of the jars.
- Use a piece of chalk or a chalk marker to write contents on each label.
- Wipe with a damp cloth to adjust lettering if needed and allow to dry.
- Arrange labeled jars on a pantry shelf for an orderly display.
Decorative book covers using scrapbook paper
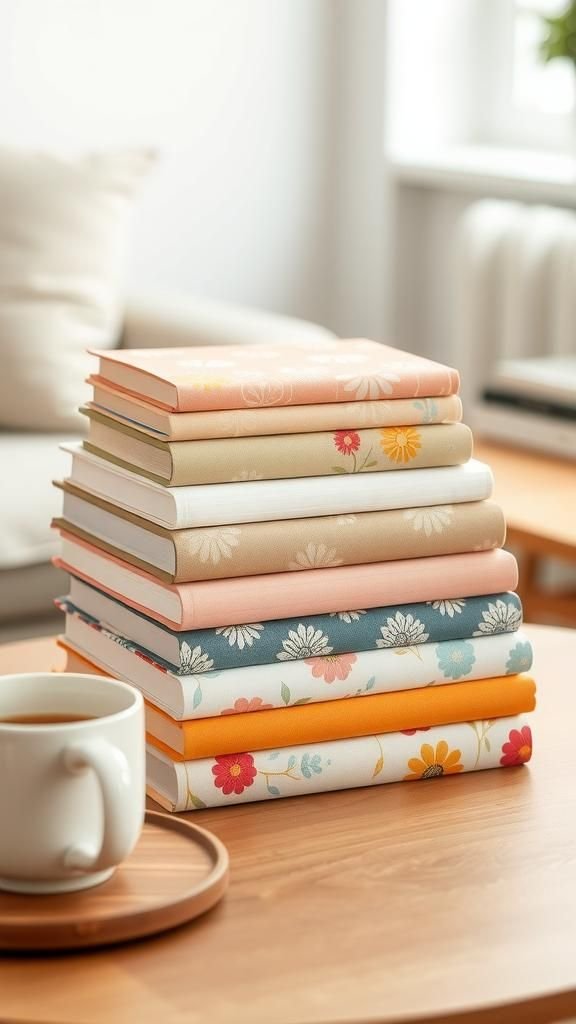
Covering paperback spines in patterned paper turns a stack into a deliberate color story. The paper’s faint texture and the gentle sheen of printed designs feel like quiet dressing for ordinary objects.
When the books are stacked on a coffee table they read like an edited vignette, each pattern catching the eye in a different way. The tactile sound of sliding a paper-covered book out from a pile is oddly satisfying, and the overall effect feels curated without being formal, adding personality to an open shelf or bedside pile.
Steps
- Choose scrapbook paper patterns that complement your room’s palette.
- Measure paper to fit book covers and wrap carefully, securing edges neatly.
- Smooth any air pockets for a clean finish and trim excess paper.
- Reinforce corners with small pieces of tape if needed for durability.
- Stack or display the books to showcase the coordinated designs.
Embellished picture ledge with washi tape frames
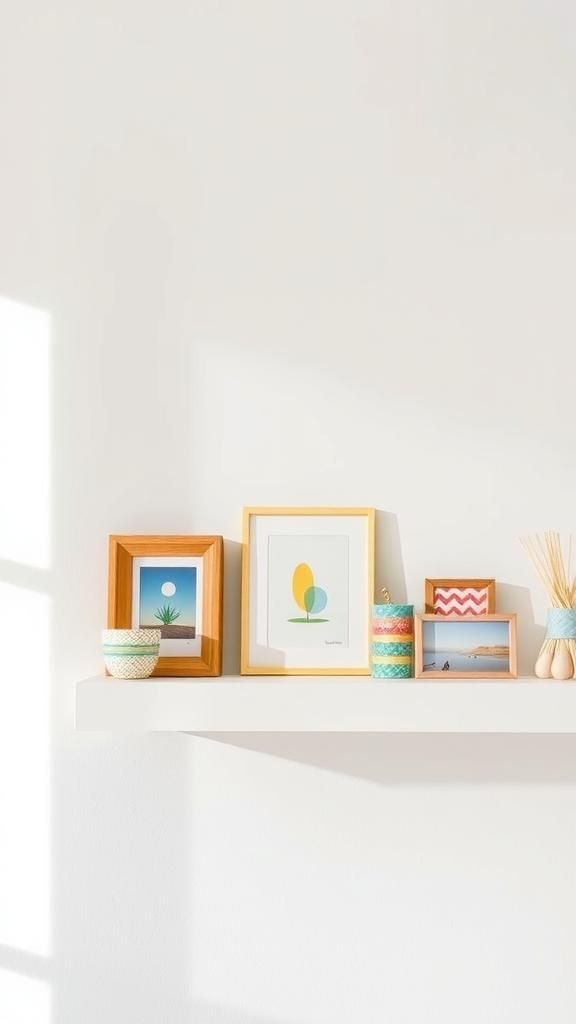
A slim ledge becomes playful when prints and photos wear colorful washi tape borders. The slight sheen of the tape contrasts with matte paper and the edges show personality like a frame with an informal wink.
The gentle hum of color across the ledge pulls the room together and invites swapping pieces whenever the mood shifts. I enjoy the way small changes alter the rhythm of the display, and how the tactile sound of paper sliding along the tray feels like a tiny ceremony of rearrangement that brightens routine afternoons.
Steps
- Select a narrow picture ledge and a variety of washi tape patterns.
- Attach washi tape around the edges of prints or photos to create decorative borders.
- Arrange the taped pieces on the ledge, mixing heights and orientations for interest.
- Slide pieces gently to refine the layout until it feels balanced.
- Refresh the display periodically with new prints or tape patterns.
Painted terra cotta pots with geometric patterns

The earthy grit of terracotta meets clean painted lines in a way that pleases the eye. The warm clay tone peeks through where paint is left thin, and the contrast with crisp geometric shapes brings a modern energy.
Small brush marks and faint texture of clay add a handmade cadence that feels honest. Potted herbs or small blooms sit confidently inside, and the pots catch sunbeams that highlight the interplay of color and raw material.
They sit grouped on a sunny sill, looking lively and slightly indie.
Steps
- Clean terra cotta pots and allow them to dry completely.
- Apply a base coat of paint if desired and let it dry fully.
- Mask areas with tape or freehand geometric shapes using contrasting paint colors.
- Add any accent lines or dots once the main shapes are dry.
- Let the pots cure before placing plants inside.
Mirror tile mosaic tray crafted from coasters

A flat tray becomes unexpectedly luminous when small mirror tiles join together to reflect light. Each tile throws back fragments of the room in tiny, glinting pieces and the surface feels like a compact constellation when the sun hits it.
The edges of the tray retain a tactile wooden warmth while the mirrored center plays with reflections, giving ordinary cups and candles a little ceremony. Picking the tray up reveals a pleasant weight and the soft clink of glass that makes the whole piece feel jewel-like on a coffee table.
Steps
- Gather small mirror tiles or mirrored coasters and a shallow tray base.
- Lay out the tiles on the tray to plan the mosaic pattern before fixing anything.
- Affix the tiles to the tray base with adhesive suitable for glass.
- Allow the adhesive to set fully and clean any fingerprints from the mirrors.
- Use the tray to display candles or decorative objects safely.
Cork bulletin board with a painted frame edge

A corkboard softened by a painted frame feels both practical and pretty. The grainy pins and the faint woody scent of cork contrast with the crisp, painted border.
It becomes a small stage for notes, ticket stubs, and thumbtacked postcards that jostle for attention. Placing a few layered items creates a patchwork rhythm that feels personal.
The board hangs where it can be glanced at while making coffee, and the frame color ties it into the room like a wearable accessory that nudges daily life into a pleasant, organized pattern.
Steps
- Select a corkboard and choose a paint color for the frame.
- Paint the frame edge with even strokes and allow it to dry thoroughly.
- Mount the corkboard securely on the chosen wall.
- Pin notes, photos, and small mementos to create a lively collage.
- Refresh the pinned items over time to keep the display current.
Ribbon loop wreath for an easy seasonal touch

A wreath made of soft ribbon loops looks plush and cheerful on a door or over a mantel. The ribbons whisper against each other and the colors catch the eye like a welcome sign.
Each loop adds a little volume and the whole circle feels like a soft echo of celebration. Hanging it in autumn or spring changes the mood instantly, as the palette can shift from warm to bright.
It reads as handcrafted and approachable, the kind of piece that invites compliments and a moment of pleased surprise from guests.
Steps
- Gather ribbons in complementary colors and a foam or wire wreath base.
- Create loops with ribbon pieces and attach them to the base, filling the circle evenly.
- Adjust loop placement for balance and fullness as needed.
- Add a small bow or accent if desired for a focal point.
- Hang the wreath on a door or above a mantel to set the tone.
Floating shelf from stacked dollar crates

Stacked crates gain an architectural calm when arranged as a floating shelf. The scent of raw wood mingles with the room and small imperfections become part of the charm.
Displayed books, a small vase, and a ceramic figure settle into the shelf with a composed casualness. The visual cadence of slats and shadowed gaps creates an interesting backdrop for objects.
It feels both industrious and homey, like furniture that earned its place by being useful and inviting. Passing a hand along the edge reveals the grain and the little surprises that make it personal.
Steps
- Select matching crates and clean them of any dust or debris.
- Arrange the crates in the desired floating configuration and secure them together.
- Mount the assembled crates to the wall using suitable hardware for the weight.
- Style the shelf with books, plants, and small decorative pieces.
- Check stability periodically and adjust as needed for safety.
Beaded doorway curtain adds soft boho motion
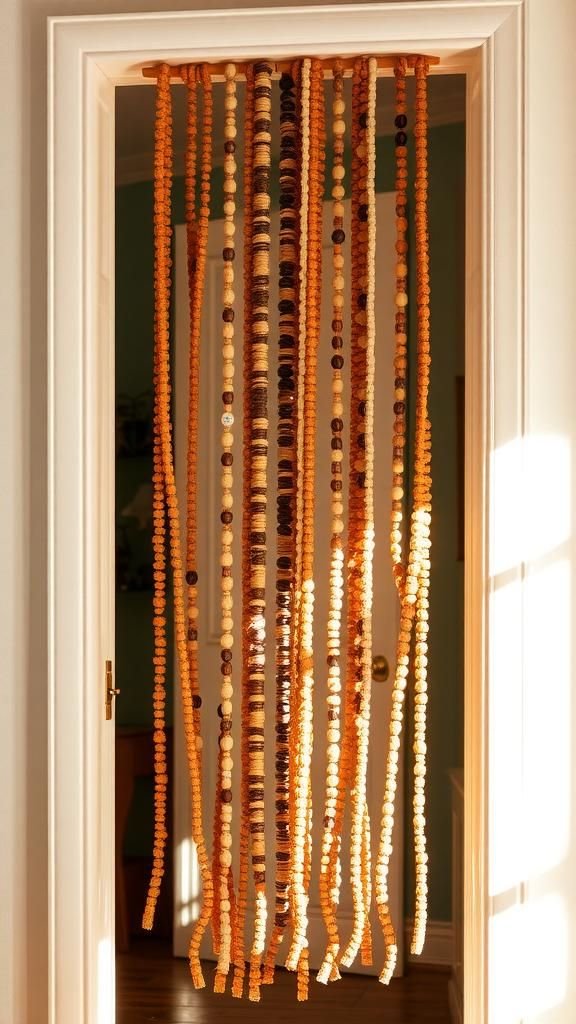
Strands of wooden and glass beads create a gentle curtain that moves with the air and a casual rhythm. The beads click softly when footsteps pass and the light that filters through creates tiny dancing highlights.
The mix of smooth and matte finishes gives a tactile diversity that invites a reach and a smile. Hung in a doorway it suggests a relaxed border between rooms, a hint of global market charm.
The overall feeling is unforced and playful, a simple element that brings texture and a sense of travel into everyday spaces.
Steps
- Choose bead strands in coordinating colors and lengths for the doorway.
- Secure a sturdy rod or rail above the doorway to hang the strands from.
- Attach the bead strands evenly across the width of the opening.
- Trim excess length for a uniform bottom line if desired.
- Adjust spacing and strand order until the curtain flows pleasingly.
Candle centerpiece with sand and collected shells

A shallow dish filled with fine sand and shells becomes an anchor for a cluster of candles. The sand offers a muted, granular field while shells introduce smooth curves and pearly flashes.
When candles are lit the flicker plays over the textured surface, throwing amber pools of light and a faint perfume of spent sea air to the imagination. It feels like a small altar to calm evenings, an arrangement that invites slow conversation and gentle breathing, and it brings a seaside hush into an ordinary dining hour.
Steps
- Fill a shallow dish with a base layer of fine sand for texture.
- Nestle shells and small beach finds on the sand to create visual interest.
- Place pillar or votive candles securely among the shells.
- Light candles carefully and monitor them while burning for safety.
- Extinguish candles when finished and store the centerpiece safely.
Photo clip string with tiny wooden clothespins

A string of photos clipped with small wooden pegs turns a wall into a casual memory lane. The grain of the clothes pegs and the slight snap of the string combine into a familiar domestic soundtrack.
The photos sway lightly with drafts, and their glossy surfaces catch slivers of light. I enjoy rearranging images on a slow afternoon; the act feels like tending a small gallery.
The installation gives the room a personal pulse, a line of moments that reads like a conversation in quiet colors and candid angles.
Steps
- Stretch a length of twine or thin rope across a chosen wall area.
- Attach small wooden clothespins at intervals along the twine.
- Clip printed photos or postcards to the pegs, varying heights for interest.
- Secure the ends of the twine to the wall so it remains taut.
- Update the display over time to keep the gallery fresh.
Upcycled tray lined with marbled contact paper

A plain tray takes on a gentle elegance when its surface wears marbled contact paper. The swirling veins and muted colors feel almost like stone, and the smooth, cool surface invites the touch of fingers and the set of a warm mug.
The tray becomes a stage for beverages and small objects, its pattern adding a quiet sophistication. Watching sunlight skim across the marbling becomes a small pleasure, and the contrast between the tray’s solid rim and the fluid interior pattern feels thoughtfully balanced, like a small slice of gallery craft.
Steps
- Choose a tray and select marbled contact paper in a complementary colorway.
- Measure and cut the contact paper to fit the tray base accurately.
- Adhere the paper carefully, smoothing out any bubbles as it is applied.
- Trim excess material for a neat edge and press corners securely.
- Use the tray to serve items or as a decorative catchall.
Book page collage wall art with aged edges

Pages torn from an old book create a layered tapestry when arranged on a board. The paper carries a faint musty scent and its margins hold tiny edits and age marks that feel like traces of another life.
The soft whisper of paper edges and the faded type draw the eye into quiet spots of rhythm and contrast. When clustered, the pages form a neutral, textured field that reads like weathered plaster or a faded map.
Hung above a desk it gives the space a studious hush, the kind that invites slow thinking.
Steps
- Select book pages with interesting type or illustrations and arrange them on a backing board.
- Overlap edges to create depth and experiment with orientation for visual interest.
- Adhere the pages securely to the backing, smoothing gently to avoid wrinkles.
- Frame or mount the board for display on a wall.
- Place the finished piece where its texture can be appreciated up close.
Painted wooden bead plant hanger with neutral tones

Wooden beads threaded into a plant hanger feel reassuringly weighty and smooth under the palm. When painted in soft neutrals the beads read like a string of tiny sculptures, and the plant’s trailing leaves contrast with the rounded geometry.
The hanger moves gently with air currents and the painted surfaces catch light differently, some matte, some satin, creating a subtle visual beat. It hangs near a kitchen sink or a bright corner and the whole assembly gives the plant a little stage, lending it a considered presence that I appreciate every time I water.
Steps
- Select wooden beads and cord suited to the plant pot’s weight and size.
- Paint the beads in chosen neutral colors and allow them to dry fully.
- Thread the painted beads onto the cord, spacing them to create a balanced hanger.
- Secure the cord ends and create a loop for hanging.
- Hang the planter in a well-lit spot where the foliage can cascade.
Mini shadowbox seaside scene with found objects
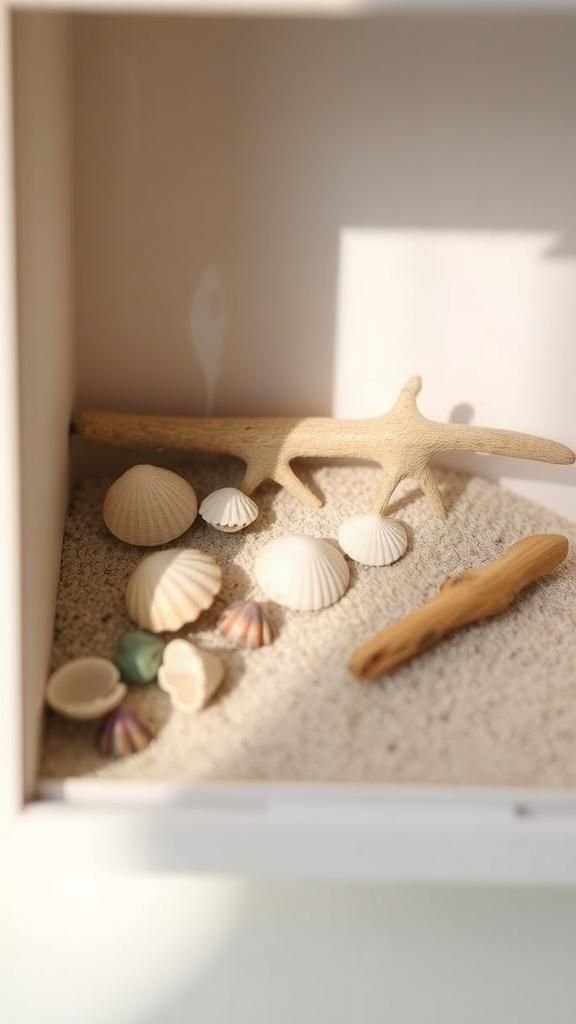
A small shadowbox becomes an intimate stage for shells, a scrap of net, and a bleached driftwood twig. Each element sits in a tiny landscape that smells faintly of salt in the imagination and looks weathered in delicate ways.
The shallow depth creates a sense of containment, like a pocket of coast carried indoors. Light hitting the glass casts soft shadows of tiny objects and the overall effect feels wistful and calm.
It is the sort of keepsake that sparks brief daydreams of distant shores while sitting on a bookshelf.
Steps
- Choose a small shadowbox and gather shells, pebbles, and found beach trinkets.
- Arrange the objects within the box to create a balanced miniature scene.
- Secure pieces to the backing so they remain in place over time.
- Close and seal the shadowbox, cleaning the glass of any smudges.
- Display the box on a shelf where its tiny details can be admired.