Glazed Donut Manicure Ideas are having a sweet moment on feeds, mixing glossy shine with soft jelly hues for a look that flatters every mood. These Glazed Donut Manicure Ideas bring tasty, high-shine finishes that range from sheer candy glazes to pearly, iced-over effects, and work with short, medium, and long nails in almond, coffin, square, and oval shapes.
Because the glazed look pairs well with neutral to bold palettes, these Glazed Donut Manicure Ideas feel seasonal and versatile-perfect for daytime coffee runs, date nights, or brightening up a workweek.
They suit natural nails and enhancements like gel or acrylic, and adapt to minimalist to maximalist tastes.
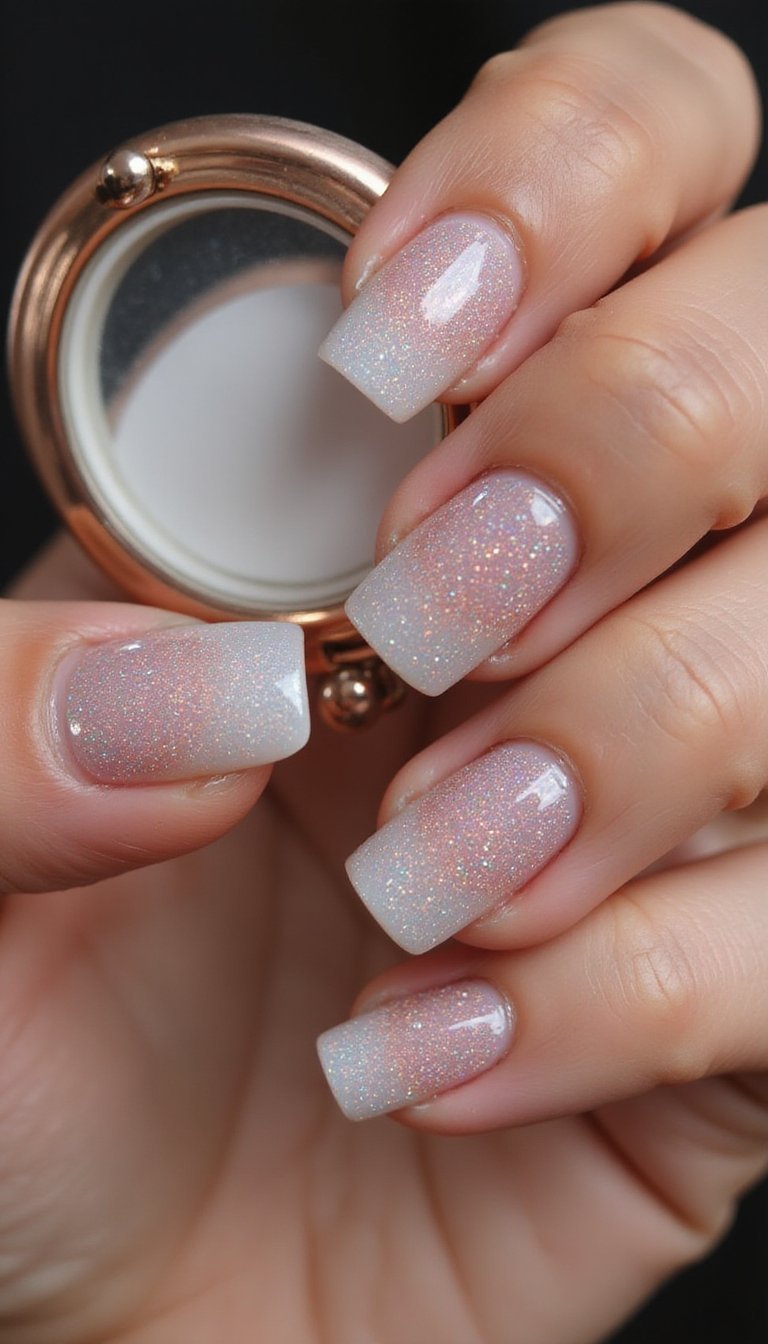
Shimmering Pink Glazed Donut Nails For Sweet Looks
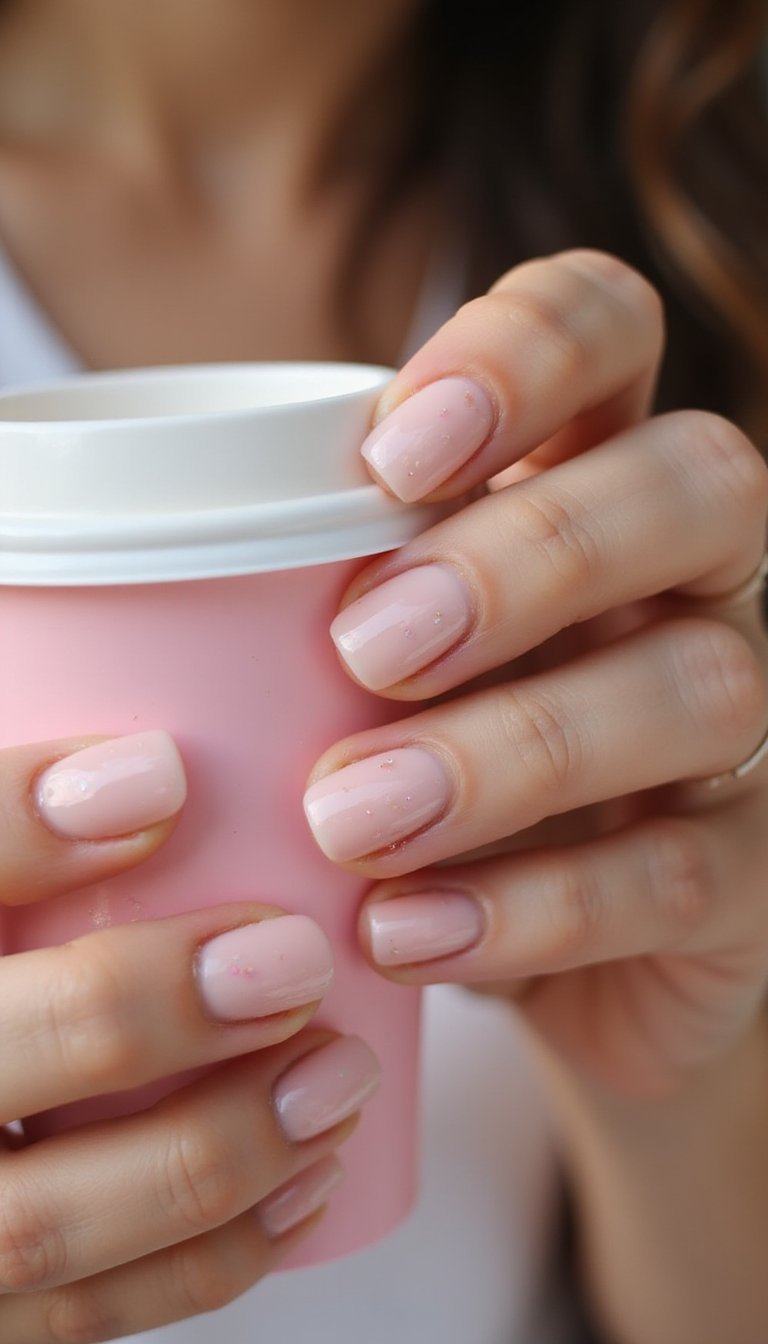
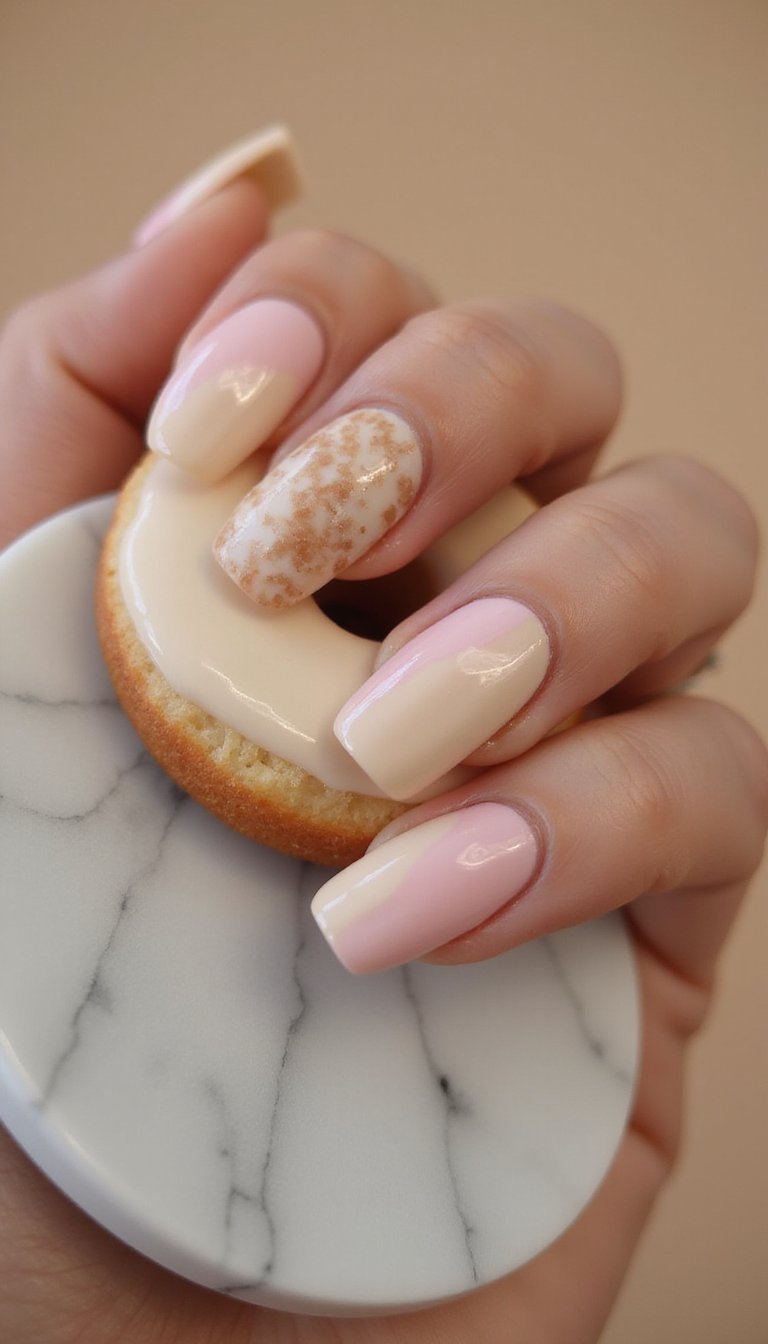
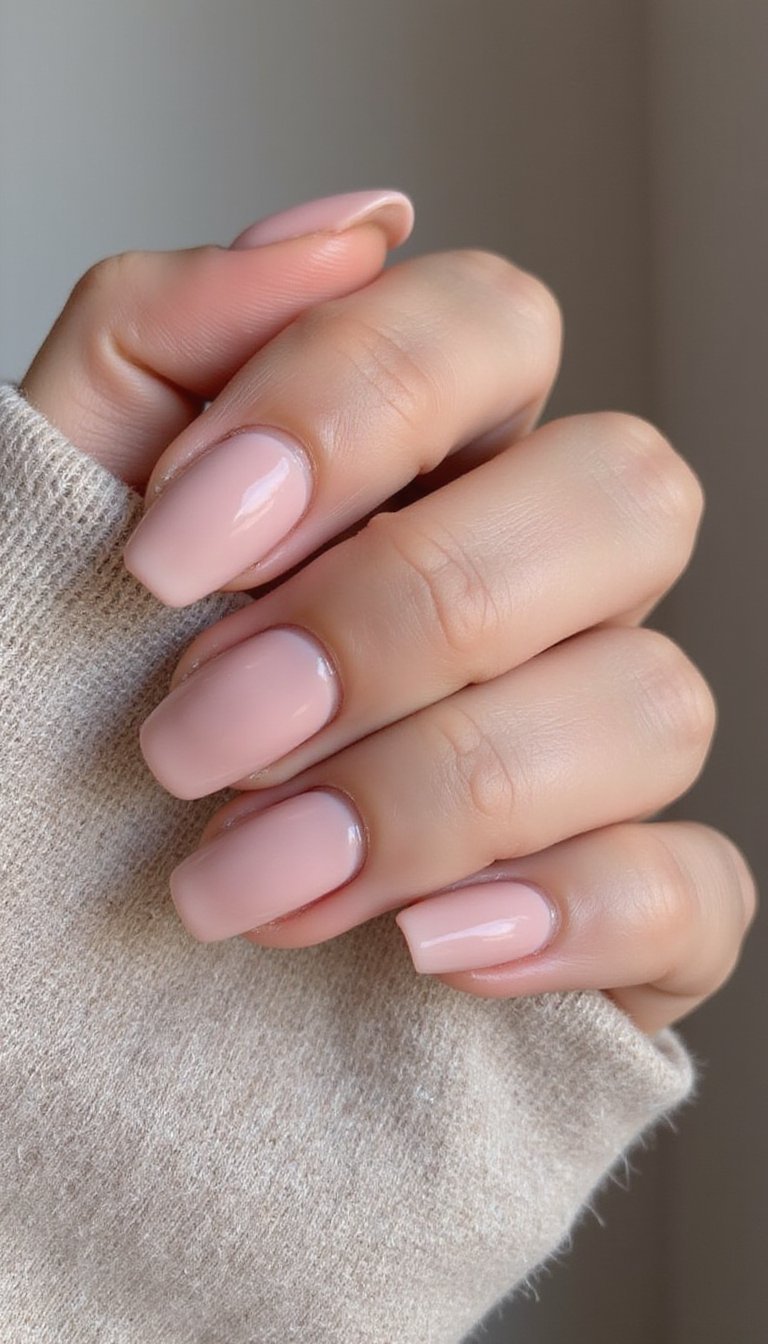
Soft, candy-pink glazed donut nails with a pearly shimmer bring a girly, polished vibe that’s perfect for medium almond or oval shapes. The color palette blends sheer baby pink with a warm iridescent top layer to mimic that freshly iced donut glow. Finished with a high-shine gel top coat, these nails catch warm light and look juicy without being overstated. Ideal for medium length or natural nails, the finish reads feminine and modern-perfect for brunch, spring weddings, or anytime you want a glow-up that still feels wearable.
Nail Tips
- Shape the nails to a soft almond or oval and push back cuticles before applying a dehydrator and thin base coat.
- Use a sheer pink gel or thin builder gel layers, curing each for 30-60 seconds; add a fine pearlescent pigment before the final cure.
- Finish with a glossy gel top coat, cure fully, and massage cuticle oil into the skin nightly to keep the shine and hydration.
Pastel Rainbow Glazed Donut Nails For Playful Vibes
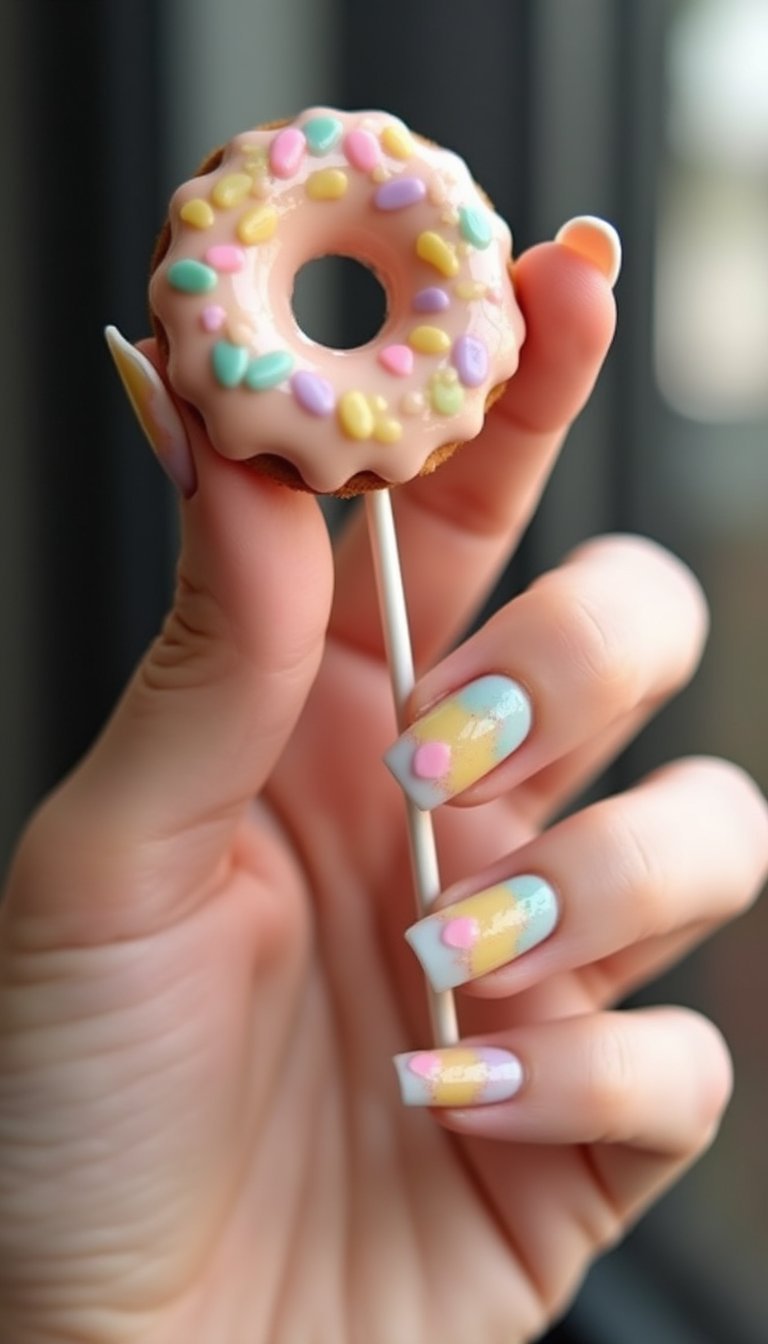
Pastel rainbow glazed donut nails use soft milky tones-mint, lavender, peach, lemon, and baby blue-each with a translucent jelly finish that looks like candy glaze. Best on medium coffin or rounded square shapes, the glazes are layered thinly so each shade remains light and glossy. A touch of subtle iridescent flakes under the top coat adds dimension without heavy glitter. The overall atmosphere is playful and fresh, perfect for spring and summer outings, festivals, or anyone who loves a cheerful, low-commitment manicure with lots of soft color.
Nail Tips
- File to a neat coffin or rounded square shape and buff gently; apply a nail dehydrator and base coat for adhesion.
- Paint thin layers of pastel gel or sheer polish, curing each coat for 30-60 seconds; add a sliver of iridescent flake before final cure for depth.
- Seal with a glossy top coat, cure thoroughly, and use cuticle oil daily to maintain that syrupy glaze look.
Decadent Chocolate Glazed Donut Nails For Cozy Days

Rich chocolate glazed donut nails blend deep cocoa browns with a glossy, almost syrup-like top layer for a luxe, cozy vibe. This look works well on long almond or coffin shapes to emphasize the glossy depth, and pairs beautifully with gold accents or minimal negative space for contrast. The finish should be reflective and smooth, like melted chocolate, which feels warm and comforting for autumn and winter months. Wear alone for a chic monochrome statement or add tiny gold flecks for a hint of decadence.
Nail Tips
- Prep nails by shaping to almond or coffin and lightly buffing the surface, then apply a dehydrator and base coat to prevent lifting.
- Use a rich brown gel or dip powder in thin layers, curing or drying between coats; add a glossy gel top layer to build the molten look.
- Top with a super-gloss top coat and cure completely; keep cuticles nourished with oil to preserve the smooth, glossy effect.
Iced Coffee Glazed Donut Nails For Casual Chic Moments
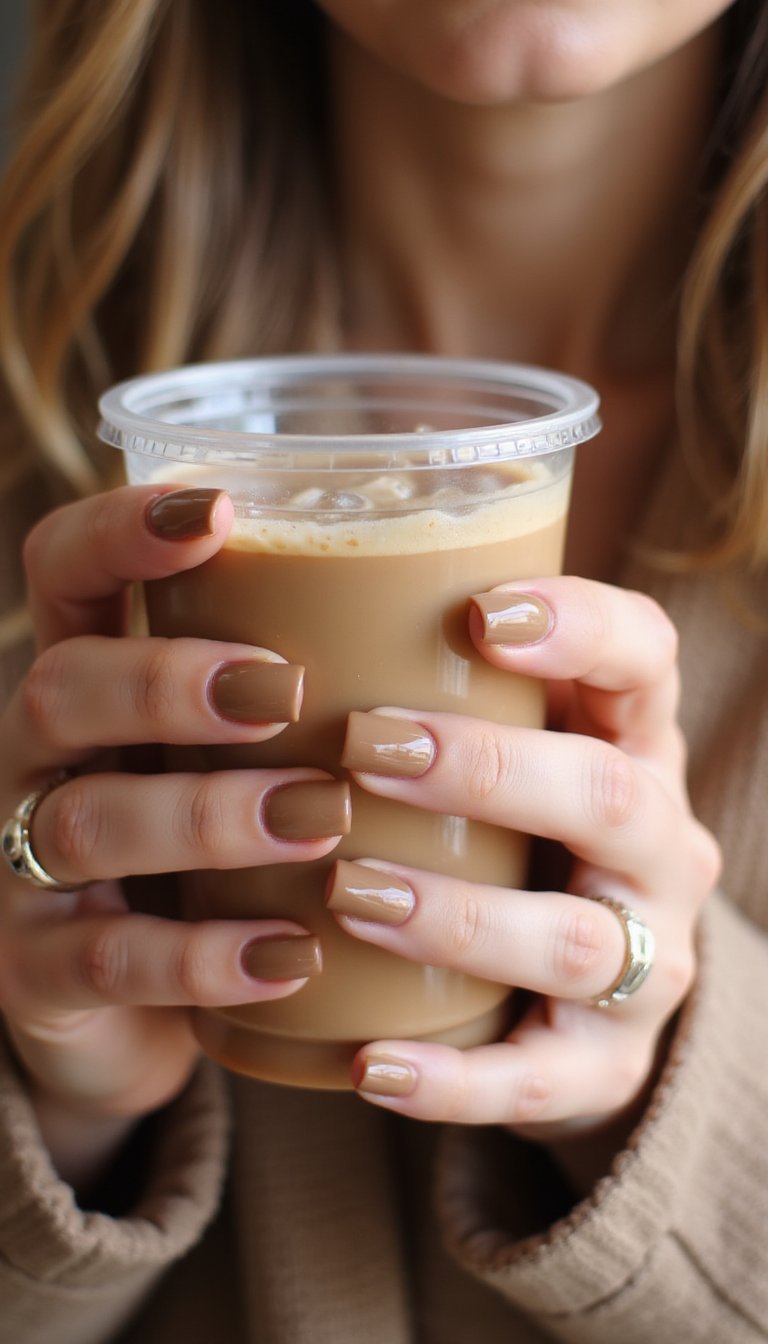
Iced coffee glazed donut nails mix milky taupe and caramel tones with a sheer glossy layer that reads like iced cream swirling in coffee. Medium-length square or oval shapes suit this coffee-toned palette best, offering a neutral, wearable look that still feels elevated. The glazed top makes the colors pop and gives the manicure a juicy, lived-in shine. This style pairs effortlessly with neutral wardrobes and works for both office settings and casual weekends when you want nails that look polished without screaming for attention.
Nail Tips
- Shape to a soft square or oval and clean the nail plate; apply a dehydrator and thin base coat to enhance adhesion.
- Apply sheer taupe and caramel gel layers in thin coats, curing each for 30-60 seconds; blend colors gently for a marbled effect if desired.
- Finish with a glossy top coat, cure fully, and apply cuticle oil regularly to keep the glossy, hydrated look.
Mirror Chrome Glazed Donut Nails With Gleaming Finish
Mirror chrome glazed donut nails combine a reflective chrome base with a translucent glaze top to create a glassy, high-shine effect that plays with light. Best on medium to long stiletto or almond shapes for drama, the palette can be silver, rose gold, or holographic chrome layered under a sheer warm glaze. The end result is futuristic and luxe-great for nights out or when you want nails that double as accessories. Keep the surface flawless to maintain the mirror-like glaze and catch every spark of light.
Nail Tips
- File nails to your chosen shape and buff to a smooth surface; apply dehydrator, base coat, and a black or dark gel base for mirror pigments.
- Press chrome pigment onto cured tack-free base or use chrome gel, then add a thin translucent glaze coat; cure each layer as directed.
- Seal with a non-wipe high-gloss top coat, cure fully, and use cuticle oil to keep surrounding skin soft and shiny.
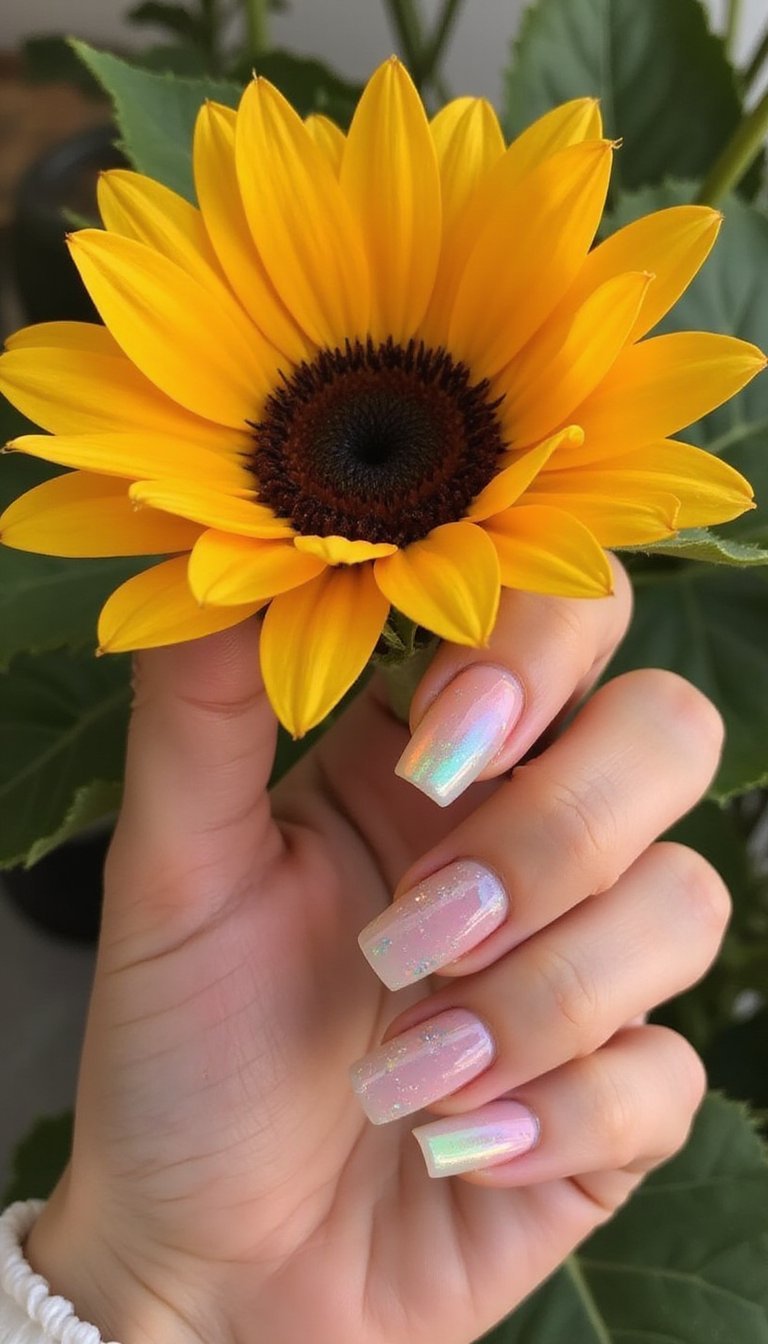
Holographic Glazed Donut Nails That Catch Light Everywhere
Holographic glazed donut nails layer micro-holo powder or flakes under a syrupy translucent top coat so the rainbow flash glows through the glaze. Medium coffin or almond shapes show off the shifting colors best, while shorter nails can keep a subtle holographic hint on accent fingers. The vibe is playful and eye-catching, ideal for parties, concerts, or anyone who loves iridescent color shifts. Keep the holographic elements fine and evenly distributed so the glaze reads smooth and glossy rather than textured.
Nail Tips
- Prep nails and apply a smooth base coat; for best results use a slightly darker base to enhance holographic pigment depth.
- Apply holographic powder or flakes onto cured base, then seal with a translucent gel glaze and cure each layer carefully to avoid fogging.
- Finish with a high-gloss top coat, cure fully, and maintain with cuticle oil to preserve the glossy holographic sheen.
Pearl Glazed Donut Nails For Soft, Elegant Shine
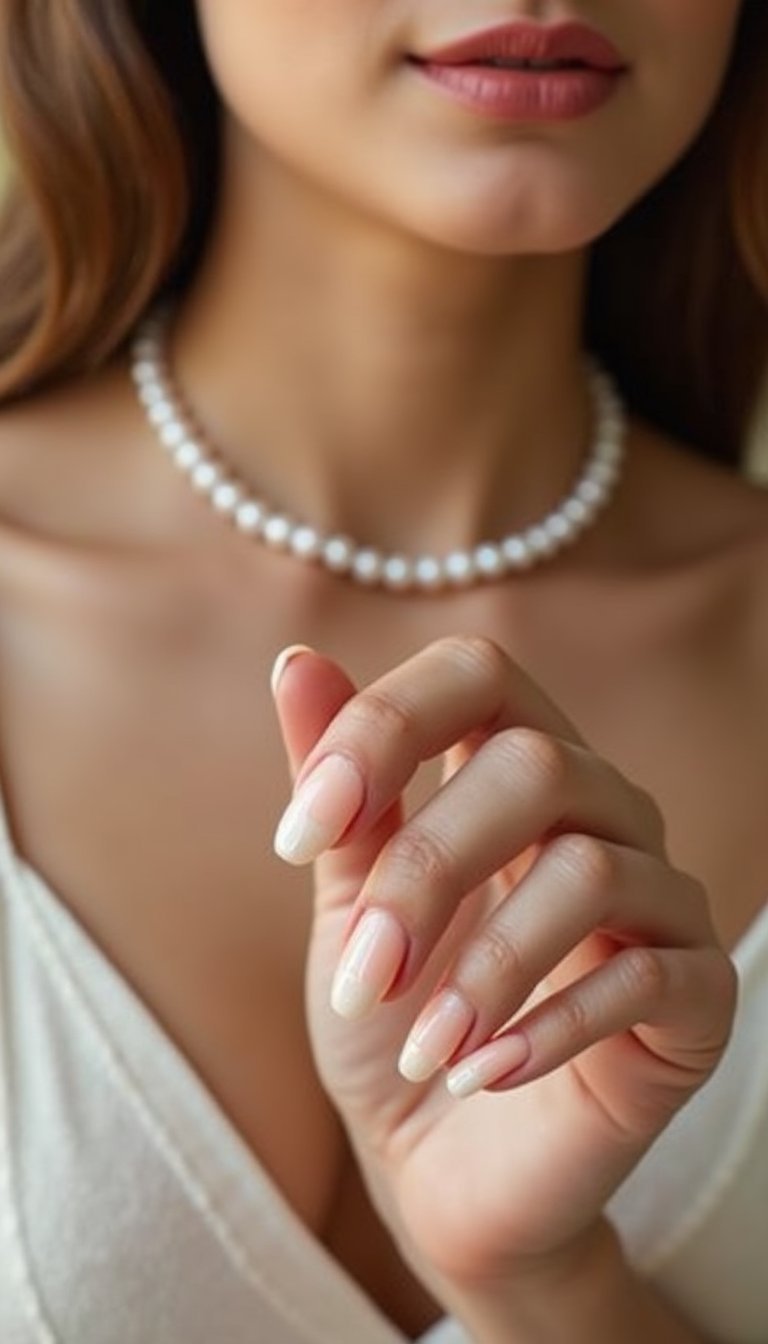
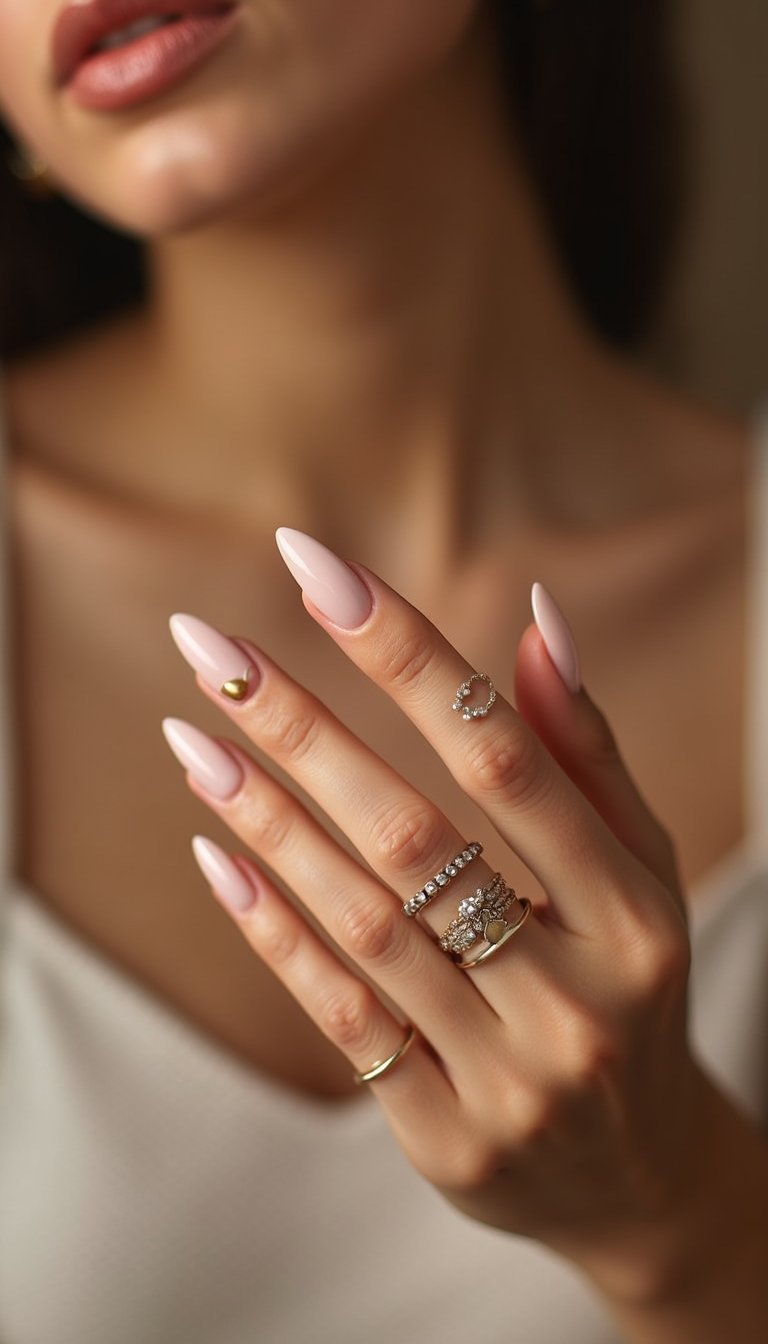
Pearl glazed donut nails mix creamy off-white bases with a soft pearlescent shimmer under a glossy glaze, creating an opulent, satin-like shine. Medium to long oval or almond nails carry this elegant look beautifully, making it a favorite for brides and formal events. The finish is luminous rather than glittery, with light-catching shimmer that feels refined. Pair with understated jewelry and a neutral wardrobe to let the pearly glaze be the focal point, or add a delicate accent nail with a micro-foil touch.
Nail Tips
- Shape to almond or oval and gently buff; apply dehydrator and a white or cream base coat to anchor the pearly pigment.
- Layer pearl pigment over cured base and seal with a thin translucent gel glaze, curing each layer to prevent fogging.
- Finish with a glossy top coat and cure fully; keep cuticles nourished with oil for a polished, elegant presentation.
Sprinkle Glitter Glazed Donut Nails For Fun Texture
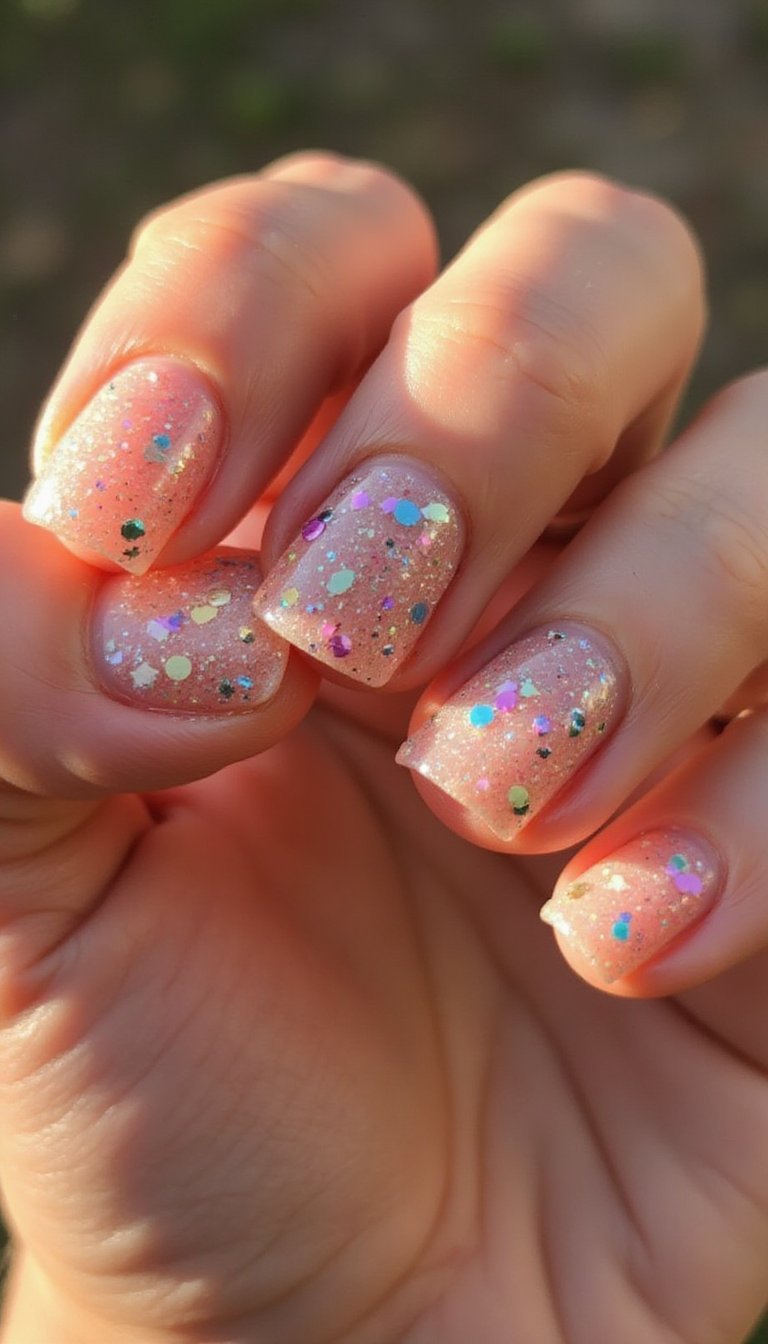
Sprinkle glitter glazed donut nails pair a soft translucent base with strategically placed micro-sparkles or candy-like glitter, all set under a glassy glaze. Medium square or coffin shapes work well to showcase the playful texture without overwhelming the finger. Keep glitter small and sparse so the glaze remains smooth and juicy, rather than textured. This design reads youthful and celebratory-think birthday vibes or weekend glam-and balances shimmer with a wearable silhouette that looks great in photos and in person.
Nail Tips
- Prep the nail with shaping and a light buff, then apply a dehydrator and base coat to prevent lifting around glitter pieces.
- Place micro-glitter or tiny flakes onto a tacky gel layer, then encapsulate with a thin translucent glaze; cure each layer as recommended.
- Finish with a smooth glossy top coat and cure completely; keep cuticles hydrated to enhance the overall neat, glossy look.
Negative Space Glazed Donut Nails With Chic Open Shapes
Negative space glazed donut nails mix sheer glazed sections with intentional gaps of bare nail for modern contrast. This minimalist approach looks great on short to medium square or oval shapes, where geometric cut-outs or half-moon designs peek through the glossy glaze. Color choices can be soft neutrals or bold accents, but the glazed overlay keeps the result polished and wearable. The interplay of shine and skin gives a contemporary edge while remaining refined-perfect for those who want a trendy manicure that still feels elegant.
Nail Tips
- Use tape or vinyl guides to block off negative space areas before applying base and glaze layers for crisp lines.
- Apply thin coats of sheer glaze polish, curing or drying between layers; remove guides carefully before the final cure to keep edges clean.
- Seal with a glossy top coat, cure fully, and massage cuticle oil around the design to maintain healthy-looking skin and shine.
Marbled Glazed Donut Nails For Soft Swirls And Shine
Marbled glazed donut nails combine soft swirls of cream, beige, and soft pink beneath a translucent glaze that gives the marble depth and a wet look. Medium oval or almond shapes showcase the flowing patterns best, and the glossy finish makes the veins of color shimmer like polished stone. This option reads refined and artistic-ideal for anyone who wants a manicure with gentle movement and a luxe surface. Keep color contrasts subtle to retain the glazed, jelly-like quality rather than a heavy stone effect.
Nail Tips
- Prep and shape the nails to oval or almond, then apply a base coat and a light neutral background color to anchor the marbling.
- Create marble using diluted gels or thin polish swirls, blending with a brush then applying a translucent glaze layer to unify and add shine; cure each layer as directed.
- Finish with a glossy top coat and cure fully; use cuticle oil regularly to keep the surrounding skin soft and polished.
Floral Pressed Glazed Donut Nails For Romantic Charm
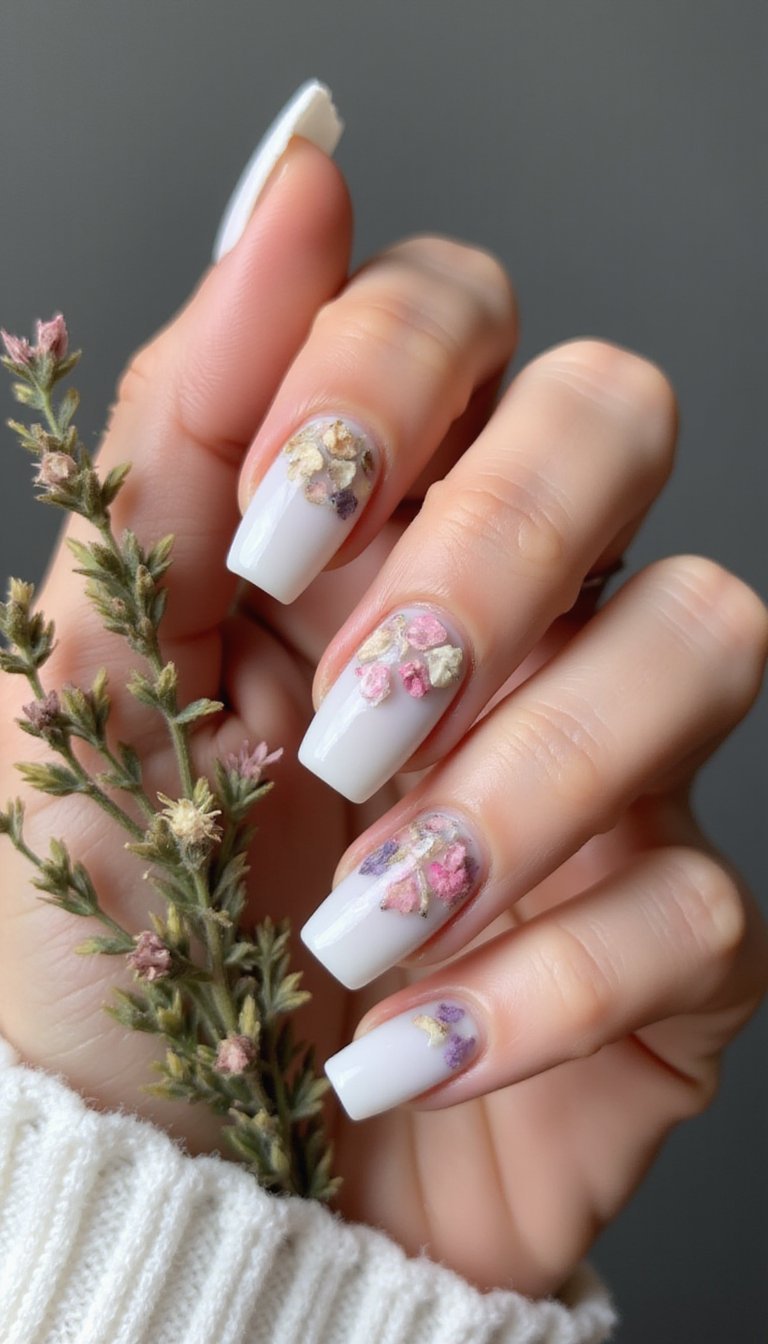
Floral pressed glazed donut nails encapsulate tiny dried petals under a translucent glaze for a delicate, garden-inspired look. Best on medium to long oval or coffin shapes, pick pastel bases like blush or sheer cream to let the flowers float beneath the glossy layer. The effect is softly romantic and perfect for weddings, showers, or springtime events. Because the flowers are sealed under a smooth glaze, the finish stays glossy and wearable without texture, keeping the manicure both pretty and practical.
Nail Tips
- Shape nails and apply a thin base coat; carefully place pressed flower pieces on the tacky layer using tweezers for precise placement.
- Encapsulate the floral elements with a thin translucent gel glaze in layers, curing between passes to lock them flat under the surface.
- Top with a high-gloss top coat, cure thoroughly, and keep cuticles oiled to complement the floral, glazed aesthetic.
Cat Eye Glazed Donut Nails With Magnetic Light Lines

Cat eye glazed donut nails use magnetic pigments to create a subtle shimmering line beneath a glossy glaze that shifts as you move. This mystical finish looks striking on medium almond or stiletto nails and pairs well with deep jewel tones or soft neutrals. The cat-eye line gives a dimensional focal point while the glaze adds that syrupy, reflective surface. Wear them for evening events or when you want nails that feel luxe and a little mysterious without heavy texture or embellishment.
Nail Tips
- Shape nails to almond or stiletto and apply a black or dark base for maximum magnetic pigment payoff, then cure.
- Apply cat-eye gel polish and use a magnet over the uncured layer to pull the pigment into a line; cure and repeat for intensity.
- Finish with a glossy translucent glaze top coat, cure fully, and nourish cuticles to keep the glazed look sleek.
Satin Glazed Donut Nails For Soft, Subtle Sheen
Satin glazed donut nails offer a lower-gloss, silky-sheen variant of the glaze-think a soft, satiny finish rather than mirror shine. This finish flatters short to medium oval or square nails and pairs well with muted tones like dusty rose, mushroom, and soft khaki. The result is understated and modern, with the glaze giving a tender glow that reads refined and cozy. It’s ideal for everyday wear when you want something polished but not flashy, and it photographs beautifully under soft lighting.
Nail Tips
- Shape nails to a soft oval or square and prep with a dehydrator and primer to ensure smooth application of satin products.
- Apply pigmented gel or polish in thin layers and lightly buff between coats if needed to create a smooth base for the satin glaze.
- Use a satin-finish top coat or a glossy top coat buffed slightly to reduce sheen, cure fully, and keep cuticles hydrated to maintain the soft look.
Neon Jelly Glazed Donut Nails For Bold Summer Energy
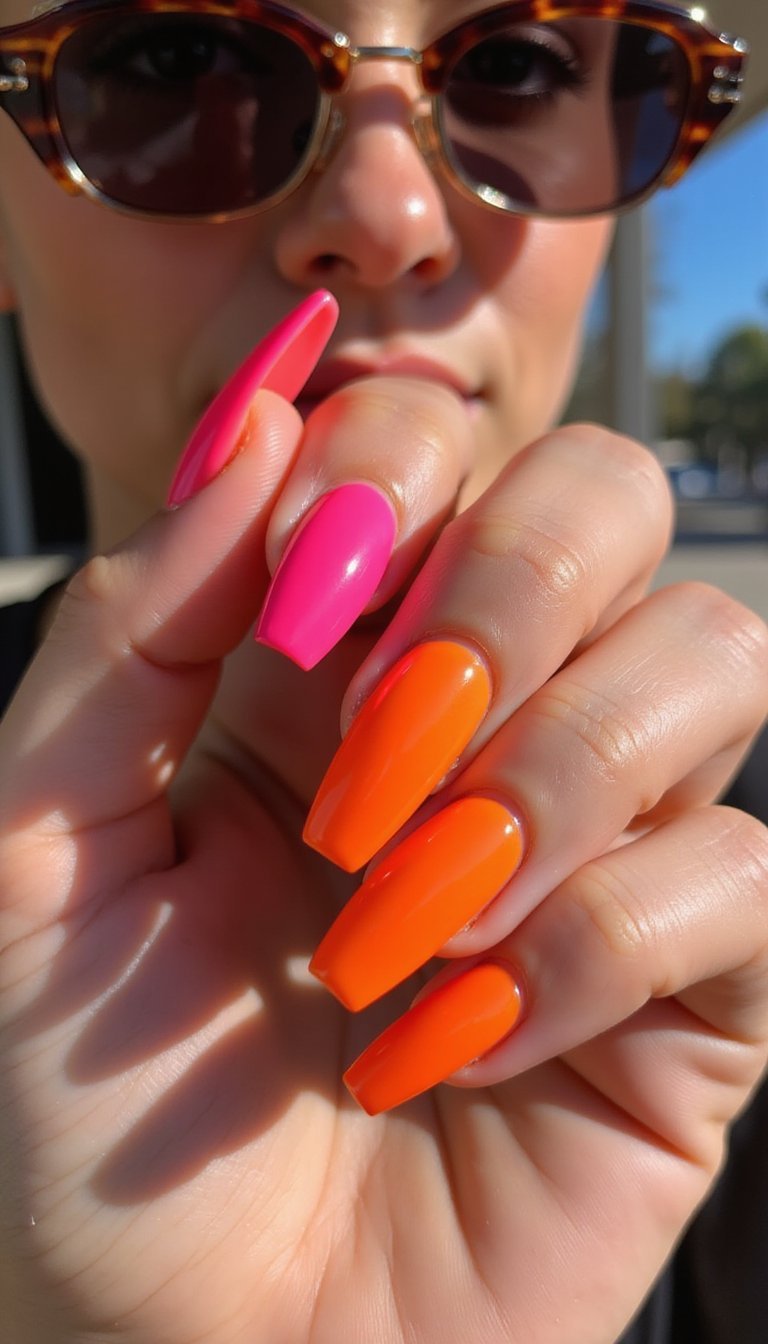
Neon jelly glazed donut nails pack punchy, translucent neon hues-hot pink, electric orange, and lime-beneath a glossy glaze that amplifies color. Best on medium coffin or almond shapes to maximize impact, the jelly quality keeps brights wearable by toning them slightly while preserving vibrancy. This design screams summer, pool parties, and festival days. Pair with minimal outfits to let nails be the focal point, or mix neon accents with clear nails for a trendy, playful contrast.
Nail Tips
- File to your chosen shape and apply a dehydrator plus base coat to help neon pigments adhere evenly.
- Build neon jelly color in thin layers with gel or pigmented sheer polish, curing between coats to avoid bubbling.
- Seal with a glossy top coat and cure thoroughly; apply cuticle oil to reduce any dryness from bright pigments.
Minimalist Single Accent Glazed Donut Nail Statement

Minimalist single accent glazed donut nails keep most fingers neutral or clear, with one accent nail boasting a full glazed donut finish for contrast. This approach suits short and medium oval or square shapes, offering a low-effort yet polished statement. Accent colors can be bold or soft depending on your mood, but the glossy glaze ties the whole look together and keeps the manicure cohesive. It’s a great choice for those who prefer understatement with a little personality-photo-friendly and office-appropriate with a modern twist.
Nail Tips
- Prep all nails uniformly and apply a neutral base color or sheer jelly on most fingers; shape to neat oval or square.
- Create the accent nail using your chosen glazed color in thin, cured layers to build depth without bulk.
- Finish with a high-gloss top coat over the accent and a regular top coat on others; cure fully and moisturize cuticles regularly.
Swirled Candy Glazed Donut Nails For Whimsical Motion
Swirled candy glazed donut nails mix two or three complementary hues in a soft swirl under a glossy glaze to mimic icing patterns. Medium almond or coffin nails bring out the motion and playfulness of the design, which looks lively without being chaotic. Keep the swirls airy and slightly translucent so the glaze gives them a wet, delicious depth. This style is great for playful weekends, holidays, or whenever you want a manicure that feels fun, colorful, and full of sweet movement.
Nail Tips
- Shape nails to almond or coffin and prep with a dehydrator; select two to three compatible jelly tones for the swirl.
- Create soft swirls with thin brush strokes of gel or polish, blending lightly while still tacky, then apply a translucent glaze layer and cure.
- Top with a glossy finish, cure fully, and keep cuticles oiled to preserve the glossy, candy-like sheen.
Frozen Ice Blue Glazed Donut Nails For Crisp Cool Tones
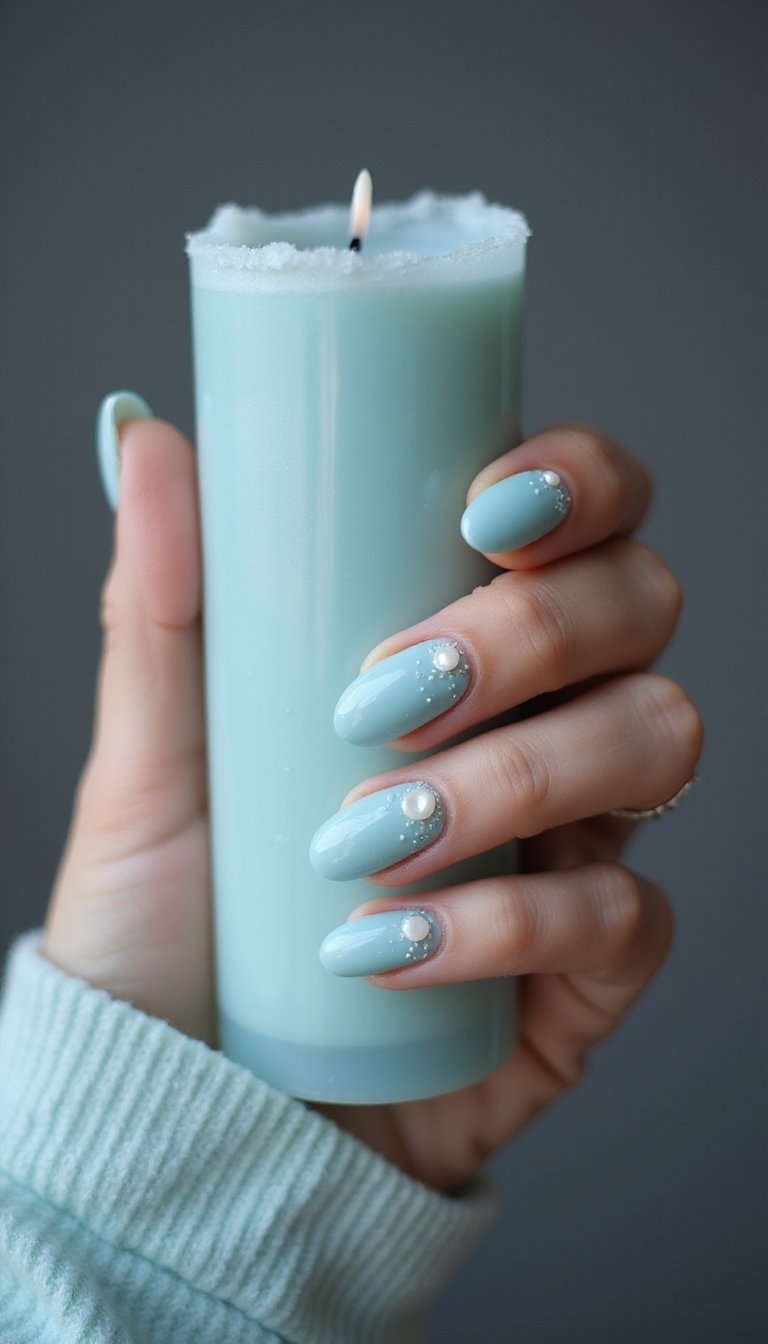
Frozen ice blue glazed donut nails use crisp, icy blues and pearly whites under a glossy glaze to create a fresh, wintry look. Medium to long oval or square shapes make the cool tones pop and keep the manicure looking sleek. The glazed finish amplifies the crispness of the colors and adds a glassy dimension that feels cool and refined. This manicure suits winter events, holiday photos, or anyone who favors a calm, icy palette with a polished, modern surface.
Nail Tips
- File and shape nails to oval or square, then apply dehydrator and a neutral base to help icy pigments appear true to tone.
- Layer ice blue and pearly white gels in thin coats, curing between layers; add a translucent glaze layer to achieve the glassy effect.
- Seal with a high-gloss top coat and cure fully; use cuticle oil regularly to maintain a sleek, hydrated finish.
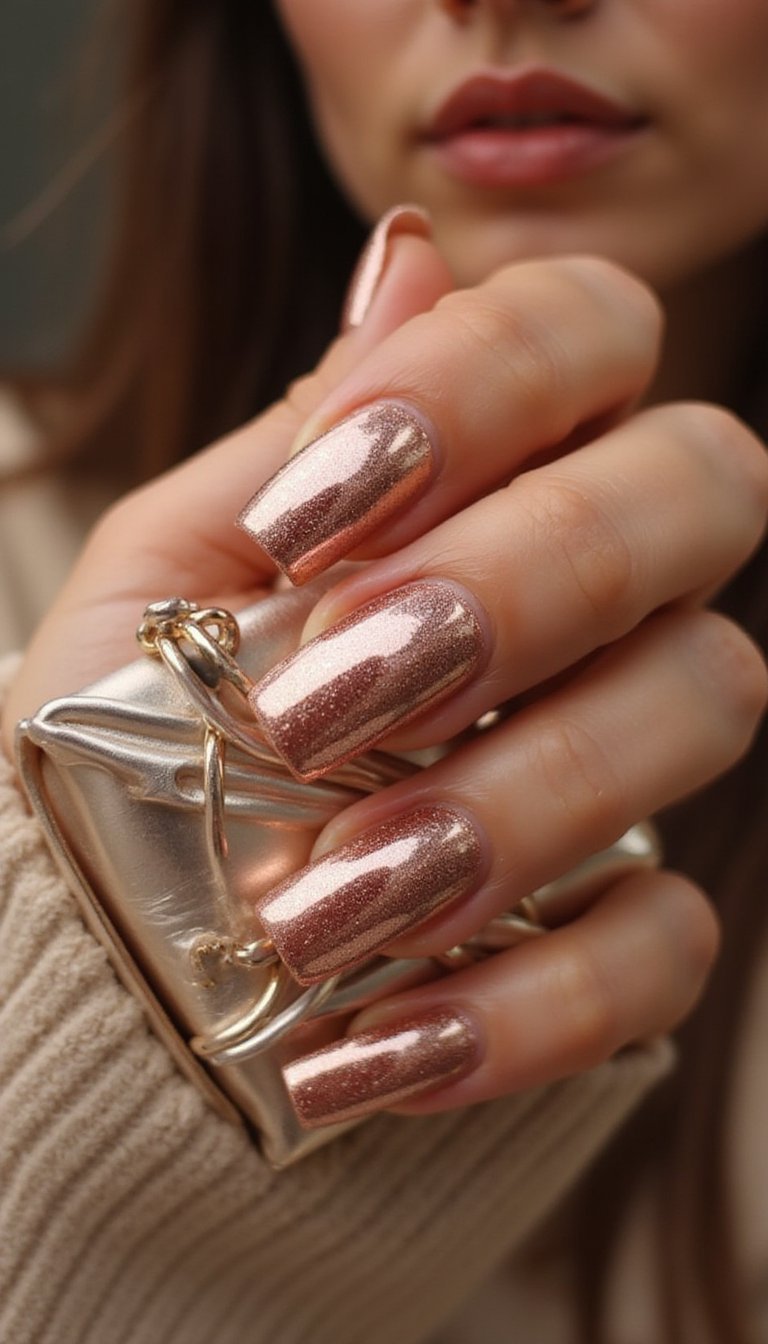
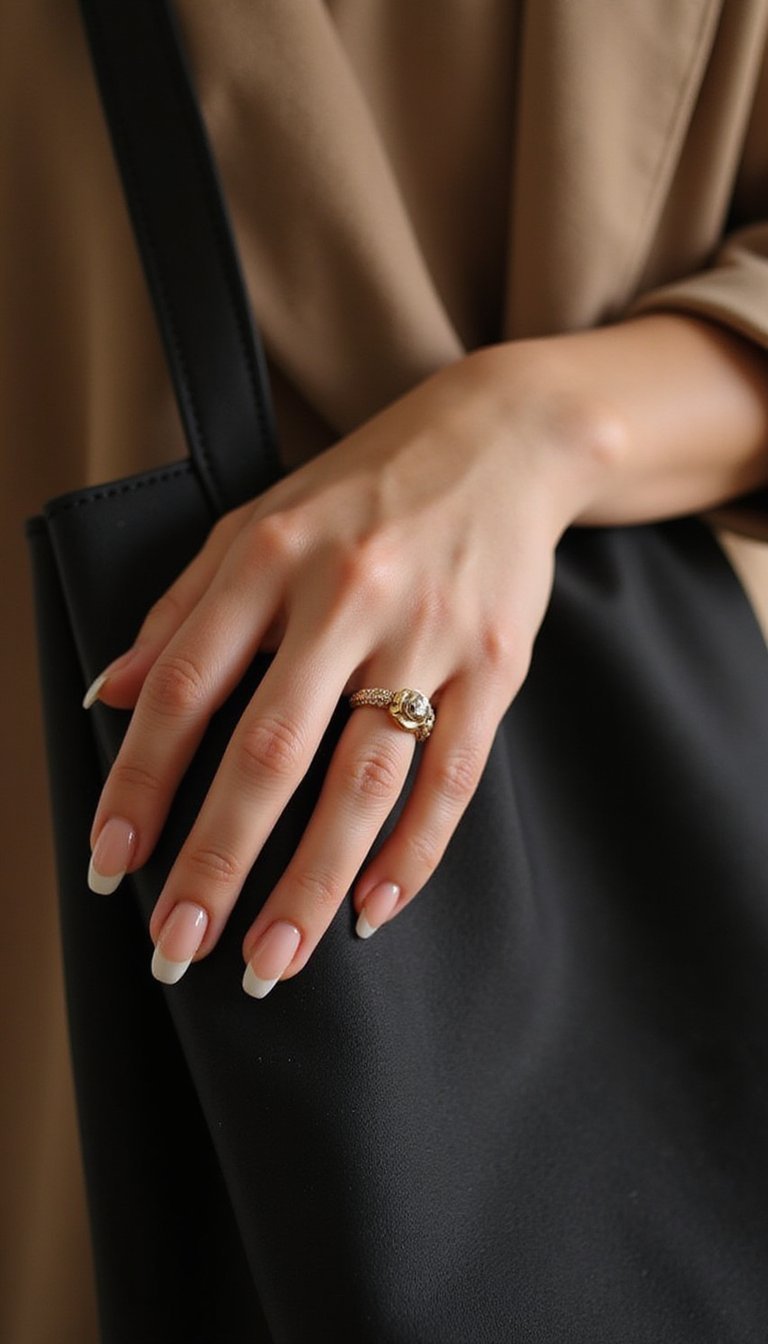
Metallic Tip Glazed Donut Nails For Edge And Shine
Metallic tip glazed donut nails blend a sheer glazed base with metallic tips-gold, chrome, or rose gold-for a modern twist on the French. Best on medium almond or square shapes, the metallic edge gleams beneath the translucent glaze for a polished, jewelry-like effect. This manicure reads luxe but subtle and is versatile enough for daytime or evening wear. Keep the metallic tips crisp and the glaze smooth so the reflection reads clean and mirror-like rather than cluttered.
Nail Tips
- Shape nails to almond or square and apply a sheer base coat; use guides for clean metallic tip application if needed.
- Paint metallic tips with thin coats of chrome or foil polish, cure, then apply a translucent glaze layer to merge the elements and cure again.
- Finish with a glossy top coat, cure fully, and maintain with cuticle oil to preserve the gleaming contrast.
Animal Print Glazed Donut Nails For Playful Statement Pieces
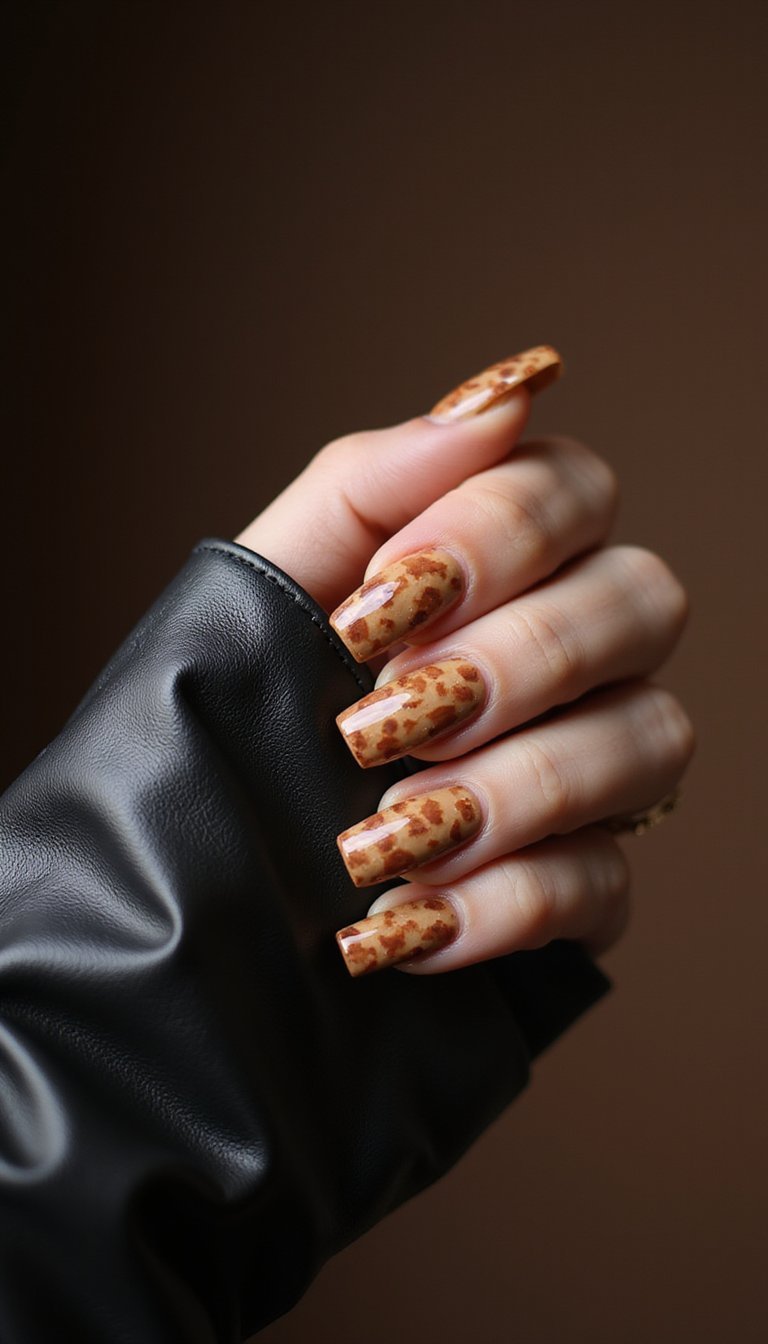
Animal print glazed donut nails layer subtle leopard or snake motifs under a glossy jelly glaze for a wild but wearable look. Medium coffin or almond shapes help the pattern read clearly while the glaze keeps the tones soft and wearable. Use neutral bases like tan, cream, and caramel, and let the glazed overlay slightly soften the contrast so the result feels chic rather than loud. These nails are great for nights out or mixing prints in your wardrobe without overpowering the whole outfit.
Nail Tips
- Prep and shape nails to coffin or almond; apply a neutral base color to let the animal pattern sit naturally.
- Create the print with a small brush or stamping tool using slightly darker pigments, then encapsulate with a translucent glaze and cure.
- Top with a glossy finish and cure fully; keep cuticles moisturized to enhance the polished glazed effect.